Health / Laboratory Equipment
Operator's Manual for Drucker Diagnostics BOOST 2+ Flex Centrifuge
Quick guide for the Drucker Diagnostics BOOST 2+ Flex centrifuge. Learn how to operate, program cycles, balance loads, perform maintenance, and troubleshoot common issues.
Table of contents
Manual images
Click an image to enlargeQuick Guide
The BOOST 2+ Flex is a general-purpose laboratory centrifuge designed for density-based separation of fluids. This manual provides instructions for setup, operation, and maintenance. Always ensure the centrifuge is placed on a flat, level surface with 6 inches (15 cm) of clearance for ventilation. The unit must be operated by trained personnel using appropriate personal protective equipment (PPE).
Device Description
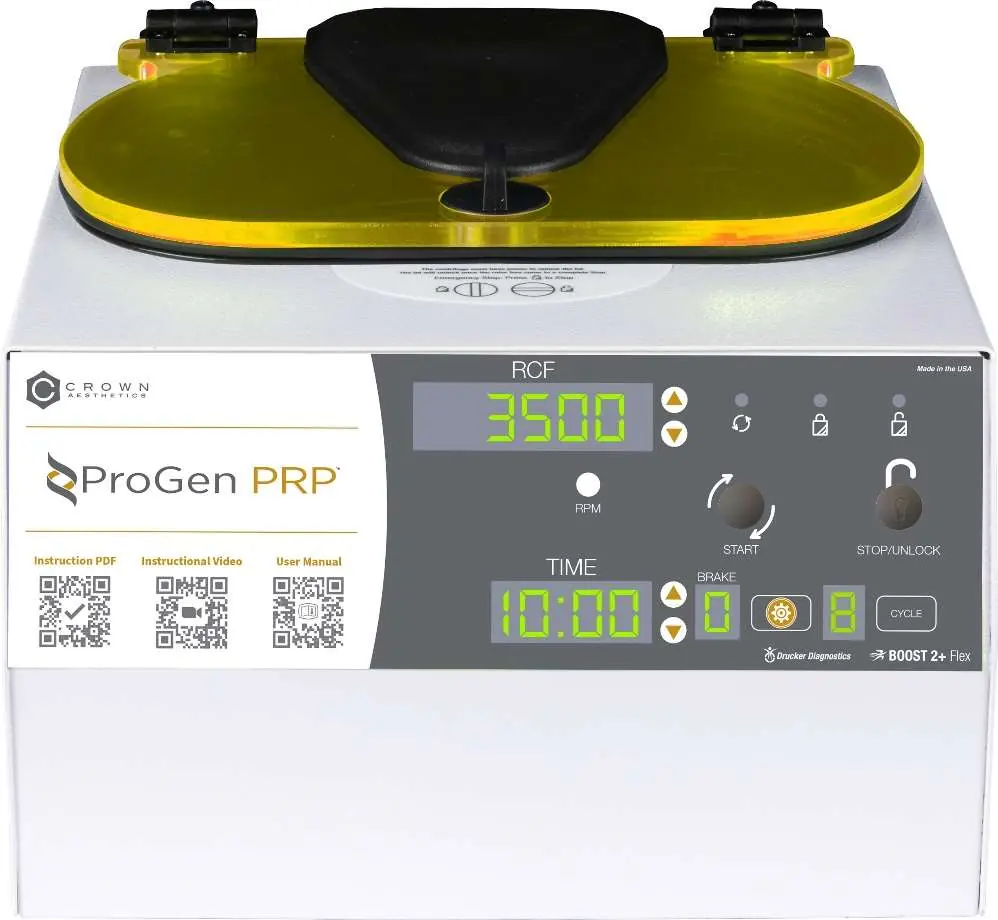
The centrifuge features a digital display for RCF/RPM and time, a brushless motor, and a lid safety system that prevents operation unless the lid is closed and latched. It includes a lid lighting system to indicate status (ready, running, done) and an audible alert upon cycle completion.
Initial Setup
- Unpack the centrifuge, power cord, carriers, and Quick Start Insert.
- Place on a flat, level surface with 6 inches (15 cm) of clear space around the unit.
- Ensure the ambient temperature is between 16°C and 32°C.
- Plug the power cord into the centrifuge and an approved electrical outlet.
- Ensure the outlet is accessible for emergency disconnection.
Operation and Loading
Loading: Place tubes into the carriers. Ensure the maximum combined weight per carrier does not exceed 140.0 grams. Carriers must hang from the rotor pins and swing freely into a horizontal position. Opposing carriers must be equally loaded or empty to maintain balance.
Running a Cycle:
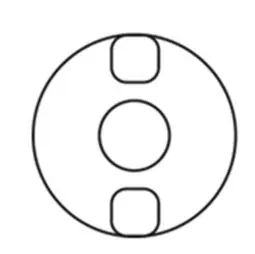
- Close the lid and turn the lid knob clockwise to its stop position.
- Use the UP or DOWN buttons to select the desired cycle.
- Press the START button to begin.
- When the cycle is complete, the rotor will stop, and the lid light will flash.
- The unlocking mechanism engages for 60 seconds. If more time is needed, press the UNLOCK button.
- Turn the lid knob counterclockwise to open.
Programming and Settings
The centrifuge allows for up to 10 custom cycles. To modify a preset:
- Select the cycle using the CYCLE button.
- Hold the CYCLE button until it beeps twice to enter the menu.
- Use the RCF (xg) button to toggle between speed and g-force settings.
- Use the GEAR button to access advanced settings like Brake (0-9) and Beeper (ON/OFF).
- To save, hold the CYCLE button until the double beep.
Maintenance and Cleaning
Cleaning is recommended every six months or after spills. Unplug the unit before cleaning. Use only isopropyl alcohol or a 10% bleach solution. Do not submerge the unit in water. Inspect the rotor and carriers regularly for cracks; replace carriers every 24 months.
Troubleshooting
If the centrifuge does not run, verify power and ensure the lid latch is turned fully clockwise. If the unit makes excessive noise, check that it is on a flat surface and the load is balanced. If the lid does not open, ensure the knob is turned fully counterclockwise; if stuck, turn clockwise, press UNLOCK, then turn counterclockwise.
General Specifications
- Max g-Force: 3,000 xg
- Max Speed: 4,400 RPM
- Cycle Time: 0.5 to 99 minutes
- Voltage: 95-253 VAC
- Power Requirement: 280 Watts
- Weight: 34 lbs (15 kg)
For customer service, contact 1-814-692-7661 or email [email protected].
Manufacturer information
Drucker Diagnostics
Practical help
Common problems
Centrifuge does not run
Verify power is connected and the lid latch is turned completely clockwise to its stop position.
Excessive noise or vibration
Ensure the unit is on a flat surface and the load is balanced according to the manual.
Lid does not open
Ensure the knob is turned fully counterclockwise. If stuck, turn fully clockwise, press UNLOCK, then turn counterclockwise.
Cycle parameters cannot be changed
The unit may be in Preset Lock mode. Press the UNLOCK button for 5 seconds to deactivate.
Before use
- Verify all components are included (Centrifuge, power cord, carriers, Quick Start Insert).
- Ensure 6 inches (15 cm) of clear space around the unit.
- Verify ambient temperature is between 16°C and 32°C.
- Ensure electrical outlet is accessible for emergency disconnection.
- Check that carriers are hanging from rotor pins and swing freely.
Specs in practice
- Max Carrier Load
- 140.0 grams
Images and diagrams
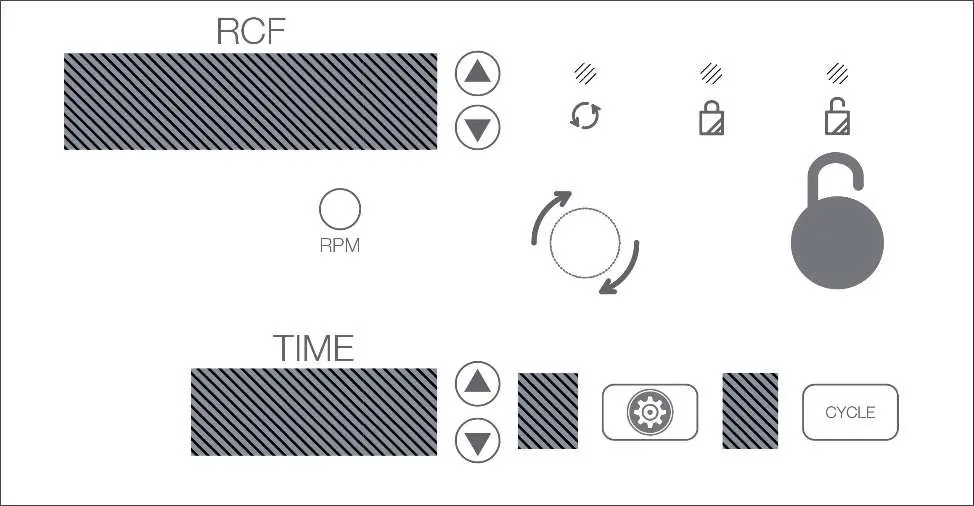
- Control Panel: Displays RCF/RPM and Time. Buttons for Start, Stop/Unlock, Cycle selection, and Gear (Advanced Menu).
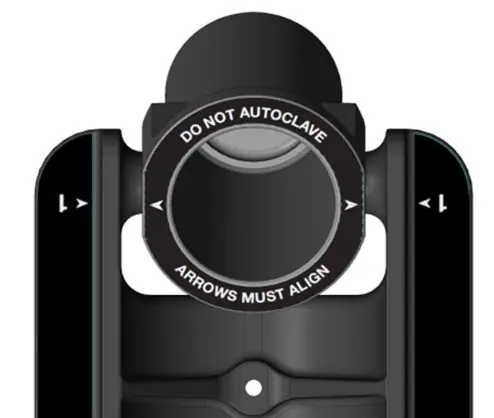
- Carrier Alignment: Arrows on the rotor and carriers must align for proper operation.
- Balancing Loads: Opposing carriers must be equally loaded or empty.
Model compatibility
- Only use Drucker Diagnostics components.
- Do not use flammable, explosive, or highly reactive chemicals.
- Carriers should be replaced after 24 months of use.

Manual page author
David Miller
Documentation analyst
Organizes user manual content into clear summaries, with attention to model details, product context, and everyday usability.