Electronics / Cameras
User Manual for Creality Falcon Pro 10W Laser Engraver
Quick guide for the Creality Falcon Pro 10W laser engraver. Includes assembly instructions, safety guidelines, software setup, and troubleshooting steps.
Table of contents
Manual images
Click an image to enlargeQuick guide from the manual
This document provides essential instructions for the Creality Falcon Pro 10W laser engraver. It covers the assembly process, safety precautions, software configuration, and operational workflows. Always ensure the machine is used in a well-ventilated area and that you wear appropriate safety goggles during operation.
Safety Statement
- Environment: Operate in a well-ventilated, cool, and dust-free area. Avoid flammable substances.
- Temperature: Run the laser only between 0°C and 35°C.
- Protection: Always wear safety goggles. Place a non-penetrable flat object (e.g., aluminum or stainless steel plate) under the material being processed.
- Supervision: Children under 10 years old must not operate the machine without adult supervision.
- Maintenance: Clean the tripod and laser module with a dry cloth when the power is off.
Assembly Instructions
The assembly process involves four main steps:
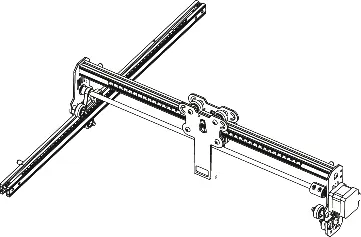
- Y-axis Assembly: Pass the left Y-axis assembly through the X-axis assembly and secure the belt.
- Right Y-axis Assembly: Insert two T-shaped nuts into the right Y-axis assembly and secure it.
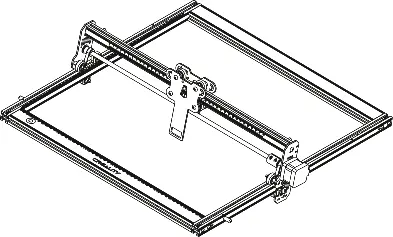
- X-axis Profiles: Assemble the rear and front X-axis profiles using eight M5*20 screws.
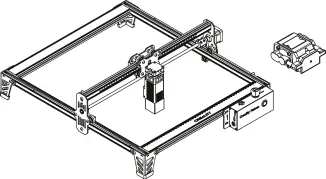
- Tripods and Control Box: Attach the three tripods and the control box assembly using eight screws. Ensure the X-axis assembly is parallel to the rear X-axis profile.
Laser Module Installation: Place the multi-level fixed focus bar between the laser module and the material to set the correct focal length, then lock it with the two hand screws.
Software & Operation
The machine can be controlled via PC using LaserGRBL or LightBurn, or offline using a TF card.
Offline Working
- Save the gcode file to the root directory of the TF card.
- Insert the TF card and power on the machine.
- Press the microswitch to enter preview mode.
- Press the button again to start engraving.
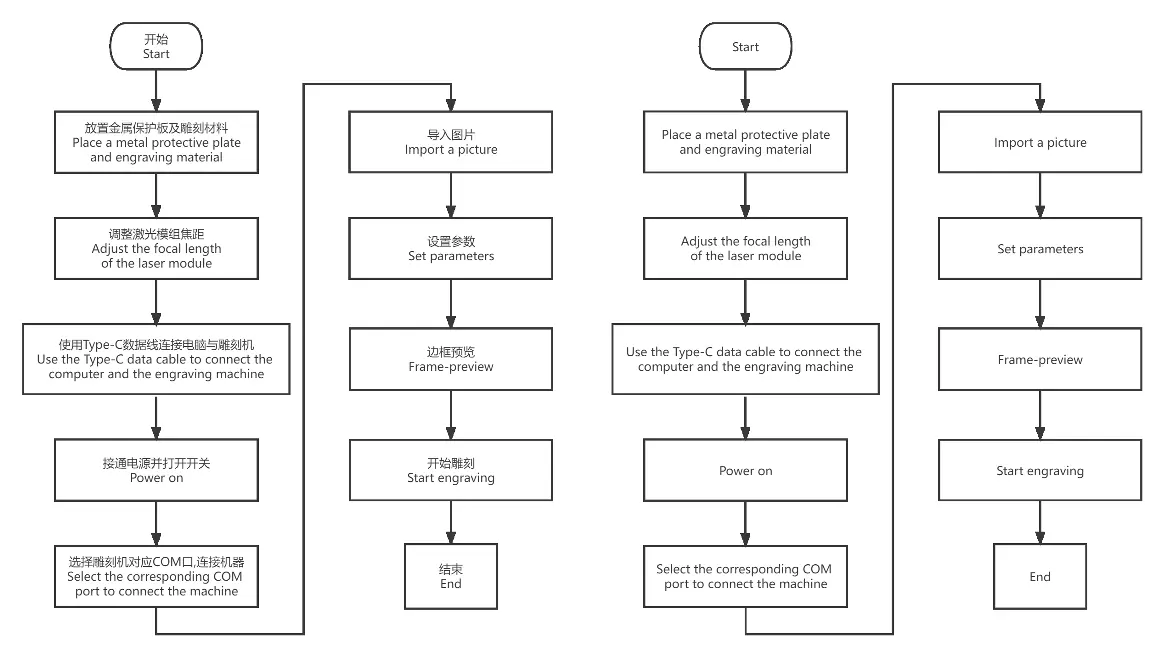
Control from PC
Connect the machine to your computer using a Type-C cable. Select the corresponding COM port in your software to establish a connection.
Indicator Status
- Light off: Power off or abnormal state.
- Breathing light: Standby mode.
- Light flashes: Upgrade mode or abnormal mode.
- Light always on: Preview or engraving mode.
Troubleshooting
If the machine fails to turn on, check the emergency stop and safety lock. If the machine moves suddenly during operation, move it back to its original position and press the microswitch to clear the error. If preview mode fails, ensure the TF card is inserted and contains a valid gcode file.
Technical Specifications
- Laser Power: 10W
- Engraving Size: 400mm x 415mm
- Operating System: Windows / MacOS
- Supported Software: LaserGRBL, LightBurn
- Supported Formats: jpeg, jpg, png, bmp, svg, dxf
Manufacturer information
Shenzhen Creality 3D Technology Co., Ltd.
Practical help
Common problems
Machine will not turn on
Check the emergency stop button and the safety lock.
Machine overturns or moves during operation
Move the machine back to its original position and press the microswitch on the control box.
Cannot enter frame-preview mode
Ensure the TF card is inserted and that a gcode file is saved in the root directory.
Before use
- Place a metal protective plate on the workbench.
- Wear safety goggles.
- Ensure the environment is well-ventilated.
- Verify the laser module is installed correctly.
- Adjust the focal length using the multi-level fixed focus bar.
Specs in practice
- Engraving Size
- 400mm x 415mm maximum working area.
- Operating Temperature
- Must be operated between 0°C and 35°C.
- Supported Software
- Compatible with LaserGRBL and LightBurn.
Images and diagrams
- Assembly involves connecting X and Y axis profiles and securing them with screws.
- Focusing requires placing the multi-level fixed focus bar between the laser module and the material.
Model compatibility
- Compatible with Windows and MacOS.
- Supports file formats: jpeg, jpg, png, bmp, svg, dxf.

Manual page author
Michael Turner
Technical manual editor
Reviews PDF manuals for structure, safety notes, and practical product details so readers can find the right information quickly.