Industrial / Valves
User Manual for Emerson Quiet Kool Window Air Conditioner
Comprehensive user guide for the Emerson Quiet Kool window air conditioner. Includes installation instructions, control panel and remote operation, maintenance tips, and troubleshooting steps for 6K-12K BTU models.
Table of contents
Manual images
Click an image to enlargeQuick Guide
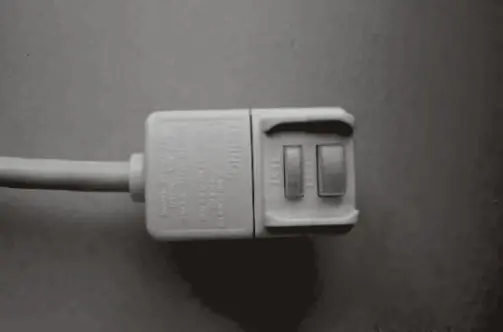
This manual covers the installation and operation of Emerson Quiet Kool window air conditioners (6,000 to 12,000 BTU models). Before using your unit, ensure it is plugged into a grounded 3-prong outlet. Do not use an extension cord or plug adapter. The unit features an LCDI power cord with Test and Reset buttons; ensure the unit is ready for use by pressing the Reset button until you hear a click.
Installation
Proper installation is critical for performance and drainage. The unit must be installed in a standard double-hung window. Ensure the unit is tilted slightly downward toward the rear to allow accumulated rain or condensation to drain properly.

- Window Requirements: 23"-36" width for 6K/8K models; 26"-36" width for 10K/12K models.
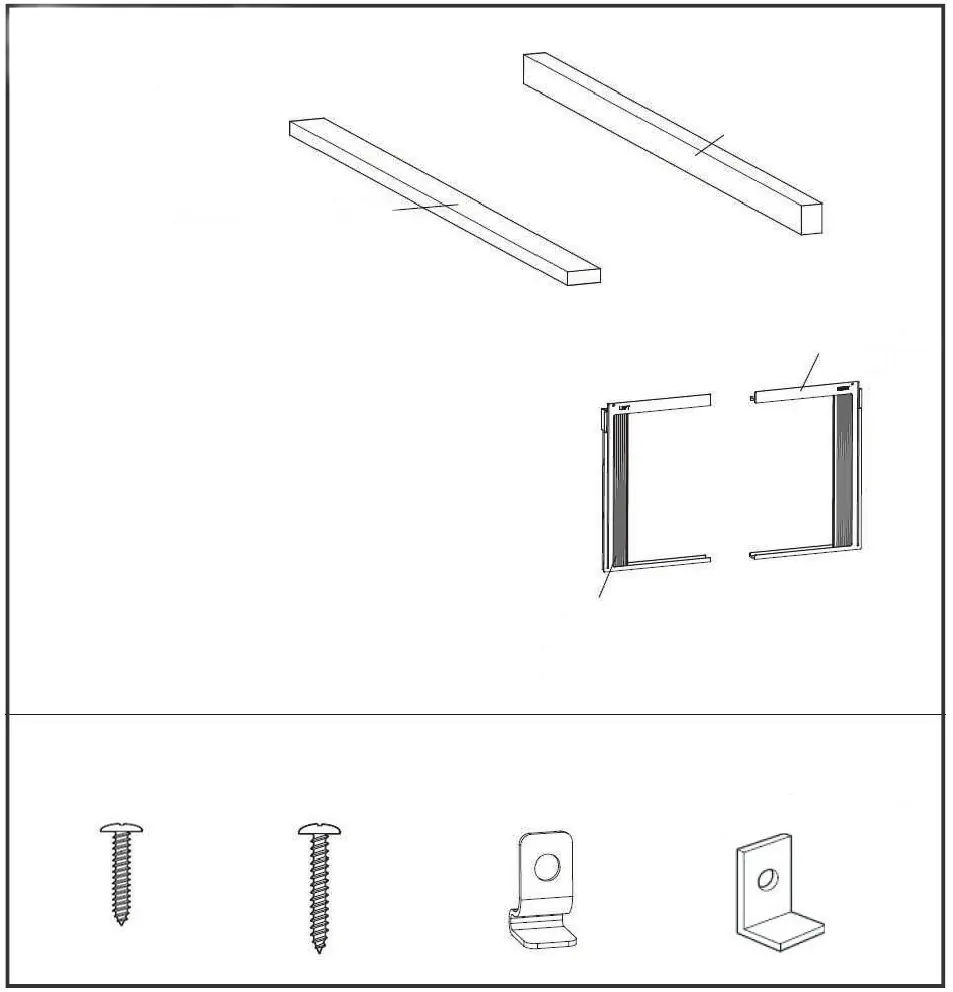
- Top Rail: Assemble the top rail to the unit using the provided 3/8" screws before placing the unit in the window.
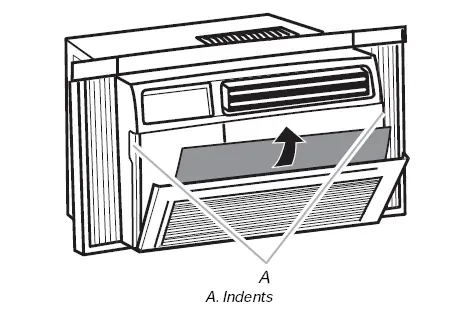
- Side Panels: Install the accordion filler panels into the cabinet frame to seal the window opening.
- Securing: Use the provided lock frame and screws to secure the unit to the window sill and sash.
- Sealing: Use the included foam sash seal and insulation strips to fill gaps between the window sashes.
Operation
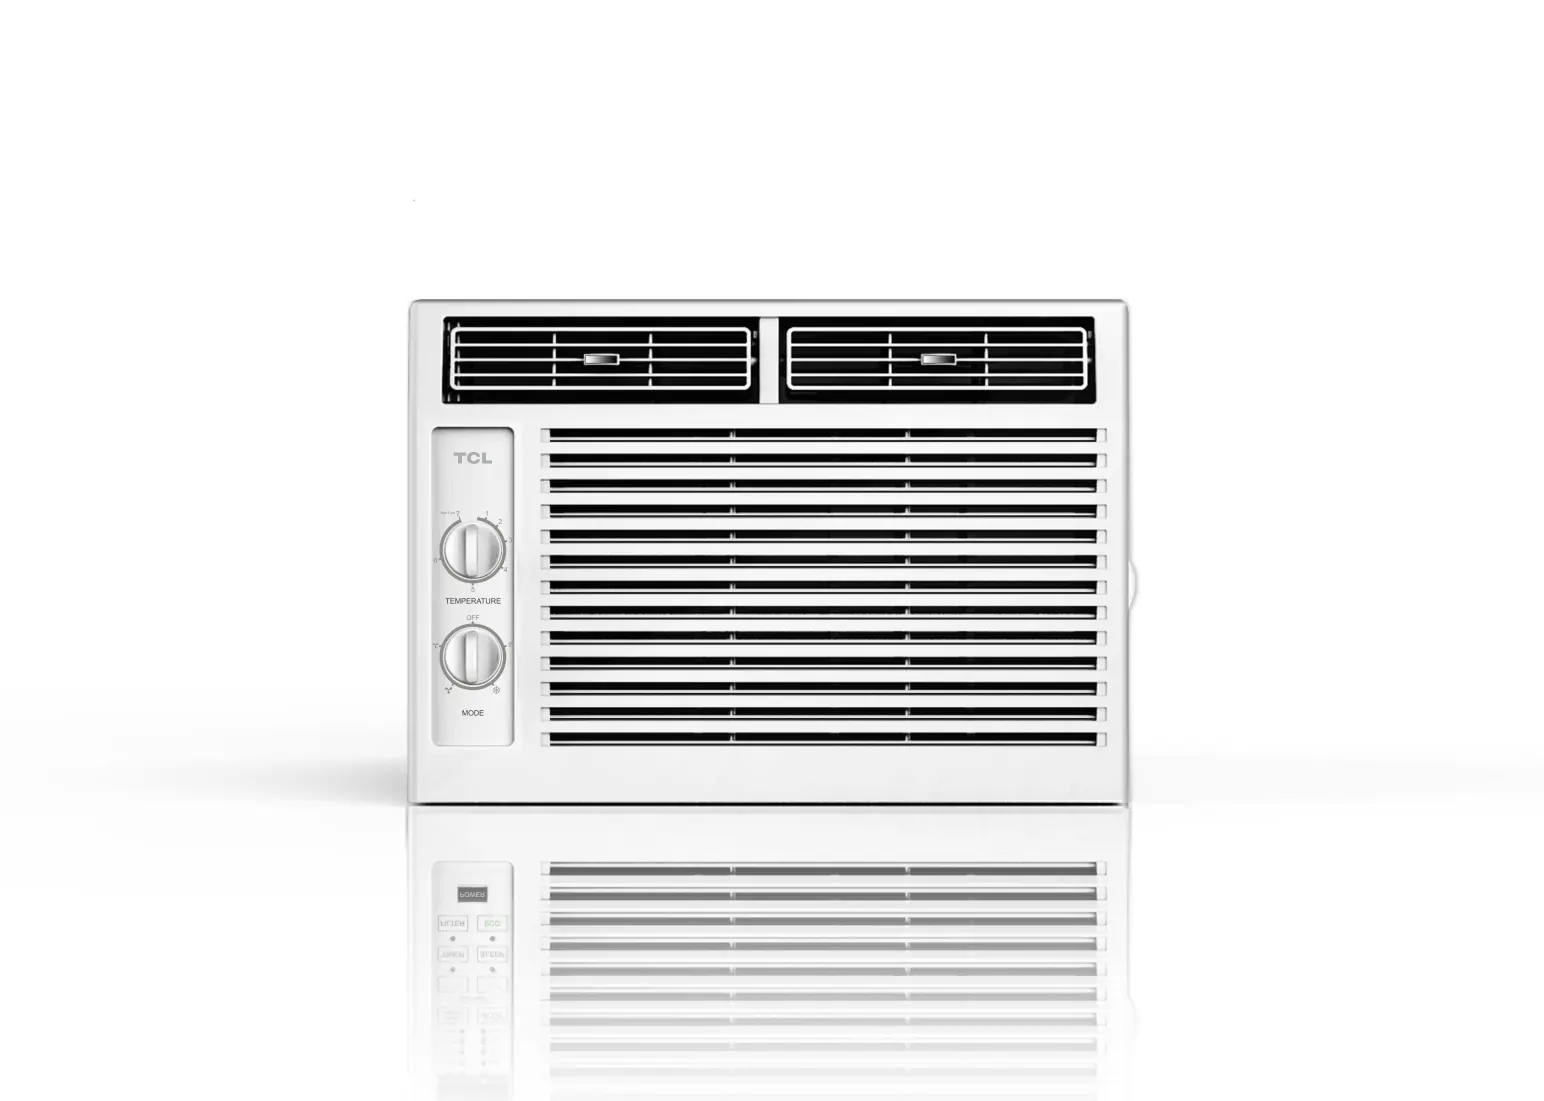
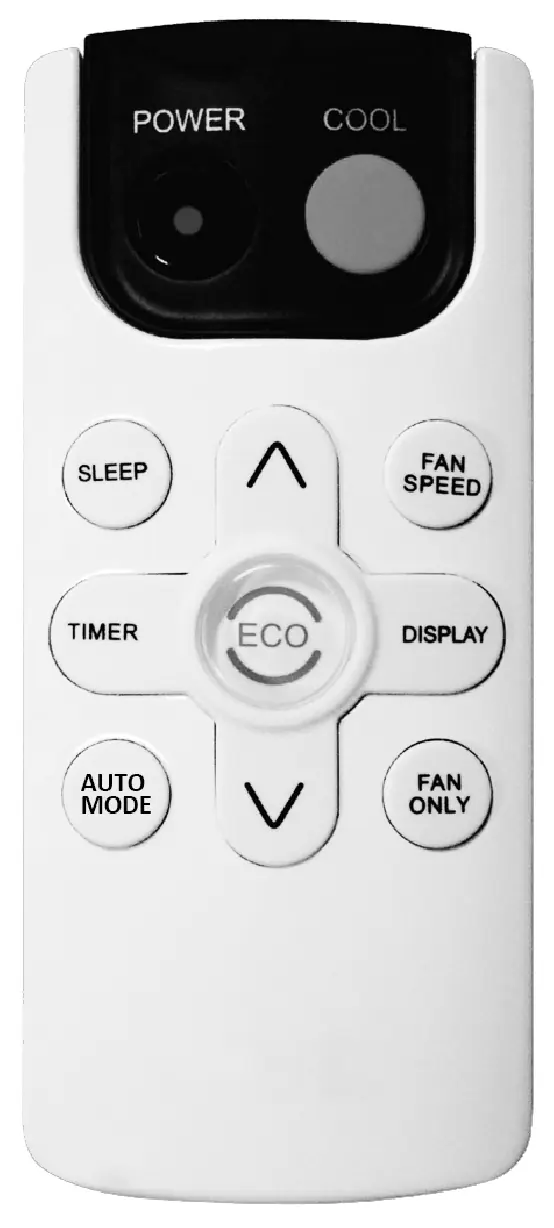
You can control the air conditioner using the electronic control panel on the unit or the included remote control.
- Modes: Cycle through Cool, Dry, Fan, and Auto modes using the Mode button.
- Fan Speed: Adjust airflow intensity using the Fan Speed button (HI, MED, LO, or AUTO).
- Eco Mode: The unit turns off the fan and compressor once the room reaches the set temperature to save energy.
- Sleep Mode: Automatically adjusts temperature and fan speed for overnight comfort.
- Timer: Use the Timer button to program the unit to turn on or off automatically within 0.5 to 24 hours.
Care and Cleaning
Regular maintenance ensures efficient operation.
- Air Filter: Check the filter at least once a month. The "Check Filter" light will illuminate after 500 hours of operation. Wash the filter with liquid dish soap and warm water, then let it dry completely before reinstalling.
- Cabinet Cleaning: Unplug the unit before cleaning. Wipe the cabinet with a damp cloth and mild liquid soap. Never use harsh cleaners or wax.
- Winter Storage: If not using for an extended period, remove the unit from the window, drain any remaining water, and store it in the original box.
Troubleshooting
If you encounter issues, check the following before calling support:
- Unit won't start: Check if the unit is plugged in, the fuse is blown, or the circuit breaker is tripped. Press the RESET button on the LCDI plug.
- Not cooling: Ensure there are no obstructions (curtains, blinds) in front of the unit. Check if the air filter is dirty.
- Water dripping inside: Ensure the unit is tilted slightly downward toward the rear for proper drainage.
For technical support, please call Customer Service at 1-844-801-8880.
Practical help
Common problems
Air conditioner will not start
Check if the unit is plugged in, check the house fuse or circuit breaker, and press the RESET button on the LCDI power cord plug.
Unit does not cool as it should
Ensure there are no curtains, blinds, or furniture blocking the front of the unit. Clean the air filter and ensure the thermostat is set correctly.
Water is dripping inside the room
The unit is not tilted correctly. Ensure it is tilted slightly downward from the front to the rear to allow proper drainage.
Before use
- Verify the window width is between 23"-36" (6K/8K) or 26"-36" (10K/12K).
- Ensure the electrical outlet is a grounded 3-prong type.
- Do not use an extension cord or plug adapter.
- Ensure the unit is tilted slightly downward toward the rear.
- Press the RESET button on the LCDI plug before operation.
Images and diagrams
- Control Panel: Located on the front of the unit, allows selection of modes, fan speeds, and timer settings.
- Remote Control: Provides wireless access to all control panel functions.
- Installation Hardware: Includes top rail, filler panels, lock frames, and various screws for securing the unit.
Model compatibility
- Requires a grounded 3-prong outlet.
- Not compatible with extension cords.
- Designed for standard double-hung windows.

Manual page author
Emily Carter
User documentation editor
Prepares concise manual descriptions and highlights the most useful setup, operation, and maintenance information for readers.