HVAC / Air Conditioners
Fisher Type 114PL High-Pressure Reducing and Low-Flow System Instruction Manual
Quick guide for the Fisher Type 114PL high-pressure reducing and low-flow system. Includes installation requirements, startup procedures, maintenance frequency, and operational schematics.
Table of contents
Manual images
Click an image to enlargeQuick guide from the manual
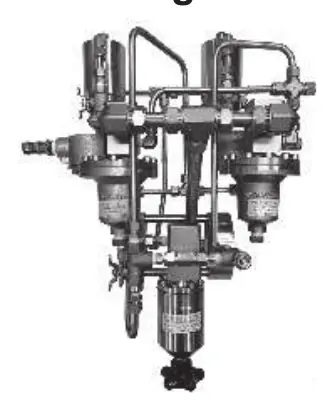
The Fisher Type 114PL is a high-pressure reducing and low-flow system designed for high-pressure reduction with low-flow conditions. It consists of a battery of three Type BSL85 pilots, where two are pneumatically loaded and one is spring-loaded. For optimal performance, it is recommended to install the system on a horizontal pipeline and ensure all tubing and piping are clean and unobstructed.

Installation
Before installation, ensure there is no damage or debris in the system. The regulator must be installed in a safe location, and service conditions must not exceed the limits specified on the nameplate. Key installation requirements include:
- Install the regulator so that the flange connected to the spring-loaded pilot's feeding is on the inlet side.
- Use gaskets between pipeline and system flanges.
- Connect the sensing line to the downstream.
- Maintain a minimum distance of 4 x D to a straight run of the outlet pipe for the impulse line.
- It is recommended to install a servicing valve on the outlet pipeline to facilitate adjustments and bleeding.
Startup Procedure
Follow these steps to start the system:
- Slowly open V1 (upstream valve).
- Slowly open R1 and check for leakage of the pilot nozzle PM by ensuring there is no pressure rise on the downstream pressure gauge.
- Slowly open R2 and check for leakage of the nozzle of the BPM1 by ensuring there is no pressure rise on the downstream pressure gauge.
- Slowly open R3 and check for leakage of the BPM2 by ensuring there is no pressure rise on the downstream pressure gauge.
- Adjust PM to the required value Pd (read on M1 if necessary using valve P1).
Maintenance
Regular maintenance is required to ensure safe operation. Before disassembly, check that there is no pressure between the inlet and outlet valves. It is recommended to perform the following every year:
- Disassemble the manometric boxes and nozzles.
- Inspect and control O-rings, diaphragms, and grease.
Safety Warnings
Failure to follow instructions or improper installation can result in explosion, fire, property damage, or personal injury. Only qualified personnel should install or service the regulator. In hazardous or flammable gas service, ensure the vent line is directed to a remote, safe location away from air intakes.
Practical help
Common problems
Leakage at pilot nozzle (PM, BPM1, or BPM2)
Check for pressure rise on the downstream pressure gauge during startup. If pressure rises, there is a leak.
Freezing during large pressure drops
Consider using the Type RPE Electric Heater to reheat gas supplying the regulator pilots.
Overpressure or service condition violation
Ensure service conditions do not exceed nameplate limits; install pressure-relieving or pressure-limiting devices.
Before use
- Ensure all tubing and piping are clean and unobstructed.
- Verify installation on a horizontal pipeline.
- Check that all assembling elements (bolts, O-rings, flanges) are compatible with working conditions.
- Ensure no damage or debris is present in the system.
- Verify that service conditions match the nameplate ratings.
- Ensure the vent line or stack opening is protected against condensation or clogging.
Specs in practice
- Outlet Pressure Range (Pd)
- 1.0 to 18 bar / 14.5 to 261 psig (depending on pilot type).
- Maximum Allowable Operating Pressure (Ps)
- 100 bar / 1450 psig.
Images and diagrams
- Figure 2 illustrates the operational schematic, identifying key valves (R1, R2, R3, V1, V2) and pressure points (Pu, Pd, Pm) necessary for system setup and troubleshooting.
Model compatibility
- Compatible with Type RPE Electric Heater for gas reheating.
- Pilots used are Type BSL85 (refer to Instruction Manual D103711X012 for pilot-specific parts).

Manual page author
David Miller
Documentation analyst
Organizes user manual content into clear summaries, with attention to model details, product context, and everyday usability.