Home Appliances / Refrigerators
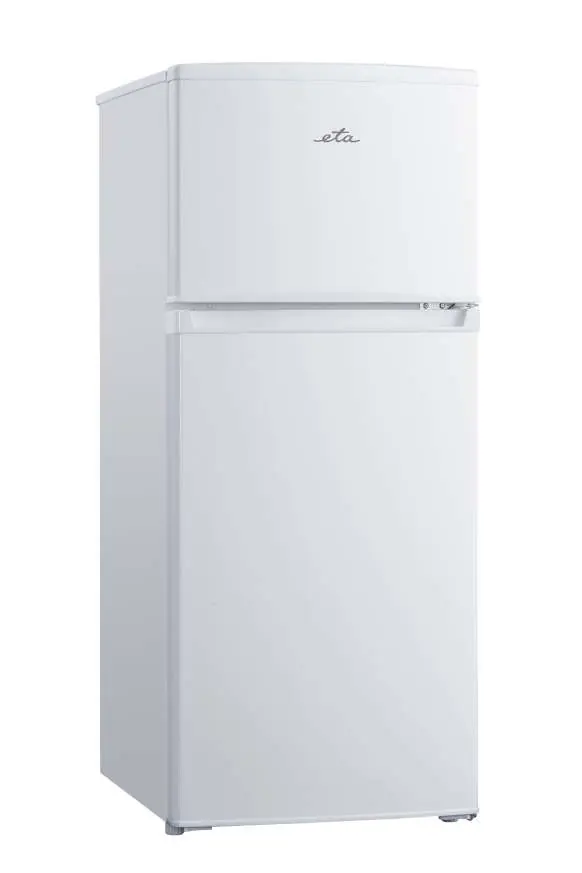
User Manual for ETA 174490000E Fridge
Quick guide for the ETA 174490000E fridge. Includes installation, door reversal, temperature settings, food storage tips, and troubleshooting.
Quick answers from the manual
Quick answer
- The ETA 174490000E is a freestanding refrigerator. Ensure it is placed away from heat sources, leveled properly, and allowed to rest for 4 hours before first use. p. 13, 53
Key actions
- Reversing the door p. 9, 49
- Cleaning the drain hole p. 20, 60
First start
- Wait 4 hours before plugging in, then clean the interior. p. 7, 47
Problems and fixes
Appliance does not work
Check power supply, fuse, and thermostat setting.
p. 21, 61Maintenance and reset
- Defrost the freezer if ice becomes too thick. p. 20, 60
Technical specifications
| Parameter | Value | Meaning | Pages |
|---|---|---|---|
| Climate Class | N | Ambient temperature 16-32°C | p. 13, 53 |
Where to find it in the PDF
- Safety Information p. 3, 43
- Installation p. 7, 47
- Troubleshooting p. 21, 61
Table of contents
Manual images
Click an image to enlargeQuick guide from the manual
This manual provides essential information for the safe and efficient operation of the ETA 174490000E refrigerator. Before first use, ensure the appliance is installed correctly and allowed to rest for at least 4 hours to allow the oil to settle in the compressor.
Installation
Proper installation is critical for performance:
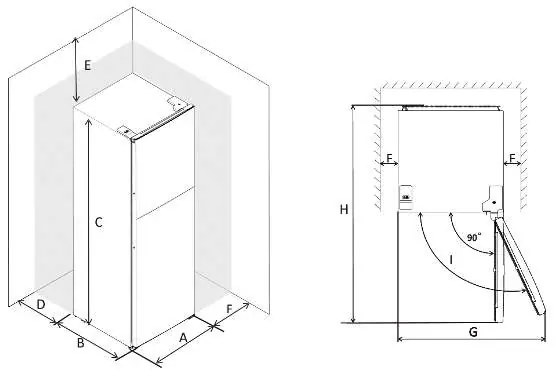
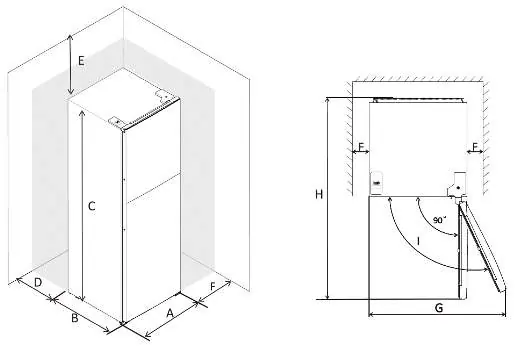
- Space: Ensure adequate air circulation around the appliance. Maintain at least 50mm of space on both sides and 100mm above the unit if placed under an overhanging wall unit.
- Leveling: Use the adjustable feet at the front to ensure the unit is level; otherwise, the doors and magnetic seals will not close properly.
- Electrical: Ensure the voltage matches the rating plate. The appliance must be earthed.
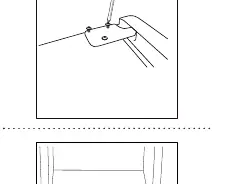
Door Reversal
The door opening direction can be changed. This process requires a Phillips screwdriver, a flat-bladed screwdriver, and a hexagonal spanner. It is recommended that two people perform this task. Ensure the appliance is unplugged and empty before starting.
Daily Use and Temperature Setting
The internal temperature is controlled by a thermostat with 8 settings (0-7):
- 0: Off.
- 1: Warmest setting.
- 7: Coldest setting.
Adjust the setting based on the ambient temperature (e.g., 2-4 for warmer environments, 4-6 for colder environments).
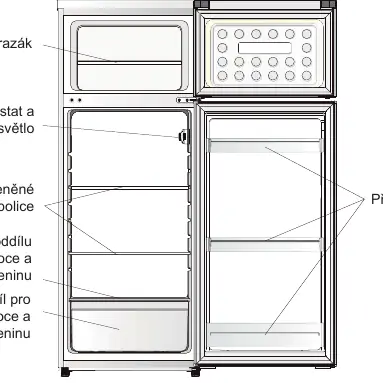
Food Storage
To maintain food quality and safety:
- Do not store warm food or evaporating liquids.
- Wrap food properly, especially if it has a strong odor.
- Store raw meat and fish on the bottom shelf for short-term storage.
- Do not re-freeze thawed food.
Maintenance and Cleaning
- Cleaning: Disconnect the power before cleaning. Use lukewarm water and neutral soap. Avoid abrasive cleaners or steam cleaners.
- Drain Hole: Periodically clean the drain hole at the back of the fridge compartment to prevent water accumulation.
- Defrosting: If the freezer compartment accumulates thick ice, disconnect the unit, remove food, and allow the ice to melt. Do not use sharp metal tools to scrape ice.
Troubleshooting
If the appliance does not work, check the power supply, fuse, and thermostat setting. Unusual noises are often normal (compressor/refrigerant circulation), but ensure the unit is level and not touching walls.
Practical help
Common problems
Appliance does not work
Check if the thermostat is set to '0', if the plug is connected, or if the fuse/circuit breaker is tripped.
Food is too warm
Check temperature settings, ensure doors are not opened frequently, or check if the appliance is near a heat source.
Unusual noises
Ensure the appliance is level, not touching walls/objects, and that rear components are not obstructed.
Before use
- Unpack and check for damage.
- Wait at least 4 hours before connecting to allow oil to settle.
- Ensure adequate air circulation around the unit.
- Clean the interior with lukewarm water and neutral soap.
Specs in practice
- Climate Class
- Determines the ambient temperature range for optimal operation (e.g., N: 16-32°C).
- Thermostat Settings
- 1 is the warmest, 7 is the coldest, 0 is off.
Images and diagrams
- The manual includes detailed diagrams for reversing the door, showing the removal of hinges and covers.
- Space requirement diagrams show minimum clearances (50mm sides, 100mm top).
Model compatibility
- Not intended for built-in installation.
- Not for use at altitudes exceeding 2000m.

Manual page author
Michael Turner
Technical manual editor
Reviews PDF manuals for structure, safety notes, and practical product details so readers can find the right information quickly.