Home Appliances / Refrigerators
User Manual for ETA 139190001D Refrigerator
Quick guide for the ETA 139190001D refrigerator. Includes installation, door reversal, temperature settings, food storage tips, and troubleshooting.
Table of contents
Manual images
Click an image to enlargeQuick guide from the manual
This document provides essential instructions for the safe installation, operation, and maintenance of the ETA 139190001D refrigerator. Before first use, ensure the appliance is unpacked and inspected for damage. Wait at least four hours after installation before connecting to the power supply to allow the compressor oil to settle.
Safety Information
- Keep ventilation openings clear of obstructions.
- Do not use mechanical devices to accelerate the defrosting process.
- Do not damage the refrigerant circuit.
- Children aged 8 and above may use the appliance under supervision.
- Do not store explosive substances like aerosol cans in the appliance.
Installation
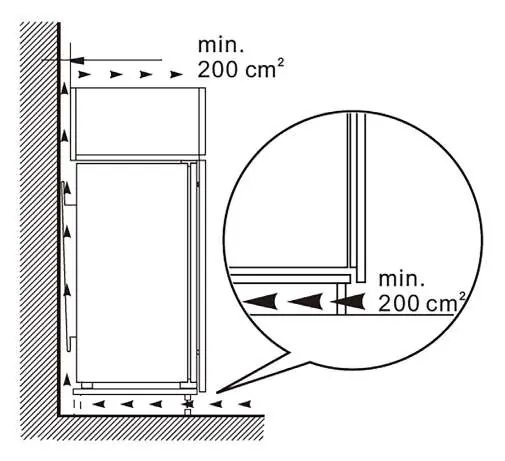
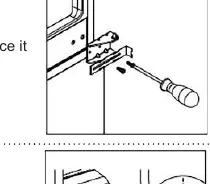
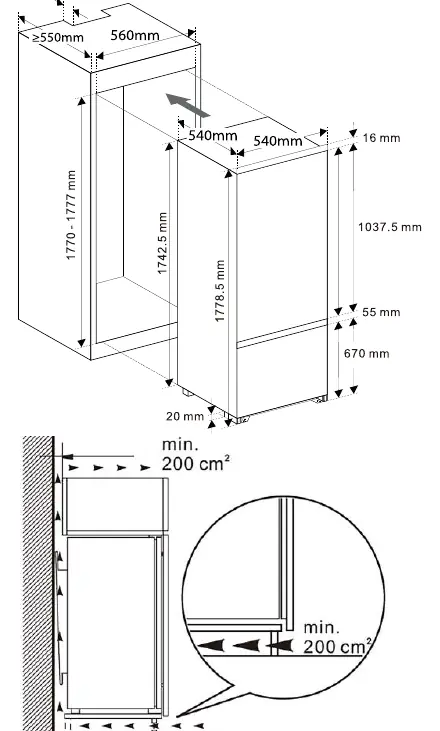
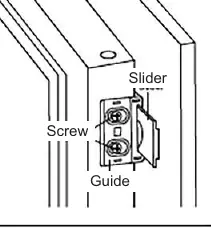
The appliance is designed for built-in installation. Ensure adequate air circulation around the cabinet to prevent overheating. A minimum ventilation space of 200 cm² is required. The door orientation can be reversed; follow the specific steps in the manual using a screwdriver and hexagonal spanner. Ensure the appliance is level and not touching walls or other objects.
Operation
The control panel allows you to adjust settings:
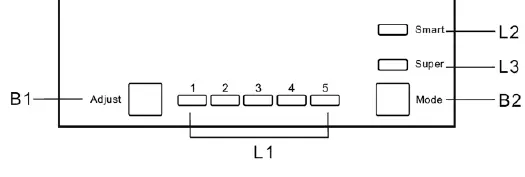
- B1 (Adjust): Cycles through cooling levels 1-5. Press and hold for 5 seconds to turn the appliance off/on.
- B2 (Mode): Selects between Smart, Super, and user settings.
- Smart Mode: Automatically adjusts based on ambient temperature.
- Super Mode: Sets the freezer to the coldest temperature for 54 hours.
Food Storage
Store food according to the recommended temperature settings. Do not place hot food in the appliance. Keep raw meat and fish in suitable containers on the glass shelf. Do not store carbonated drinks in the freezer. Always wrap food to prevent contamination and moisture loss.
Cleaning and Maintenance
Disconnect the power supply before cleaning. Use lukewarm water and neutral soap; avoid abrasive cleaners or sharp metal objects. Regularly clean the drain hole at the back of the fridge to prevent water accumulation. The LED light source must be replaced by a professional.
Troubleshooting
If the appliance does not work, check the power plug, fuse, or circuit breaker. If food is too warm, check the temperature setting or ensure the door is not left open. Unusual noises usually indicate the appliance is not level or is touching an object.
Practical help
Common problems
Appliance does not work
Check if the power plug is connected, the fuse is intact, or the circuit breaker is ON.
Food is too warm
Check temperature settings, ensure the door is not left open, or check if a large quantity of warm food was recently added.
Unusual noises
Ensure the appliance is level and not touching walls or other objects.
Water on the floor
The drain hole is likely blocked; clean it according to the maintenance section.
Before use
- Unpack the appliance and check for physical damage.
- Wait at least 4 hours before connecting to the power supply.
- Ensure the appliance is placed in a well-ventilated area.
- Clean the interior with lukewarm water and neutral soap.
- Ensure the power plug is easily accessible.
Specs in practice
- Climate Class
- Indicates the ambient temperature range the appliance is designed for (SN, N, ST, T).
Images and diagrams
- Control Panel: B1 adjusts cooling levels, B2 selects operating modes.
- Ventilation: Requires a minimum of 200 cm² of air circulation space.
Model compatibility
- Built-in installation requires specific cabinet dimensions as shown in the installation diagram.

Manual page author
Michael Turner
Technical manual editor
Reviews PDF manuals for structure, safety notes, and practical product details so readers can find the right information quickly.