Electronics / Audio Interfaces
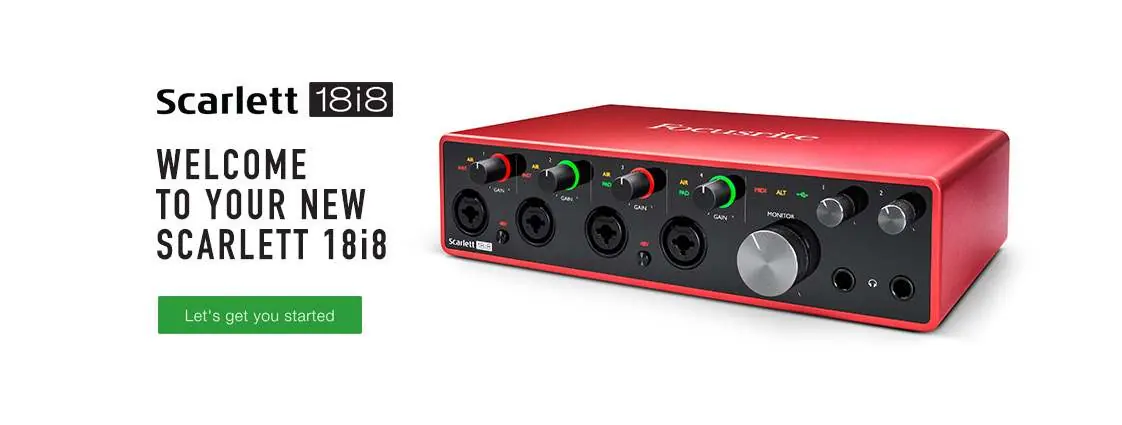
User Guide for Focusrite Scarlett 18i8 3rd Gen Audio Interface
Quick guide for the Focusrite Scarlett 18i8 3rd Gen audio interface. Learn about hardware setup, software installation, input/output configuration, and using features like AIR mode and ADAT.
Table of contents
Manual images
Click an image to enlargeQuick Start and Setup
The Scarlett 18i8 3rd Gen is designed for quick setup. Connect the device to your computer using the provided USB cable and power it using the supplied 12V DC mains adapter. Upon first connection, the device will be in Easy Start mode. Follow the on-screen instructions to register your device and download the Focusrite Control software. Installing this software is essential to unlock full functionality, including sample rates up to 192 kHz and MIDI I/O.

Hardware Overview
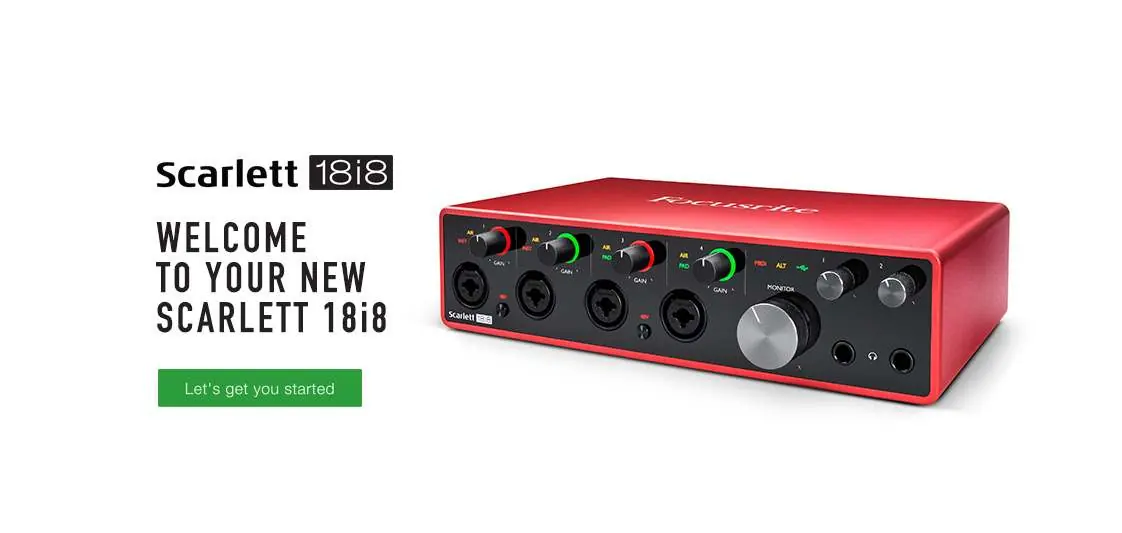
Front Panel: Features four combo inputs (XLR/jack) for microphones, instruments, and line-level signals. Each input has dedicated gain controls with tri-colour LED rings for signal level monitoring. Additional controls include 48V phantom power switches, AIR mode buttons, PAD buttons, monitor level control, and two headphone outputs.
Rear Panel: Includes four balanced line inputs, four balanced line outputs, optical input (ADAT/SPDIF), MIDI I/O, USB-C port, and the power input. A Kensington security slot is also provided.
Key Features
- AIR Mode: Modifies the preamp frequency response to model the classic transformer-based Focusrite ISA preamps, enhancing clarity for vocals and acoustic instruments.
- PAD Function: Decreases input signal level by 10 dB, useful for high-level sources to prevent clipping.
- Loopback: Virtual inputs that allow you to record audio from your computer (e.g., from a web browser) back into your DAW.
- ALT Function: Enables switching between two pairs of monitor speakers connected to Line Outputs 1-2 and 3-4.
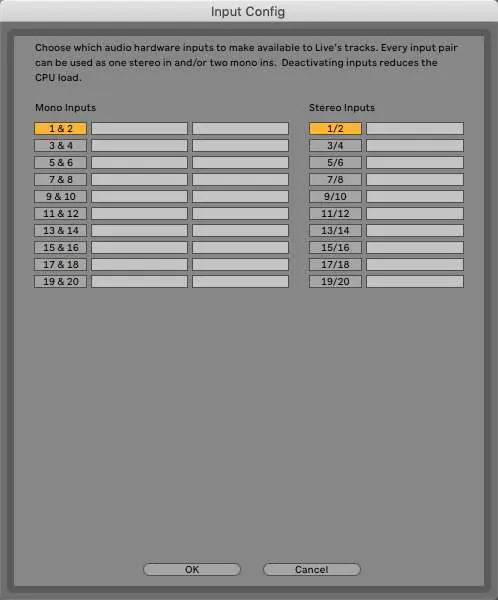
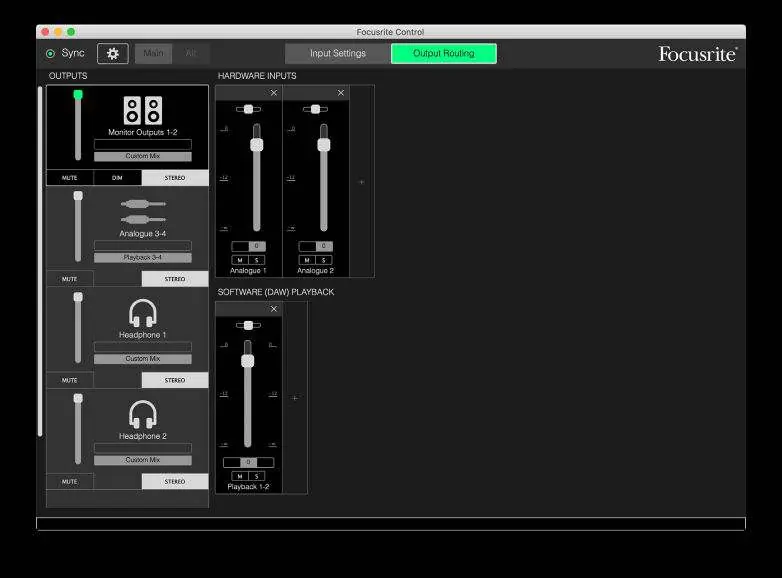
Software Configuration
Focusrite Control is the central application for routing and monitoring. It allows you to configure monitor mixes, set sample rates, and manage hardware settings. Ensure you manually select 'Focusrite USB ASIO' as the driver in your DAW's audio setup preferences to ensure proper communication with the interface.

Usage Examples
- Microphones and Instruments: Connect directly to the front panel combo inputs. The preamp automatically configures for mic or line/instrument levels. Use the 48V button for condenser microphones.
- Loudspeakers: Connect active monitors to Line Outputs 1 and 2. Use Line Outputs 3 and 4 for secondary monitors or outboard FX processors.
- ADAT Connection: Expand your input capability by connecting an 8-channel preamp (like the Focusrite Scarlett OctoPre) to the optical input.
- Stand-alone Mixer: You can store a mix configuration in the hardware, allowing the interface to function as a local mixer without a computer connection.
Troubleshooting
For all technical support queries, please visit the Focusrite Help Centre at support.focusrite.com. Ensure you are using a USB 2.0+ compliant port and the supplied power adapter to avoid performance issues.
Official resources from the manual
Manufacturer information
Focusrite
Practical help
Common problems
Audio feedback loop
Mute monitoring loudspeakers while recording and use headphones when overdubbing.
Device not recognized or not working
Ensure you are using a USB 2.0+ compliant port. The device requires the supplied 12V power adapter.
Clipping or distortion
Use the PAD function in Focusrite Control to decrease input signal level by 10 dB.
Before use
- Register your device at the Focusrite website.
- Install the Focusrite Control software.
- Connect the device to a power source using the supplied 12V adapter.
- Connect the device to your computer using the provided USB cable.
- Set the Scarlett 18i8 as the default input/output device in your DAW.
Images and diagrams
- Front panel features gain controls, input sockets, and monitoring options.
- Rear panel contains line inputs/outputs, optical, MIDI, and power connections.
Model compatibility
- Compatible with Mac OS and Windows.
- Requires USB 2.0+ compliant port.
- Optical input disabled at 176.4/192 kHz sample rates.

Manual page author
David Miller
Documentation analyst
Organizes user manual content into clear summaries, with attention to model details, product context, and everyday usability.