Industrial / Access Equipment
Operator's Manual Supplement for Genie Panel Cradle
Quick guide for the Genie Panel Cradle. Includes installation instructions, safety requirements, load limits, and operating procedures for S and Z boom lifts.
Table of contents
Manual images
Click an image to enlargeQuick guide from the manual
This document is an operator's manual supplement for the Genie Panel Cradle. It provides instructions for modifying Genie boom lifts to safely lift solid panels. This modification is only approved for specific models equipped with 6 ft or 8 ft platforms and requires foam-filled tires.
Modification approval and compatibility
This kit is approved for use on the following Genie models:
- S-Series: S-40, S-40 HF, S-40 XC, S-45, S-45 HF, S-45 XC, S-60, S-60HC, S-60 J, S-60 TRAX, S-65, S-65 TRAX, S-65 XC, S-80, S-80X, S-80 XC, S-85, S-85 XC, SX-135 XC.
- Z-Series: Z-45/22 (from SN Z45-00001), Z-45/25 RT, Z-45 FE, Z-45 XC, Z-60/34, Z-60/37DC, Z-60/37FE, Z-62/40, Z-80/60.
Important: Do not install a panel cradle assembly on any Genie boom product other than the designated models.
Safety and operating limits
Before operating, ensure you are adequately instructed and aware of all hazards associated with lifting panels. Observe the following limits:
- Maximum capacity: 250 lbs / 113 kg.
- Maximum panel area: 32 sq. ft / 3 m2.
- Maximum vertical height of panels: 4 ft / 1.2 m.
- Maximum wind speed: 15 mph / 6.7 m/sec.
- Platform capacity: Combined weight of cradles, panels, occupants, tools, and other equipment must not exceed the rated platform capacity.
Panel cradle installation

- Install the hook piece through the slots in the panel cradle base.
- Hook the panel cradle to the bottom platform tube in the desired location.
- Install the rubber bumpers through the panel cradle base and hook piece, securing them with the appropriate nuts. Do not overtighten.
- If the cradle is not installed at a platform floor support tube, place the aluminum tube between the panel cradle and the platform floor.
- Insert the U-bolt through the floor, around the tube, and into the panel cradle base. Secure with a flange nut.
- Apply the warning decal to the front of each panel cradle base.
- Repeat these steps for the other panel cradle assembly.
Platform padding and strap installation
- Install the two pieces of padding on the platform rails to protect the panels from contact.
- Install the clamp around the vertical platform rail tube.
- Secure the strap assembly to the clamp using the provided retaining fasteners. Do not overtighten.
- Ensure the strap assembly is secured between the clamp and can slide freely up and down the platform rail.
Operating instructions
- Secure both panel cradles to the platform.
- Place the load so that it rests in both panel cradles.
- Center the load on the platform.
- Secure the load to the platform using the strap.
- Tighten the strap.
Manufacturer information
Genie
Practical help
Common problems
Panel cradle does not fit or align correctly
Verify the boom model is on the approved list and that the platform is 6 ft or 8 ft. If not at a support tube, ensure the aluminum tube is placed between the cradle and the platform floor.
Load instability
Ensure the load is centered on the platform and the strap is tightened securely.
Before use
- Verify the boom model is on the approved list.
- Ensure the platform is 6 ft or 8 ft.
- Confirm the machine has foam-filled tires.
- Check that the panel cradle assembly is securely attached.
- Ensure the load does not exceed 250 lbs (113 kg).
- Check that the wind speed is below 15 mph (6.7 m/sec).
Specs in practice
- Maximum capacity
- 250 lbs / 113 kg (total weight of cradles and load).
- Maximum panel area
- 32 sq. ft / 3 m2.
- Maximum vertical height
- 4 ft / 1.2 m.
- Maximum wind speed
- 15 mph / 6.7 m/sec.
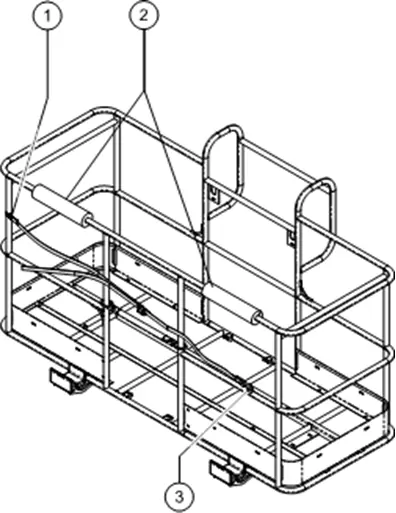
Images and diagrams
- Illustration 1 shows the assembly of the panel cradle base, hook piece, and rubber bumpers.
- Illustration 2 shows the installation of the platform padding and strap clamp.
Model compatibility
- Only approved for use on models equipped with a 6 ft or 8 ft / 1.8m or 2.4m platform.
- Foam-filled tires are required for all approved models.

Manual page author
David Miller
Documentation analyst
Organizes user manual content into clear summaries, with attention to model details, product context, and everyday usability.