Home Appliances / Washing Machines
Hitachi M 12V2 and M 12SA2 Router User Manual
Quick guide for the Hitachi M 12V2 and M 12SA2 routers. Learn about setup, bit installation, depth adjustment, maintenance, and safety instructions.
Table of contents
Manual images
Click an image to enlargeQuick guide from the manual
This manual provides instructions for the Hitachi M 12V2 and M 12SA2 routers. Always ensure the power switch is in the OFF position before connecting the tool to a power source. Wear eye protection and keep hands away from rotating parts during operation.
Installing and removing bits
WARNING: Always switch power OFF and disconnect the plug before changing bits.
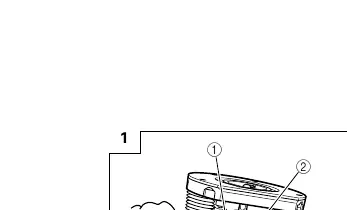
- Clean the bit shank and insert it into the collet chuck until it bottoms, then back it out approximately 2 mm.
- Press the lock pin to hold the armature shaft.
- Use the 23 mm wrench to firmly tighten the collet chuck in a clockwise direction (viewed from under the router).
- Ensure the lock pin is not inserted into the armature shaft after tightening.
Adjusting depth of cut
Standard adjustment:
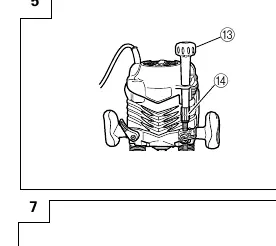
- Place the tool on a flat surface.
- Turn the quick adjustment lever counterclockwise until it stops.
- Loosen the pole lock knob and adjust the stopper block.
- Loosen the lock lever, press the tool body until the bit touches the surface, and tighten the lock lever.
- Align the depth indicator with the "0" graduation on the scale.
- Raise the tool to the desired depth and tighten the pole lock knob.
Fine adjustment (M12V2):
- Attach the knob to the fine adjustment knob.
- Turn the quick adjustment lever clockwise until it stops against the stopper screw.
- Turn the fine adjustment knob to achieve the desired depth.
Guiding the router
Use the provided straight guide for chamfering and groove cutting along the side of materials. Ensure the base is securely attached to the surface of the material while feeding the router.
Speed adjustment (M12V2 only)
The M12V2 features an electronic control system for stepless speed changes. Dial position "1" is for minimum speed, and "6" is for maximum speed.
Maintenance and inspection

- Oiling: Occasionally apply a few drops of machine oil to the sliding portions of the columns and end bracket.
- Mounting screws: Regularly inspect all mounting screws and ensure they are properly tightened.
- Carbon brushes: Inspection and replacement must be performed ONLY by a Hitachi Authorized Service Center.
- Supply cord: If damaged, the tool must be returned to a Hitachi Authorized Service Center for replacement.
Manufacturer information
Hitachi, Ltd.
Practical help
Common problems
High-pitched cutting noise
Usually caused by a worn bit. Replace the bit with a new one.
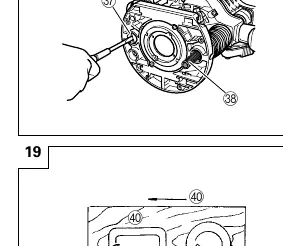
Quick adjustment lever does not stop
The bolt screw is not properly fitted. Loosen the lock lever, press down hard on the router, and re-adjust the lever.
Collet chuck damage
Ensure the lock pin is not inserted into the armature shaft after tightening the collet chuck.
Before use
- Check that the power source conforms to the product nameplate.
- Ensure the power switch is in the OFF position.
- Use an extension cord of sufficient thickness and rated capacity if needed.
- Wear eye protection.
- Ensure the bit is clean and inserted correctly.
Specs in practice
- No-load speed
- 8000–22000 min-1 (M12V2) / 22000 min-1 (M12SA2)
- Collet Chuck Capacity
- 12 mm or 1/2 inch
- Main Body Stroke
- 65 mm
Images and diagrams
- Fig 1: Bit installation using the lock pin and wrench.
- Fig 2-5: Step-by-step depth of cut adjustment.
- Fig 16: Speed adjustment dial (M12V2 only).
- Fig 19: Correct feed direction for maximum cutting effectiveness.
Model compatibility
- M12V2 features electronic speed control (dial 1-6).
- M12SA2 has a fixed speed of 22000 min-1.

Manual page author
David Miller
Documentation analyst
Organizes user manual content into clear summaries, with attention to model details, product context, and everyday usability.