Automotive / Electrical Accessories
User Manual for Hviero 18mm/23mm LED Eagle Eye Light
Quick guide for the Hviero 18mm/23mm LED Eagle Eye Light. Includes wiring instructions, technical specifications, and installation tips for your automotive lighting setup.
Table of contents
Manual images
Click an image to enlargeQuick guide from the manual
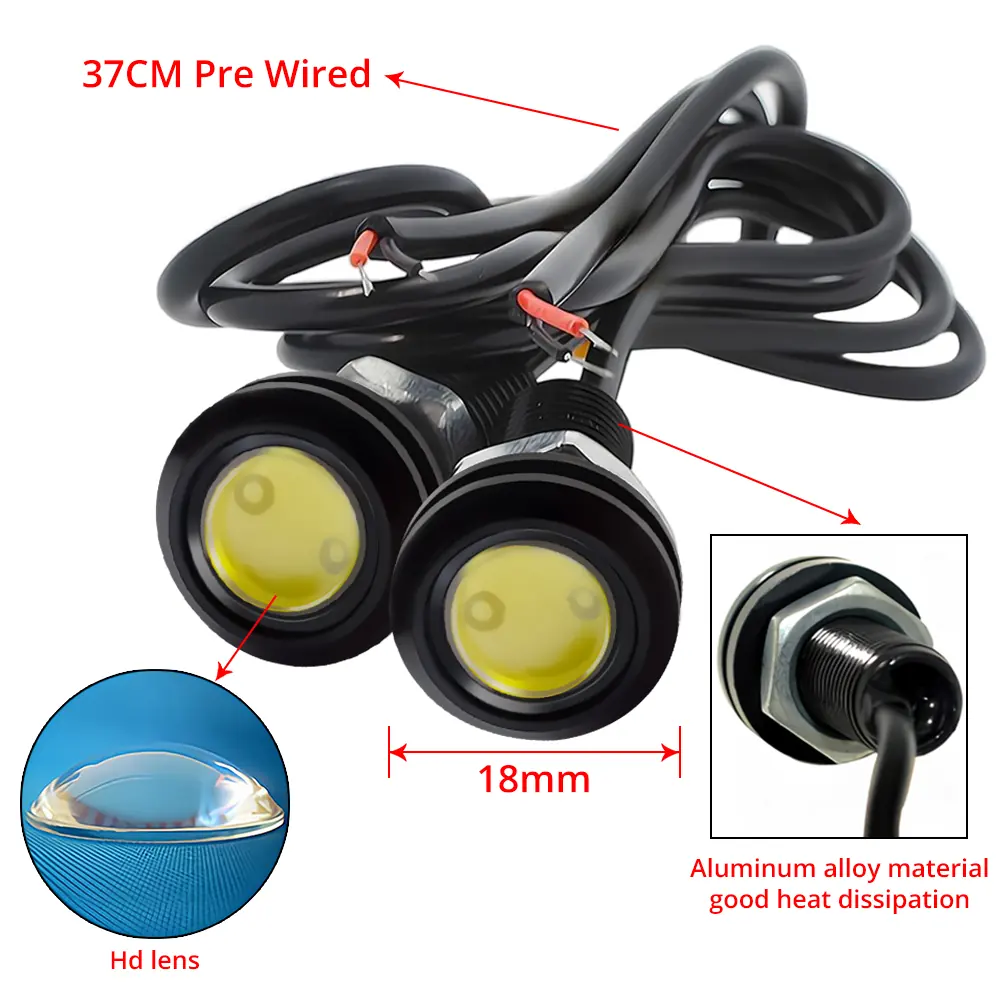
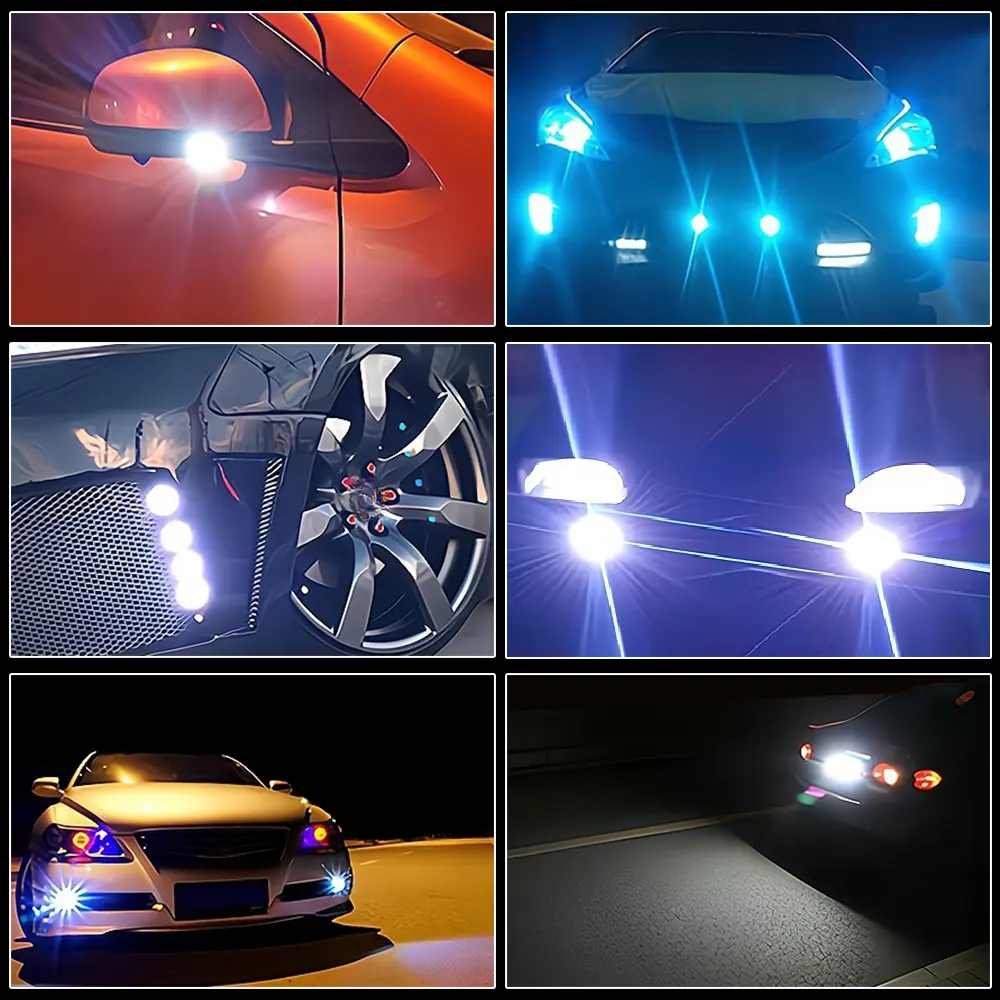
The Hviero LED Eagle Eye Light is a versatile automotive lighting solution designed for use as daytime running lights (DRL), fog lights, or auxiliary lighting. These lights are built with an aluminum alloy housing for efficient heat dissipation and are rated IP65 for water resistance. This guide covers the essential wiring and technical specifications required for installation.
Product Overview
The product features a high-definition lens and a durable, waterproof design. It is available in two primary sizes (18mm and 23mm) and comes pre-wired for easier installation. The aluminum alloy construction ensures longevity and effective cooling during operation.
Wiring and Installation
Proper wiring is essential for the correct operation of the LED lights. Follow these steps to connect the unit to your vehicle's electrical system:


- Black wire: Connect to the battery negative terminal or a solid chassis ground (lap iron).
- Red wire: Connect to the ACC (Accessory) power source or the small lamp circuit to ensure the lights activate when the vehicle is powered on.
Ensure all connections are secure and insulated to prevent short circuits.
Technical Specifications
The following parameters apply to the 18mm/23mm LED Eagle Eye Light series:
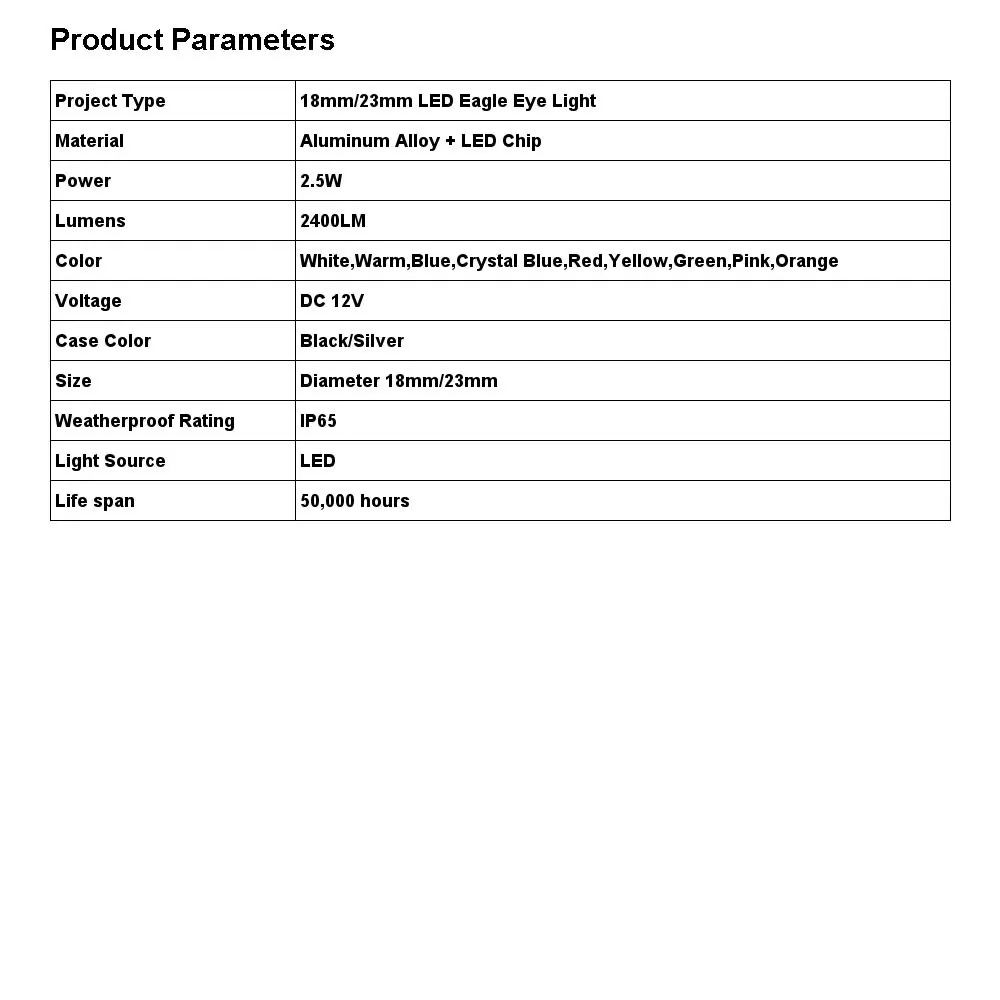
- Voltage: DC 12V
- Power: 2.5W
- Lumens: 2400LM
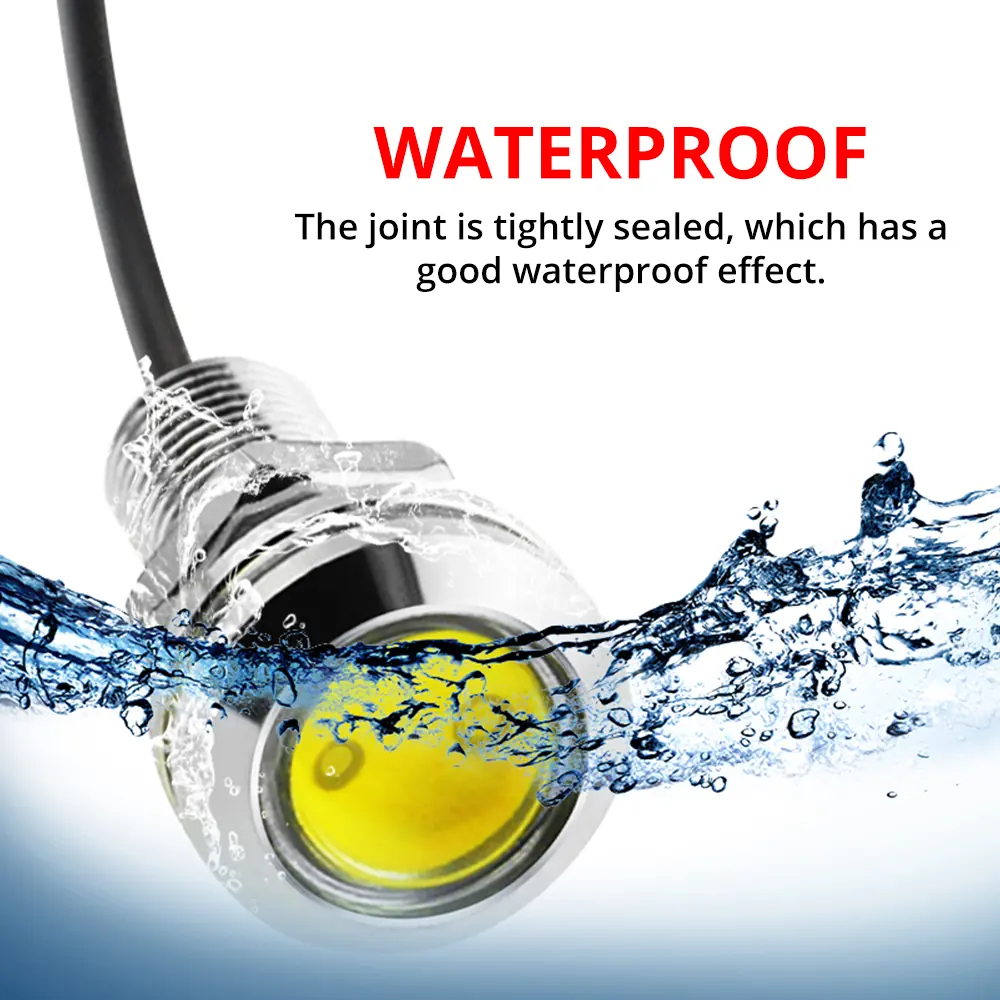
- Weatherproof Rating: IP65
- Lifespan: 50,000 hours
- Material: Aluminum Alloy + LED Chip
Maintenance and Safety
While the unit is rated IP65 for water resistance, ensure the mounting joint is tightly sealed during installation to maintain the waterproof effect. The high-precision material and silicone sealing provide protection against dust and water jets. Avoid exposing the light to high-pressure water directly on the seal for extended periods.
Practical help
Common problems
Light does not turn on
Check the wiring connections. Ensure the black wire is connected to a solid ground and the red wire is connected to a live 12V ACC or lamp circuit.
Moisture inside the lens
Ensure the mounting nut is tightened correctly and the joint is sealed. If moisture persists, check for cracks in the lens or housing.
Before use
- Verify your vehicle electrical system is 12V DC.
- Measure the mounting location to ensure it fits the 18mm or 23mm diameter.
- Ensure you have access to an ACC or small lamp power source.
- Check that the provided 37cm-40cm pre-wired cable is sufficient for your installation path.
Specs in practice
- 50,000 hours
- Expected operational lifespan under normal conditions.
Images and diagrams
- Wiring: Black wire is negative (ground), Red wire is positive (power).
- Mounting: The threaded body allows for secure installation into a drilled hole using the included nut.
Model compatibility
- Compatible with 12V automotive systems.
- Available in 18mm and 23mm diameter variants.

Manual page author
Michael Turner
Technical manual editor
Reviews PDF manuals for structure, safety notes, and practical product details so readers can find the right information quickly.