Tools / Power Tools
User Manual for KIMO 3302 12V Power Ratchet Wrench
Quick guide for the KIMO 3302 12V Power Ratchet Wrench. Includes setup, battery operation, safety instructions, and technical specifications.
Table of contents
Manual images
Jump to the sectionQuick guide from the manual
The KIMO 3302 is a 12V cordless power ratchet wrench designed for fastening tasks. Before use, ensure the battery is fully charged and the lock switch is in the unlocked position. Always wear eye protection and use only accessories designed for impact tools.
Safety Rules
Work Area: Keep the area clean and well-lit. Do not operate in explosive atmospheres (flammable liquids, gases, or dust). Keep bystanders and children away.
Electrical Safety: Do not expose the tool to rain or wet conditions to prevent electric shock.
Personal Safety: Stay alert and use common sense. Do not wear loose clothing or jewelry. Keep hair, clothing, and gloves away from moving parts. Always wear eye protection.
Components and Specifications
The tool features a 3/8" square drive, a paddle switch for speed control, a forward/reverse toggle, and a fuel gauge.
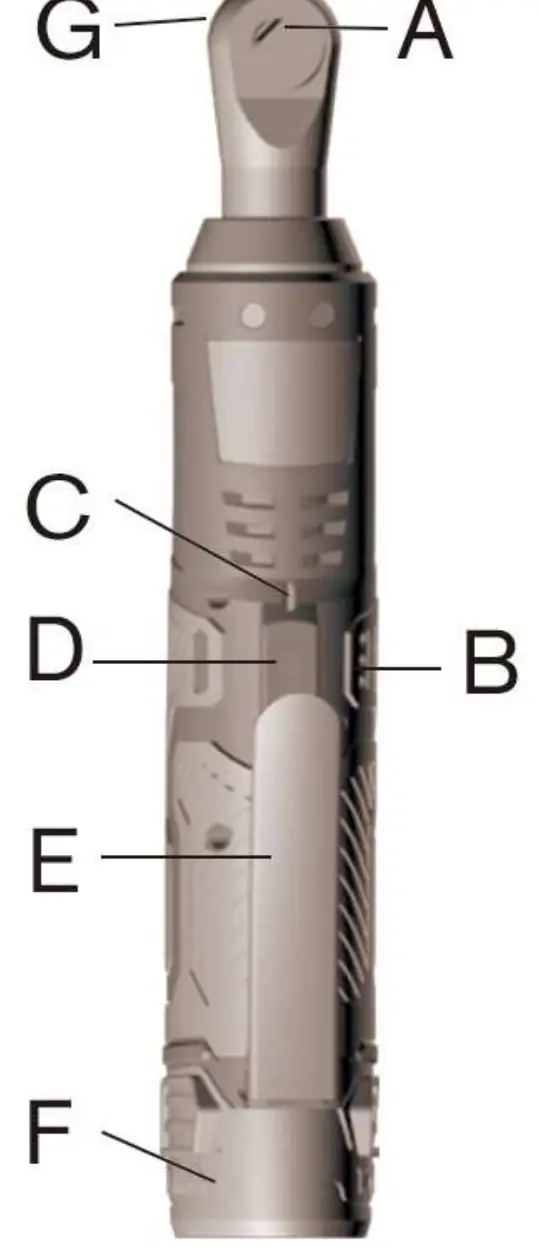
- Square Drive: 3/8 Inch
- Max Torque: 40 Foot Pounds
- Rated Speed: 400 Revolutions/Minute
- Rated Battery Voltage: 12V
- Weight (Bare Tool): 1.72 lbs
- Weight (Tool + Battery): 2.12 lbs
Operating Instructions
Battery Installation: Slide the battery pack into the body of the tool until it latches securely. To remove, push the release buttons and pull the battery away.

Accessories: Align the accessory with the drive anvil and push firmly. Only use accessories designed for impact tools.
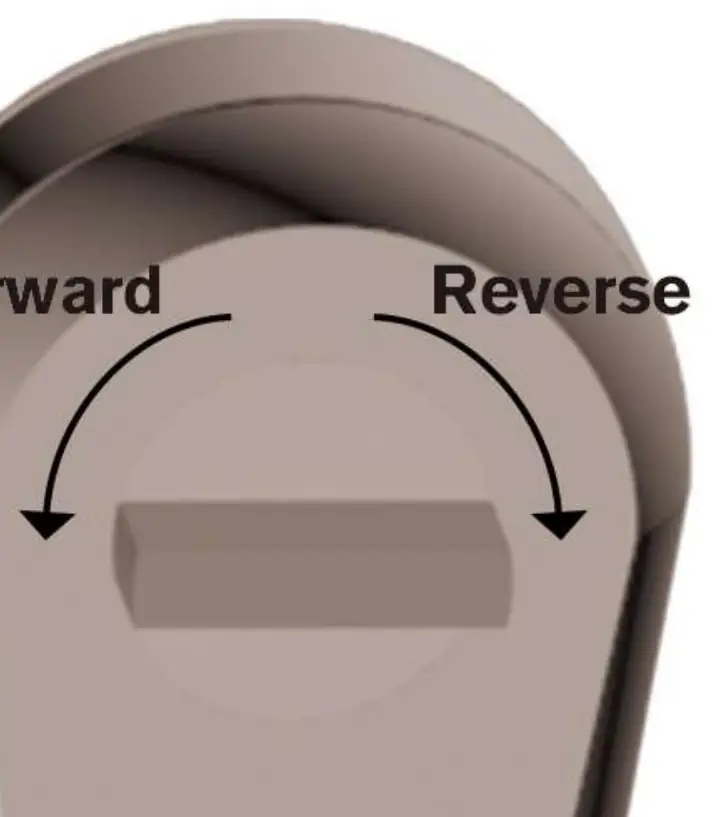
Forward/Reverse Toggle: Rotate the toggle counterclockwise for forward (clockwise) rotation. Rotate clockwise for reverse (counterclockwise) rotation.
Starting and Speed Control: Pull the paddle switch to start. The LED light will turn on. Vary the speed by increasing or decreasing pressure on the switch. The tool shuts off automatically when maximum torque is reached.
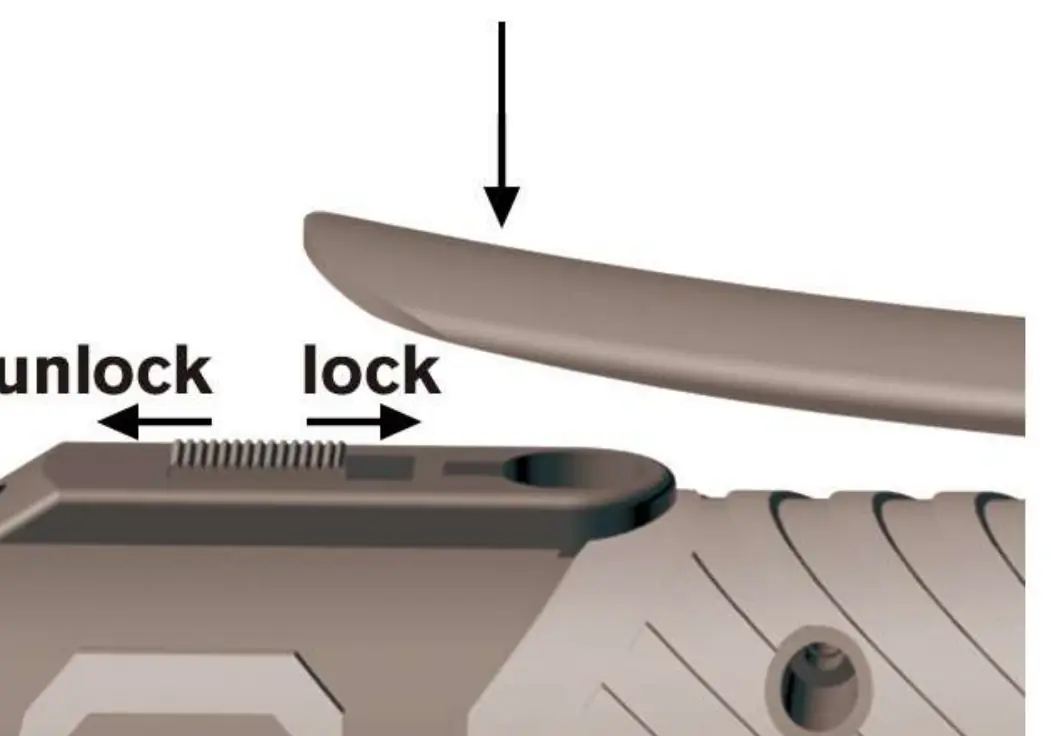
Lock Switch: Slide the lock switch down to lock the paddle switch. Slide up to unlock.
Battery and Charging
The fuel gauge consists of three LED lights indicating charge level:
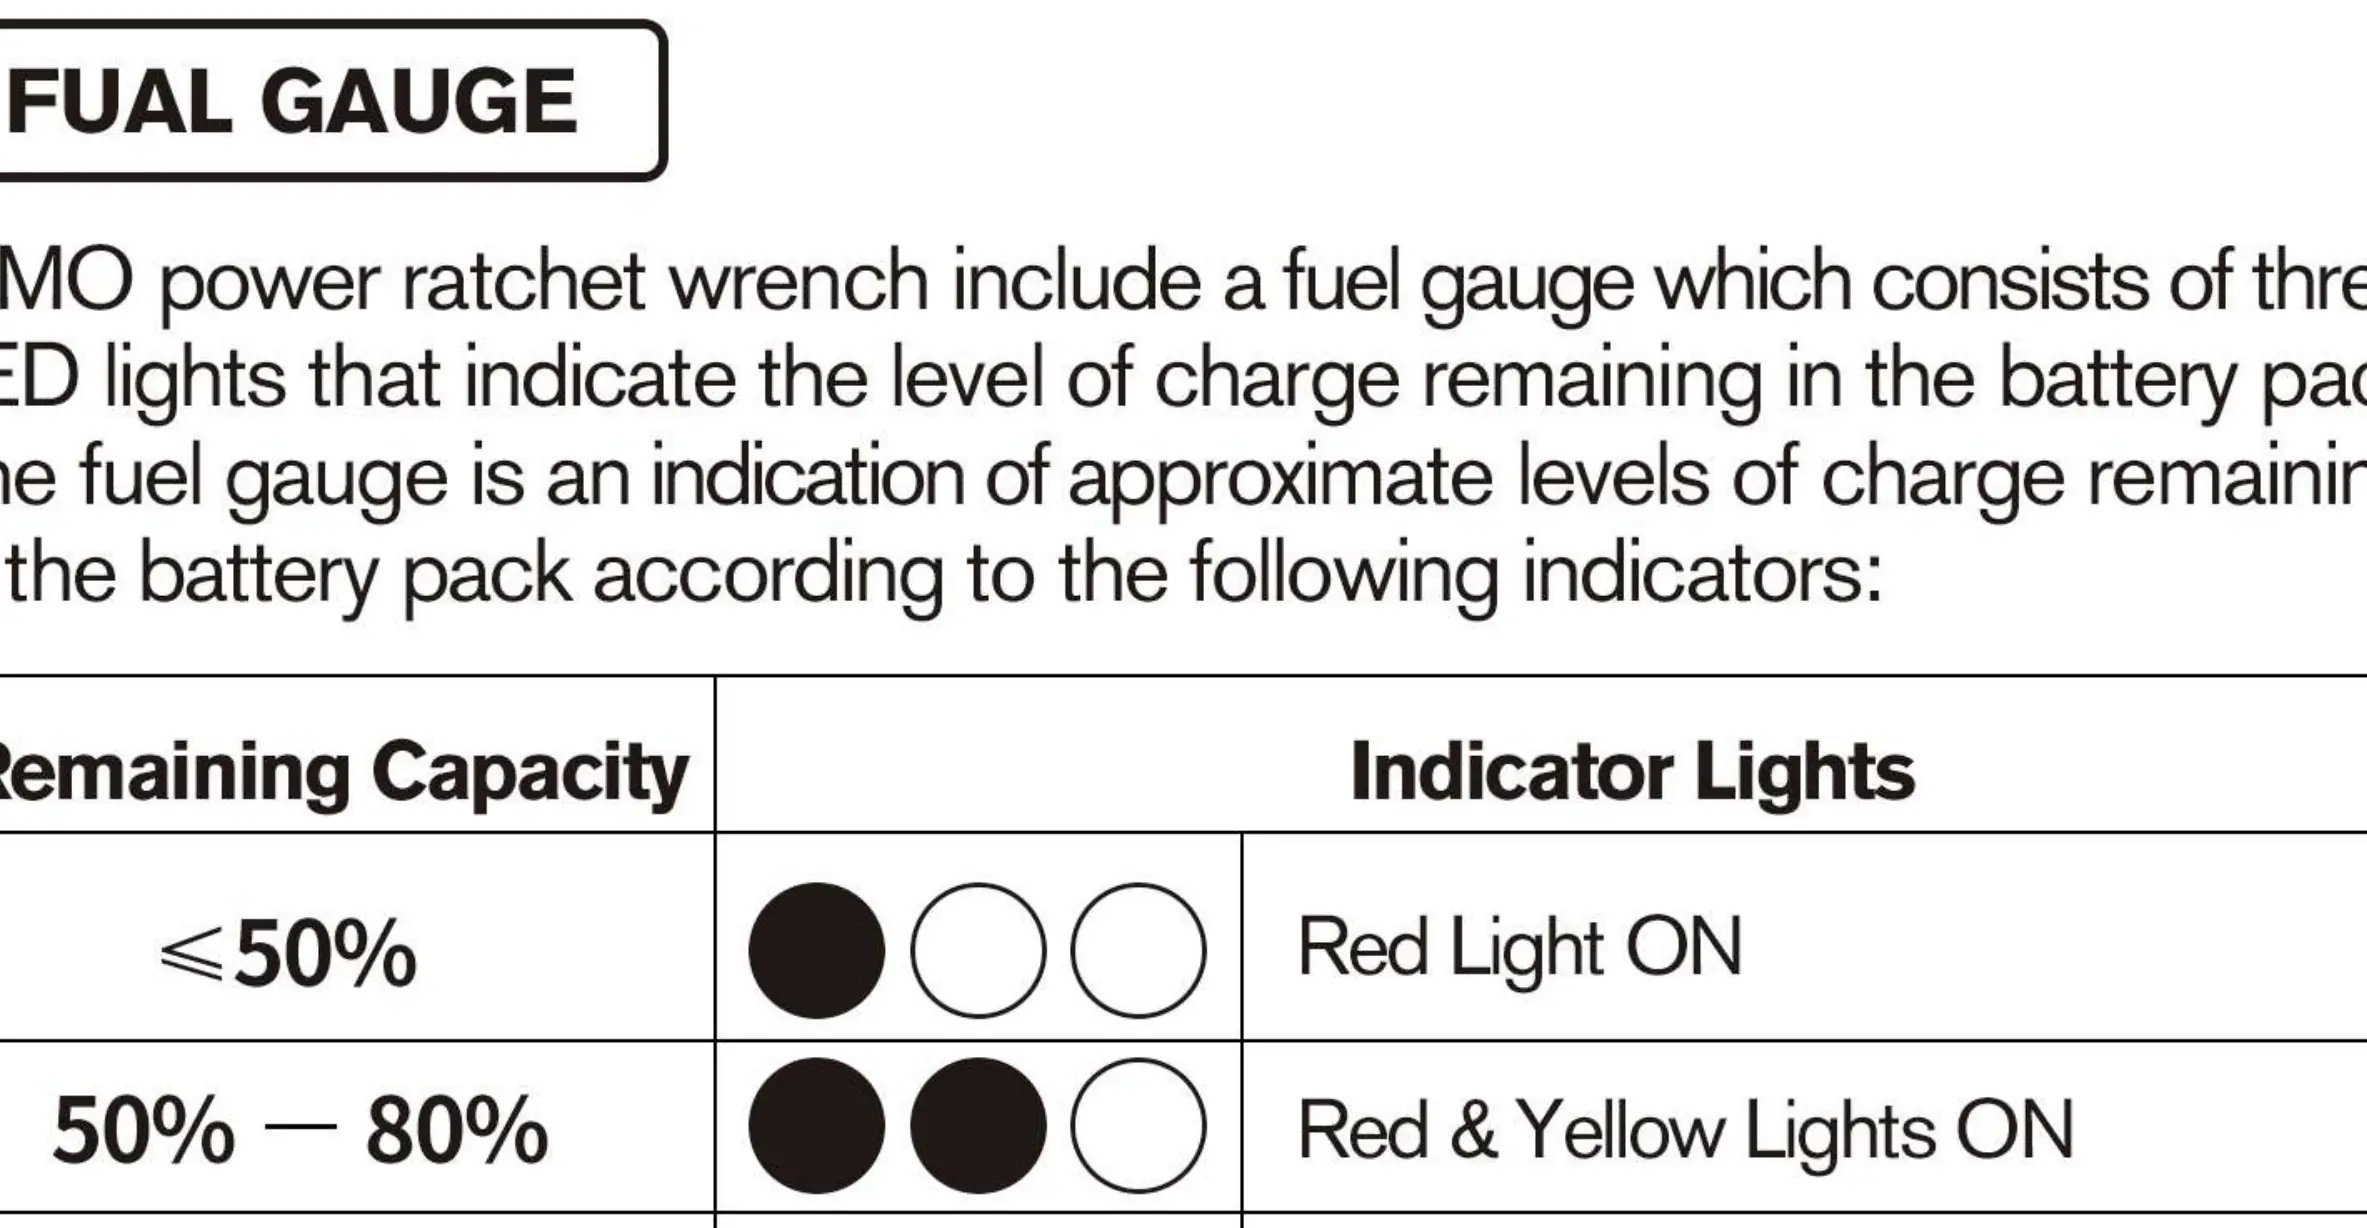
- ≤50%: Red Light ON
- 50% - 80%: Red & Yellow Lights ON
- 80% - 100%: Red, Yellow & Green Lights ON
Charging: Slide the battery into the charger. A flashing red light indicates the battery is too hot or cold; a continuous red light indicates charging. A fully discharged battery charges in 30 to 90 minutes.
Maintenance and Safety
Always lock the paddle switch or remove the battery before performing maintenance, changing accessories, or storing the tool. Do not disassemble the battery cartridge, expose it to water, or incinerate it. If the tool is damaged, have it serviced before use.
Manufacturer information
Zhejiang Kimo Power Tools Co., Ltd.
Practical help
Common problems
Tool does not start
Ensure the battery is charged and the lock switch is in the unlocked position.
Battery charger red light is flashing
The battery pack is too hot or too cold. Allow it to reach a normal temperature.
Tool stops during operation
The tool may have reached maximum torque or the battery is depleted.
Before use
- Ensure the battery is fully charged.
- Check that the lock switch is in the unlocked position.
- Verify the correct impact-rated accessory is attached.
- Wear appropriate eye protection.
- Ensure the work area is clean and free of flammable materials.
Specs in practice
- Square Drive
- 3/8 inch size for attaching sockets.
- Battery Voltage
- 12V DC power system.
Images and diagrams
- Battery insertion: Slide the pack into the tool body until it latches.
- Forward/Reverse: Toggle the switch to change rotation direction.
- Fuel Gauge: Three LEDs indicate remaining battery capacity.
Model compatibility
- Use only accessories designed for impact tools.
- Do not use standard sockets as they may shatter.

Manual page author
Emily Carter
User documentation editor
Prepares concise manual descriptions and highlights the most useful setup, operation, and maintenance information for readers.