Lighting / Fixtures
User Manual for Philips Doris 17W / Balance 17W Ceiling Light
Quick guide for installing the Philips Doris 17W / Balance 17W bathroom ceiling light. Includes step-by-step mounting instructions, wiring diagrams, and safety precautions for this IP44-rated fixture.
Table of contents
Manual images
Click an image to enlargeQuick guide from the manual
This manual provides essential installation instructions for the Philips Doris 17W / Balance 17W ceiling light. This fixture is rated IP44, making it suitable for use in bathrooms or areas where splashing water may occur. Always ensure the main power supply is disconnected before beginning any installation work.
Installation steps
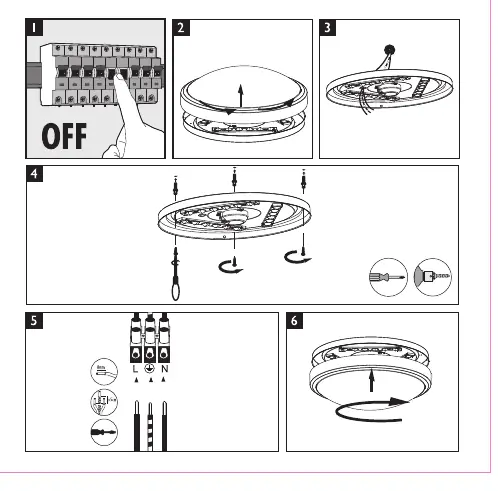
- Turn off power: Switch off the main electrical supply at the circuit breaker before starting.
- Remove cover: Carefully remove the diffuser/cover from the light base.
- Mount base: Secure the base of the light fixture to the ceiling using appropriate screws and anchors.
- Secure base: Ensure the base is firmly attached to the ceiling surface.
- Wiring: Connect the electrical wires to the terminal block. Ensure the Live (L), Neutral (N), and Ground (Earth) wires are connected to the corresponding terminals.
- Attach cover: Reinstall the diffuser/cover onto the base.
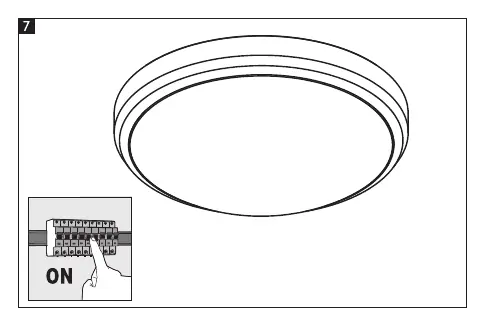
- Turn on power: Restore the main electrical supply and test the light.
Safety and technical specifications
The fixture is designed for ceiling mounting. It requires a proper ground connection for safety. The IP44 rating indicates protection against solid objects over 1mm and splashing water from any angle. Do not attempt to modify the internal LED components.
Manufacturer information
Philips
Practical help
Common problems
Light does not turn on after installation
Verify that the main power supply is switched on at the circuit breaker and ensure all wiring connections (L, N, Ground) are securely fastened in the terminal block.
Before use
- Turn off the main power supply at the circuit breaker.
- Ensure the ceiling surface is capable of supporting the fixture.
- Verify that the installation location is suitable for an IP44-rated fixture.
- Ensure you have the necessary tools, including a screwdriver and wire strippers.
- Check that the wiring matches the L, N, and Ground terminals.
Show more Show less
Specs in practice
- Grounding Symbol
- The fixture must be connected to the earth wire for electrical safety.
Images and diagrams
- The manual uses a sequence of 7 steps to illustrate the installation process from power disconnection to final assembly.
- Wiring diagram shows the connection points for Live (L), Neutral (N), and Earth (Ground) wires.
Model compatibility
- This fixture is intended for ceiling installation only.

Manual page author
Michael Turner
Technical manual editor