Electronics / Camera Accessories
Assembly Manual for Proaim 12FT Camera Crane Jib with Stand
Quick assembly and setup guide for the Proaim 12FT Camera Crane Jib with Stand (P-12-JS). Learn how to assemble the jib arm, attach the joystick controller, and mount your camera.
Table of contents
Manual images
Click an image to enlargeQuick Guide from the Manual
This document provides assembly and setup instructions for the Proaim 12FT Camera Crane Jib with Stand (P-12-JS). Before beginning, inspect the contents of your package to ensure all parts, including the Front, Middle, and End sections, Central Post, Jib Stand, and tools, are present.
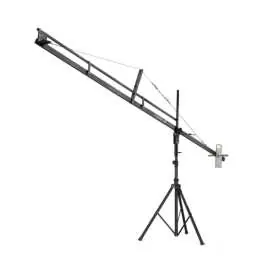
Jib Stand Setup
Start by loosening the lower knob of the Jib Stand. Extend the legs to their widest position for maximum stability and re-tighten the lower knob. Insert the Center Post of the Jib onto the Stand and secure it with the provided pins.

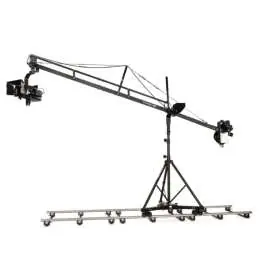
Assembling the Jib Arm
The jib arm is assembled by connecting the various sections. Insert the Center Post onto the stand, then connect the 2nd jib section to the Center Post. Use the provided spanners and Allen keys to remove bolts and washers as needed to align and secure the sections. Ensure all bolts are tightened securely after alignment.
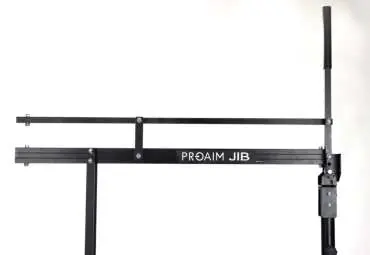
Connecting Jib Sections
Align the middle and end sections, insert the bolts and nuts, and tighten them using the spanner and Allen key. Repeat the process for the middle and front sections. Ensure the Central Pool Adapter is positioned correctly and secured with the bolt.
Pan-Tilt Head Setup
Attach the Jr. Pan-Tilt Head to the head plate on the Front Section. Insert the screws into the threaded holes and tighten them securely. Connect the 4-pin male connector of the cable to the 4-pin female connector on the head to enable panning and tilting.
Joystick Controller Attachment
Unwrap the Velcro strap from the 12V joystick controller and remove the cap. Loosen the knob at the back of the controller, insert it into the weight rod, and tighten the knobs to secure it. Connect the 4-pin Power Cable to the Joystick Controller and attach the 12V adapter cable to the power source.
Joystick Controlled Movement Functions
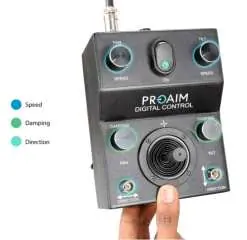
- Speed Controller: Adjusts the speed of pan and tilt based on shot requirements.
- Damping Control: Prevents the head from stopping abruptly, allowing for smooth endings.
- Pan-Tilt Direction: Allows you to reverse the panning and tilting direction as needed.
Camera Mounting
Attach your camera to the head's camera plate using the provided check nut. If the joystick control movement is opposite to your input, undo the motor connectors, rotate them 180 degrees, and re-install.
Warranty and Support
Proaim offers a one-year warranty from the date of purchase covering labor and parts. The warranty does not cover transportation costs, misuse, or accidental damage. For support, contact the manufacturer directly.
Manufacturer information
Proaim
Practical help
Common problems
Joystick control movement is opposite
Undo the connectors of the motors, rotate them 180 degrees, and re-install.
Jib arm instability
Ensure the stand legs are extended to their widest position and the lower knob is fully tightened.
Before use
- Verify all parts are present (Front/Middle/End sections, Central Post, Stand, etc.).
- Ensure the Jib Stand is stable and the lower knob is tightened.
- Check that all bolts and nuts are securely tightened using the provided spanners and Allen keys.
- Confirm the 12V power supply is connected correctly.
Specs in practice
- Speed Controller
- Adjusts the panning and tilting speed.
- Damping Control
- Prevents the head from stopping abruptly for smoother movement.
- Pan-Tilt Direction
- Allows reversing the direction of movement.
Images and diagrams
- The manual provides detailed visual steps for connecting the jib sections, attaching the central pool adapter, and wiring the joystick controller.
Model compatibility
- Designed for use with Proaim Jr. Pan-Tilt Head (not included).

Manual page author
Michael Turner
Technical manual editor
Reviews PDF manuals for structure, safety notes, and practical product details so readers can find the right information quickly.