Furniture / Home Furnishing
Proaim Overhead 12ft Modular Studio Rig Assembly Manual
Quick assembly and setup guide for the Proaim Overhead 12ft Modular Studio Rig. Includes component checklist, rail assembly steps, spacer installation, and camera mounting instructions.
Table of contents
Manual images
Jump to the sectionQuick guide from the manual
This document provides assembly instructions for the Proaim Overhead 12ft Modular Studio Rig (P-OHLR-01). The system is designed for modular studio setups, allowing for a maximum track length of 12ft. Ensure all components are present before beginning assembly.
What is in the box
- 6 x Rails (4ft)
- 3 x Accessory Spacers
- 2 x End Spacers
- 2 x Baby/Junior Stand Posts
- 2 x Extra Track Connectors
- 2 x Shanks
- 3" Riser and Ball Head
- Accessories kit
- Packing bag
Overhead Rig Setup
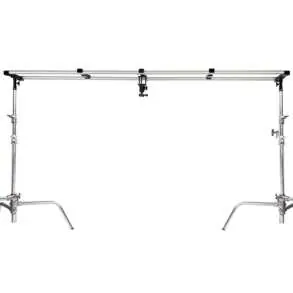
Attaching Rail Section: Connect the track sections as shown in the diagrams and secure them using the provided bolts. The system consists of three 4ft sections per side, allowing for a total length of up to 12ft.
End Spacers: These components feature 1/4" and 3/8" mounting threads. Mount the stand adapters to the bottom of the End Spacers, attach them to your light stands, and secure by tightening the knobs. Press the track into the end caps until you hear a click.
Accessory Spacers: These spacers also include 1/4" and 3/8" threads for mounting various accessories. Position them along the track as needed, ensuring the end caps face downward and the spacer clicks securely onto the rails.
Camera Setup
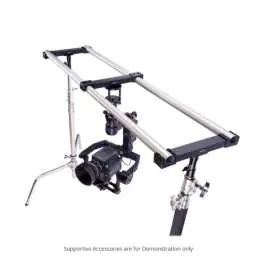
To mount camera gear, screw the 3" Riser into an Accessory Spacer. Attach the included ball head (which features a quick-release camera plate) to the riser and secure it. Mount your camera onto the quick-release plate and adjust the angle as required. You can mount multiple items such as lights, microphones, or monitors on the Accessory Spacers.
Manufacturer information
Proaim
Practical help
Common problems
Track does not feel secure in end caps
Ensure you press the track into the end caps until you hear an audible click.
Accessory Spacer is loose on the rails
Verify that the spacer is clicked onto the track rails and that the end caps are facing downward.
Before use
- Inspect all 6 rail sections for damage
- Verify presence of 3 Accessory Spacers and 2 End Spacers
- Ensure light stands are stable before mounting the rig
- Check that all bolts are tightened securely
- Confirm the ball head quick-release plate is locked
Specs in practice
- Maximum Track Length
- 12ft (achieved by connecting the provided 4ft rail sections)
- Mounting Threads
- 1/4" and 3/8" threads available on both End and Accessory Spacers for versatile equipment attachment
Images and diagrams
- The assembly sequence shows connecting rail sections with bolts first.
- End spacers are mounted to stands before the track is clicked into place.
- Accessory spacers are positioned along the track with caps facing down.
- The 3-inch riser and ball head are attached to the accessory spacer for camera support.
Model compatibility
- Compatible with standard light stands via Baby/Junior Stand Posts.
- Supports various accessories including lights, microphones, and monitors.

Manual page author
Emily Carter
User documentation editor
Prepares concise manual descriptions and highlights the most useful setup, operation, and maintenance information for readers.