Computers / Printer Accessories
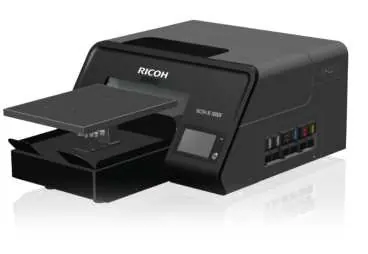
Safety Information and Quick Installation Guide for RICOH Ri 1000X Garment Printer
A comprehensive safety and quick installation guide for the RICOH Ri 1000X garment printer. This manual covers essential setup procedures, including unpacking, waste ink bottle installation, ink cartridge handling, power connection, and...
Table of contents
Manual images
Click an image to enlargeQuick Guide from the Manual
This guide provides essential safety information and installation steps for the RICOH Ri 1000X garment printer. Before operating the machine, ensure you have read the safety precautions and have the necessary environment for installation.
Safety Information
Safety is paramount when operating this industrial printer. Observe the following precautions:
- Handling Supplies: Always wear protective gear (goggles, gloves) when handling ink, cleaning solution, or pretreatment liquid. Keep these materials out of reach of children.
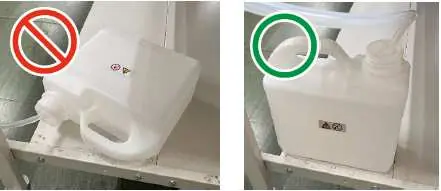
- Waste Ink: Install the waste ink bottle vertically. If installed horizontally, ink may leak.
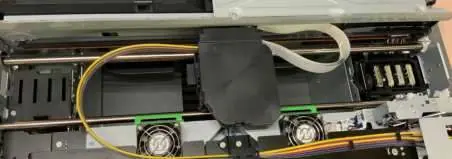
- Maintenance: Do not touch the carriage while it is moving. Always turn off the power and disconnect the plug before performing maintenance or removing covers.
- Environment: Ensure the room is well-ventilated (recommended 150 m³/h). Keep the printer in a dust-free, stable environment with humidity between 45% and 80% RH.
Installing the Machine
Follow these steps to set up your printer:

- Unpacking: The printer weighs approximately 110 kg (242.5 lb). Use four or more people to lift it. Do not lift by the platen or platen base.
- Waste Ink Bottle: Insert the waste ink tube into the bottle, close the cap tightly, and connect the tube to the connector on the right back side of the printer. Secure the bottle in an upright position.
- Ink Cartridges: Agitate white ink cartridges daily. Insert the cartridges into the designated slots. Do not touch the inside of the machine during installation.
- Power Connection: Connect the power cord to the printer, turn on the main power switch, and hold the sub power button for more than 2 seconds to boot.
- Platen Attachment: Align the protrusions on the back of the platen with the holes in the platen base.
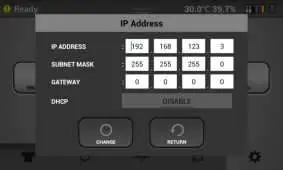
- Network Connection: Connect an Ethernet cable to the Ethernet port and configure network settings via the touch panel.
Handling Ink Cartridges
White ink is prone to precipitation. Agitate white ink cartridges daily or when prompted by the printer. Failure to do so may cause print head nozzle issues. Do not shake cartridges too quickly or too hard.
Installing ColorGATE Productionserver
The printer requires ColorGATE Productionserver software installed on a PC. Ensure your system meets the minimum requirements (Windows 10/11, 4GB+ RAM, 120GB+ disk space). Configure the printer's IP address on the touch panel (Settings > Option > IP Address) to match your network setup (DHCP or static IP).
Manufacturer information
Ricoh Company, Ltd.
Practical help
Common problems
White ink precipitation
Agitate white ink cartridges daily to prevent accumulation at the bottom of the ink solution.
Waste ink leakage
Ensure the waste ink bottle is installed vertically and the tube is not bent or twisted.
Printer does not boot
Ensure the main power switch is on and hold the sub power button for more than 2 seconds.
Initial ink charging paused
If the front cover is lifted during charging, hold the sub power button to reboot the printer.
Before use
- Ensure 4 or more people are available to lift the 110kg printer.
- Verify the room humidity is between 45% and 80% RH.
- Ensure the printer is placed on a stable, level surface.
- Confirm proper room ventilation (150 m³/h recommended).
- Ensure a Windows 10 or 11 PC is available for software installation.
- Check that the power source is 100-120 Vac, 1.1 A or more.
Specs in practice
- Operating Temperature
- 15°C to 32°C (59°F to 90°F).
- Power Source
- 100-120 Vac, 1.1 A or more, 50/60 Hz.
Images and diagrams
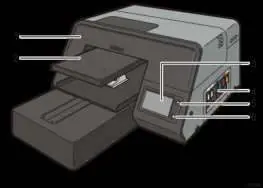
- Front/Right View: Identifies the front cover, platen, touch panel, ink cartridges, USB port, and sub power button.
- Rear View: Identifies the Ethernet port, waste ink bottle connector, main power switch, and power connector.
Model compatibility
- Requires Windows 10 or Windows 11 operating system.
- Requires ColorGATE Productionserver software.
- Use only genuine Ricoh ink cartridges.

Manual page author
David Miller
Documentation analyst
Organizes user manual content into clear summaries, with attention to model details, product context, and everyday usability.