Furniture / Storage Cabinets
Assembly Instructions for Vente-unique EDWINA Sofa
A comprehensive assembly and care guide for the Vente-unique EDWINA sofa. This manual provides step-by-step instructions for assembly, chaise configuration, and maintenance tips to keep your furniture in good condition.
Quick answers from the manual
Quick answer
- The EDWINA sofa requires assembly of the frame, backrest, armrests, and legs. The chaise can be configured on either the left or right side. p. 5, 6, 7
Key actions
- Tighten screws p. 2
First start
- Assemble in a protected area p. 2
Problems and fixes
Missing parts
Contact the store using the assembly instructions for reference.
p. 2Technical specifications
| Parameter | Value | Meaning | Pages |
|---|---|---|---|
| Leg height | 15cm | Height of the sofa legs | p. 4 |
Where to find it in the PDF
- Assembly Instructions p. 2, 3
- Parts List p. 4, 5
- Assembly Diagrams p. 6, 7, 8
- Care and Maintenance p. 9, 10
Table of contents
Manual images
Click an image to enlargeQuick guide from the manual
This document provides assembly instructions for the EDWINA sofa. Before starting, ensure you have a clean, protected space (such as a carpet or blanket) to prevent scratches. Do not force parts during assembly. It is recommended to ventilate the room during and for a few hours after installation. Keep these instructions for future reference, especially if you need to contact the store regarding missing parts.
Parts list
Before beginning assembly, identify and count all components:
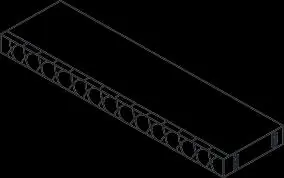
- Seat frame (59*60*17cm)
- Arm rest (86*25*60cm)
- Backrest (59*25*60cm)
- Seat cushion (56*60*15cm)
- Cushion for chaise (130*77*16cm)
- Seat base for chaise (79*69*17cm)
- Legs (H:15cm)
- Pillow (45*45cm)
- Hardware: Bolts (M8*L3.5cm), Mid-leg, Allen key
Assembly steps
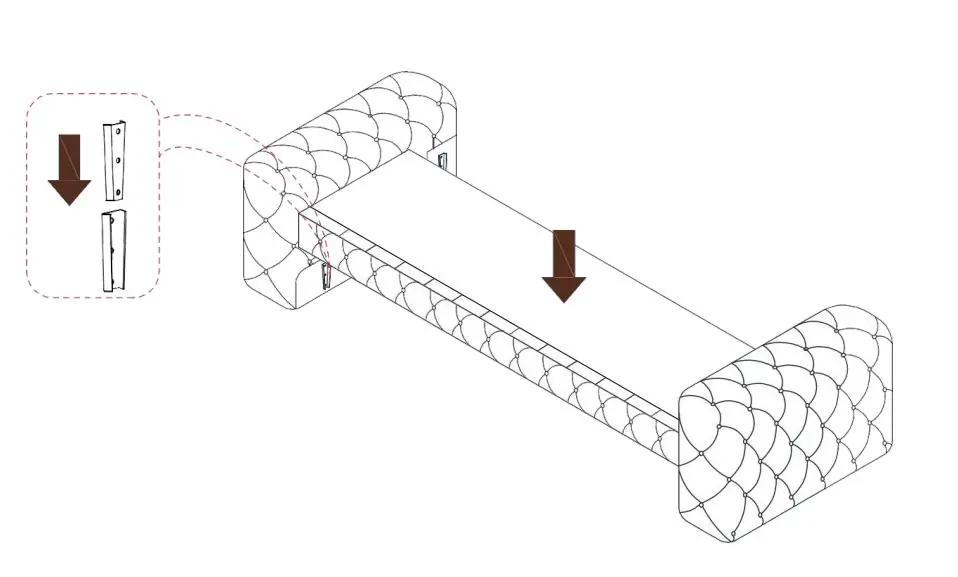

- Frame Assembly: Connect the seat frame to the armrests.
- Backrest Attachment: Secure the backrest to the frame structure.
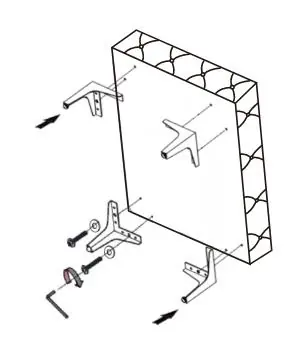
- Leg Installation: Attach the legs to the base using the provided bolts and Allen key. Ensure all legs are securely fastened.
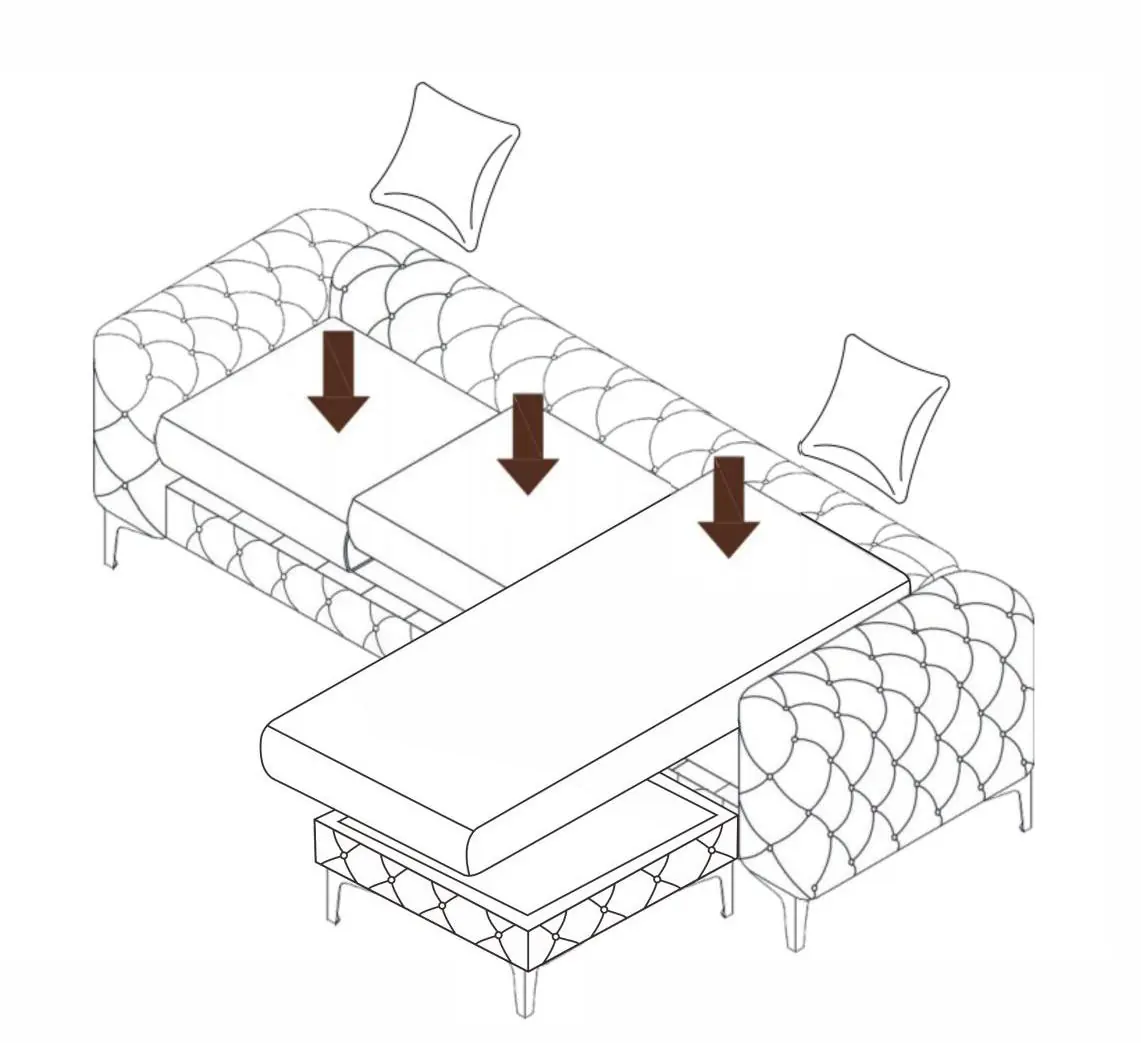
- Chaise Configuration: The chaise can be placed on either the left or right side depending on your needs. Position the cushions accordingly.
Care and maintenance
To maintain the quality of your sofa:
- Regularly remove dust using a dry cloth.
- Clean surfaces with dishwashing liquid and wipe with a damp cloth.
- Do not use the product if any parts appear damaged, broken, or missing.
- Avoid placing the sofa near open fires or strong heat sources, such as electric heaters.
- If a spill occurs, remove it immediately by dabbing with a clean, dry cloth. Do not rub, as this may damage the fabric.
- Tighten screws periodically after the sofa has been in use for some time.
Practical help
Common problems
Missing parts
Keep the assembly instructions to easily identify and communicate with the store regarding missing parts.
Stains or spills
Remove immediately with a clean, dry dabbing motion. Do not rub, as this may damage the fabric.
Before use
- Identify all parts and count hardware.
- Prepare a clean assembly space (use a blanket or carpet to prevent scratches).
- Have necessary tools ready.
- Ensure the room is ventilated during and after installation.
Specs in practice
- Bolt M8*L3.5cm
- Main assembly hardware for legs and frame.
Images and diagrams
- Assembly steps show the connection of the seat frame, armrests, and backrest.
- Leg attachment requires the provided Allen key.
- Chaise can be configured on the left or right side.
Model compatibility
- The chaise is reversible and can be placed on the left or right side.

Manual page author
David Miller
Documentation analyst
Organizes user manual content into clear summaries, with attention to model details, product context, and everyday usability.