Automotive / Motorcycle Accessories
User Manual for Vevor Solar Panel Extension Cable
Quick guide for Vevor Solar Panel Extension Cable. Includes installation steps, wiring methods, connector assembly, disassembly instructions, and safety precautions.
Table of contents
Manual images
Click an image to enlargeQuick guide from the manual
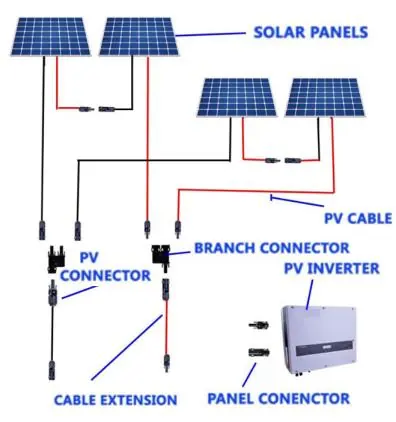
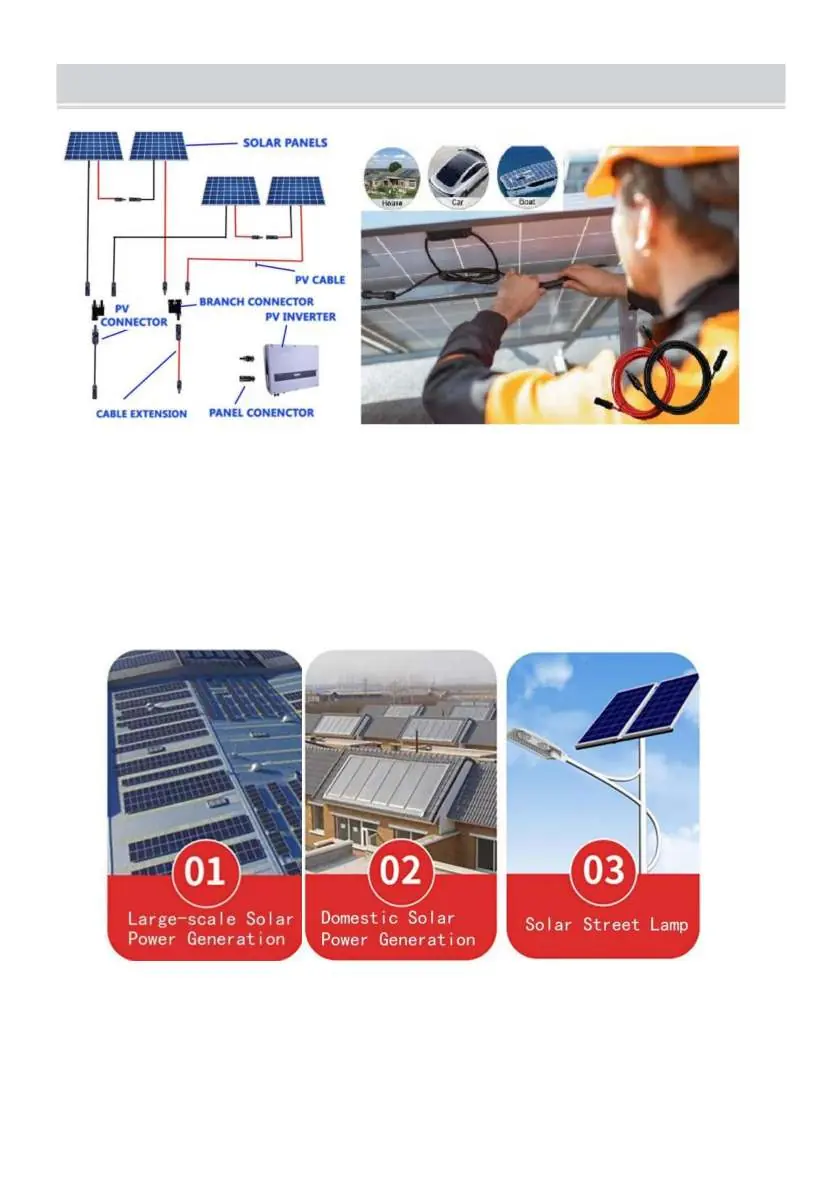
This manual provides instructions for the Vevor Solar Panel Extension Cable. The primary purpose of this cable is to extend the connection distance between solar panels, inverters, and other solar components. Key installation requirements include checking for wire damage before use, ensuring secure wiring connections, and avoiding excessive bending or twisting of the cables.
Product Use
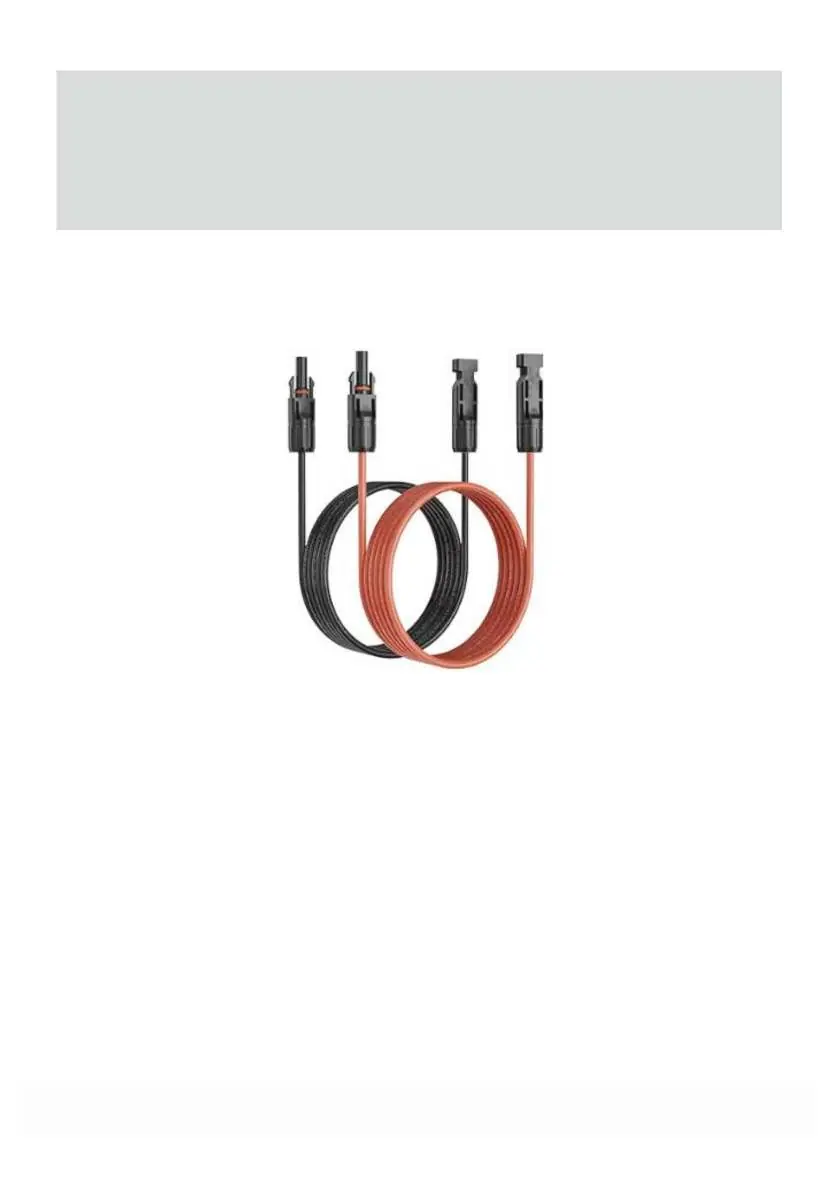
The solar panel extension wire is a component in solar photovoltaic systems. It is used to extend the cable connection distance between solar panels, inverters, solar cells, and other components to adapt to specific installation needs and site conditions.
Product Features
- High durability: MC4 connectors are made of high-quality materials resistant to high temperatures, cold, and UV rays.
- Waterproof design: Equipped with sealing rings with an IP67 waterproof rating.
- Quick installation: Plug-and-play connection method with self-locking devices.
- Standardized interface: Ensures compatibility with various brands of solar panels and inverters.
- High insulation performance: Prevents leakage and short circuits.
- High tensile strength: Withstands installation and usage forces.
- Low Resistance: Reduces electric energy loss during transmission.
Installation Procedure
Preparation: Open the accessories and separate the male and female connectors. The installation method is the same for both.
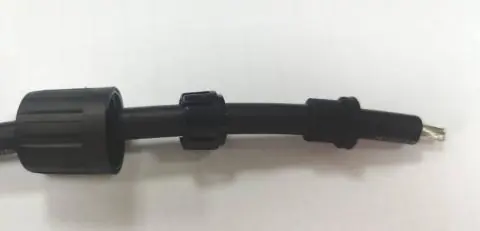
- Wire Preparation: Insert the wire, tighten the cap, lock the teeth, and peel the wire after the waterproof pad. The required peeling length is 10mm.
- Crimping: Use one of the following methods:
- Method 1: Install the wire into the terminal slot, place it in the appropriate position of the wrench, and squeeze to complete the riveting.
- Method 2: Position the wires and pins together on the terminal machine die, adjust the height, and apply pressure to secure the wire.
- Assembly: Squeeze the riveted terminal into the connector sleeve and install it until you hear a click sound.
- Finalizing: Place the waterproof pad in sequence, lock the teeth, and tighten the nut with tools to complete the installation.
How to Disassemble the Connector

- Use a tool to release the connector buckle.
- Pull the connector to both sides by hand to separate it.
Storage Conditions
- Store in a dry, ventilated, and cool place.
- Avoid direct sunlight and rain.
- Storage temperature should be between -20°C and +40°C.
- Avoid contact with corrosive substances.
Safety and Precautions
- Before installation, check for any damages or breaks in the photovoltaic wires. Replace if necessary.
- Connections must be made according to the correct wiring method.
- Avoid excessive bending or twisting of the wires.
- Conduct regular inspections of connections and insulation during use.
- Do not hang heavy objects on the wires.
Manufacturer information
VEVOR
Practical help
Common problems
Loose connection
Ensure the connector is fully engaged until a 'click' sound is heard and the nut is tightened.
Wire damage
Inspect wires before installation; if breaks or damage are found, replace the cable immediately.
Water ingress
Ensure the waterproof pad is placed in the correct sequence and the nut is fully tightened.
Before use
- Inspect photovoltaic wires for damage or breaks.
- Verify that the wiring method is correct.
- Ensure all connectors are clean and free of debris.
- Check that the storage environment is dry and cool.
Specs in practice
- -20°C to +40°C
- The recommended ambient temperature range for storing the cables.
Images and diagrams
- Wiring diagram showing connections between solar panels, branch connectors, and inverters.
- Connector assembly steps showing the male and female connector parts.
- Crimping methods using a wrench or terminal machine.
- Disassembly steps using a tool to release the buckle.
Model compatibility
- Compatible with various brands of solar panels and inverters using standard MC4 interfaces.

Manual page author
Michael Turner
Technical manual editor
Reviews PDF manuals for structure, safety notes, and practical product details so readers can find the right information quickly.