Tools / Tool Storage
User Manual for Vevor Steel Wire Shelf 040OGMXUV0
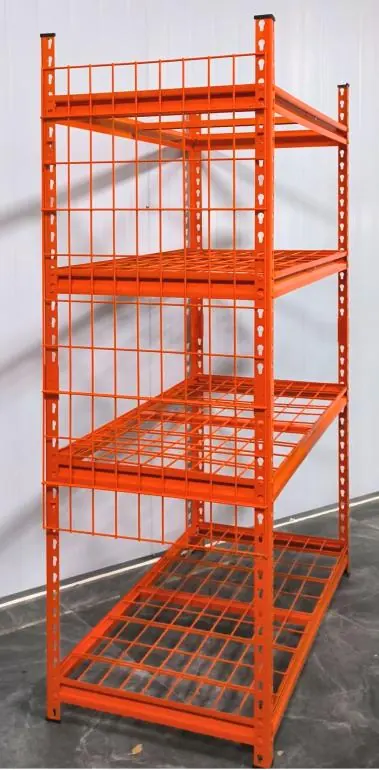
Quick guide for assembling and using the Vevor Steel Wire Shelf. Includes safety precautions, load limits, assembly steps, and maintenance tips.
Table of contents
Manual images
Click an image to enlargeQuick guide from the manual
This manual provides instructions for the Vevor Steel Wire Shelf. Key safety requirements include assembling on a flat, level surface, wearing protective gloves during assembly, and not exceeding the maximum load capacity of 180 kg per shelf. If the unit is filled to capacity, it must be anchored to the wall to prevent tipping.
Safety Instructions
- Read carefully: Always read the manual before assembly and use.
- Protective gear: Wear safety goggles and work gloves during assembly.
- Handling: Handle metal edges with care to avoid injury.
- Stability: Do not stand on the product or use it as a ladder.
- Modifications: Do not alter the product in any way not intended by the manufacturer.
- Load distribution: Store the heaviest items on the lower shelves.
- Wall mounting: Attach the unit to the wall if filling to capacity (fittings not included).
Assembly
Ensure all parts are unpacked and separated in a clear work area before beginning.
Step 1: Post Cap Assembly
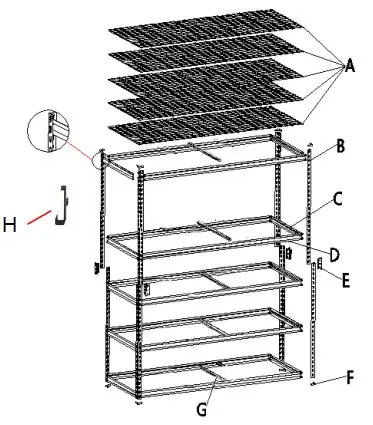
Slide each post (B) into a post cap (F). Repeat for all four upright posts. Note that post caps are for the feet only.
Step 2: Short and Long Beam Assembly
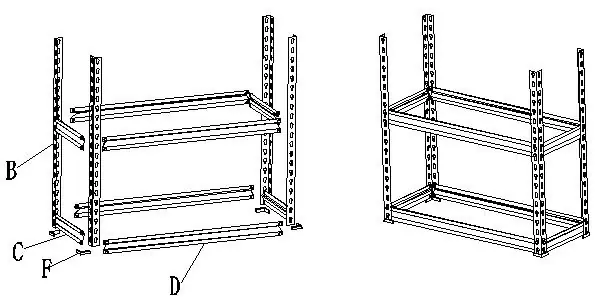
Align short beams (C) and long beams (D) with the notches between the four upright posts (B). Tap firmly into position using a rubber mallet. Ensure both ends are set at the same height.
Step 3: Fixings Assembly
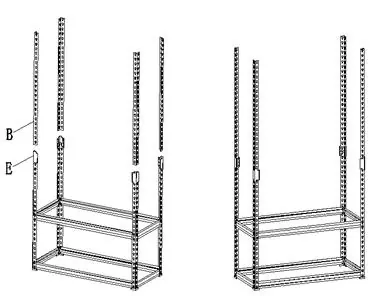
Fix the fixings (E) at the top of the upright posts (B) and tap down to the end.
Step 4: Install the Upright Post
Secure the bottom of the upright post (B) to each fixing (E) and tap down to the end.
Step 5: Install Remaining Beams
Install the third, fourth, and fifth top shelf long beams (D) and short beams (C) using the same method as Step 2.
Step 6: Install the Reinforcer
Install part G on each part D.
Step 7: Steel Mesh Top Shelf Assembly
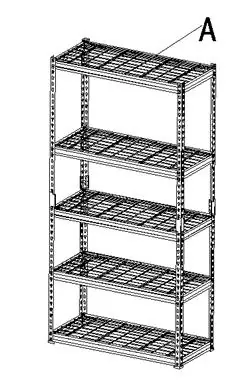
Insert the steel mesh top shelf (A) onto the top shelf supports. Ensure it sits flush with the top of the unit frame.
Step 8: Install the Top Glue Foot
Slide each post (B) into the post cap (F). The assembly is now complete. Use the anti-tip accessories (Part J) to secure the shelf to the wall.
Additional Functionality
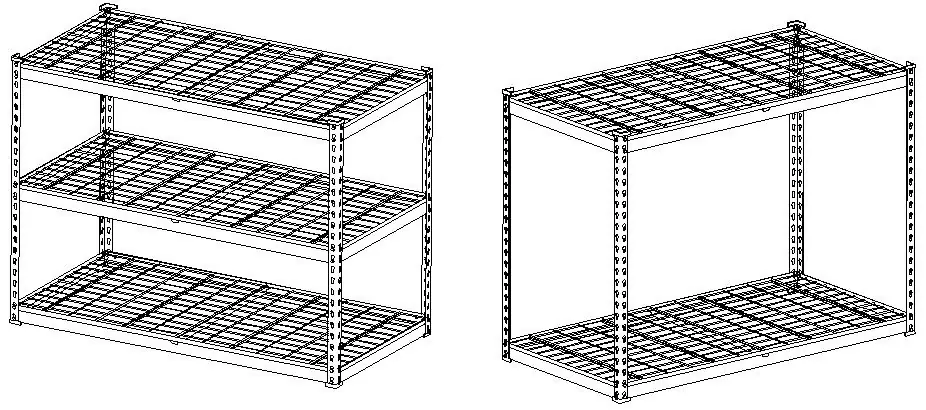
The product can be separated into two smaller shelves. When split, the two shelves can be connected using part K. Additionally, the steel mesh shelf can be converted into side panels for tool storage using two hooks (Part H). Each side panel should be supported by two hooks; do not use all four hooks for a single panel due to alignment issues.
Technical Data
Heavy objects should be evenly distributed on the shelf to avoid deformation due to concentrated load. The maximum weight of a single heavy object should not exceed 30 kg.
Manufacturer information
VEVOR
Practical help
Common problems
Shelf instability
Ensure it is assembled on a flat, level, and hard surface. If filled to capacity, attach the unit to the wall using the provided anti-tip accessories.
Deformation under load
Distribute heavy objects evenly across the shelf. Do not exceed the maximum weight of 30 kg for a single heavy object.
Difficulty in assembly
Use a rubber mallet to tap parts firmly into place. Ensure all beams are set at the same height.
Before use
- Wear safety goggles and work gloves during assembly.
- Ensure the assembly area is clear.
- Check all parts against the part list.
- Verify the surface is flat, level, and hard.
- Tighten all connections securely.
Specs in practice
- Max Load per Shelf
- 180 kg (evenly distributed).
- Single Object Limit
- Maximum 30 kg for any single item to prevent concentrated load deformation.
- Dynamic Load
- Sudden load changes can cause excessive stress; avoid dropping items onto shelves.
Images and diagrams
- The assembly process involves sliding posts into caps, aligning beams with notches, and securing them with a mallet.
- Fixings (E) are used to secure the upright posts.
- The unit can be split into two separate shelves.
Model compatibility
- Anti-tip accessories are included and recommended for full-capacity use.
- The unit can be converted to use side panels for tool storage.

Manual page author
Emily Carter
User documentation editor
Prepares concise manual descriptions and highlights the most useful setup, operation, and maintenance information for readers.