Furniture / Storage Cabinets
Installation Guide for XXXLutz POLO Wardrobe
Comprehensive assembly and installation guide for the XXXLutz POLO wardrobe. This manual provides step-by-step instructions for frame construction, drawer assembly, and sliding door mounting, including a complete parts list and hardware...
Table of contents
Manual images
Click an image to enlargeQuick guide from the manual
The POLO wardrobe assembly requires approximately 100 minutes. Before starting, ensure you have a clear, flat workspace and all necessary tools. Identify all parts (A-W1) and hardware (1-29) listed in the manual before beginning the assembly process.
Tools required
- Drill (8mm bit)
- Screwdriver (Phillips and flathead)
- Pencil
- Spirit level
- Hammer
Frame assembly
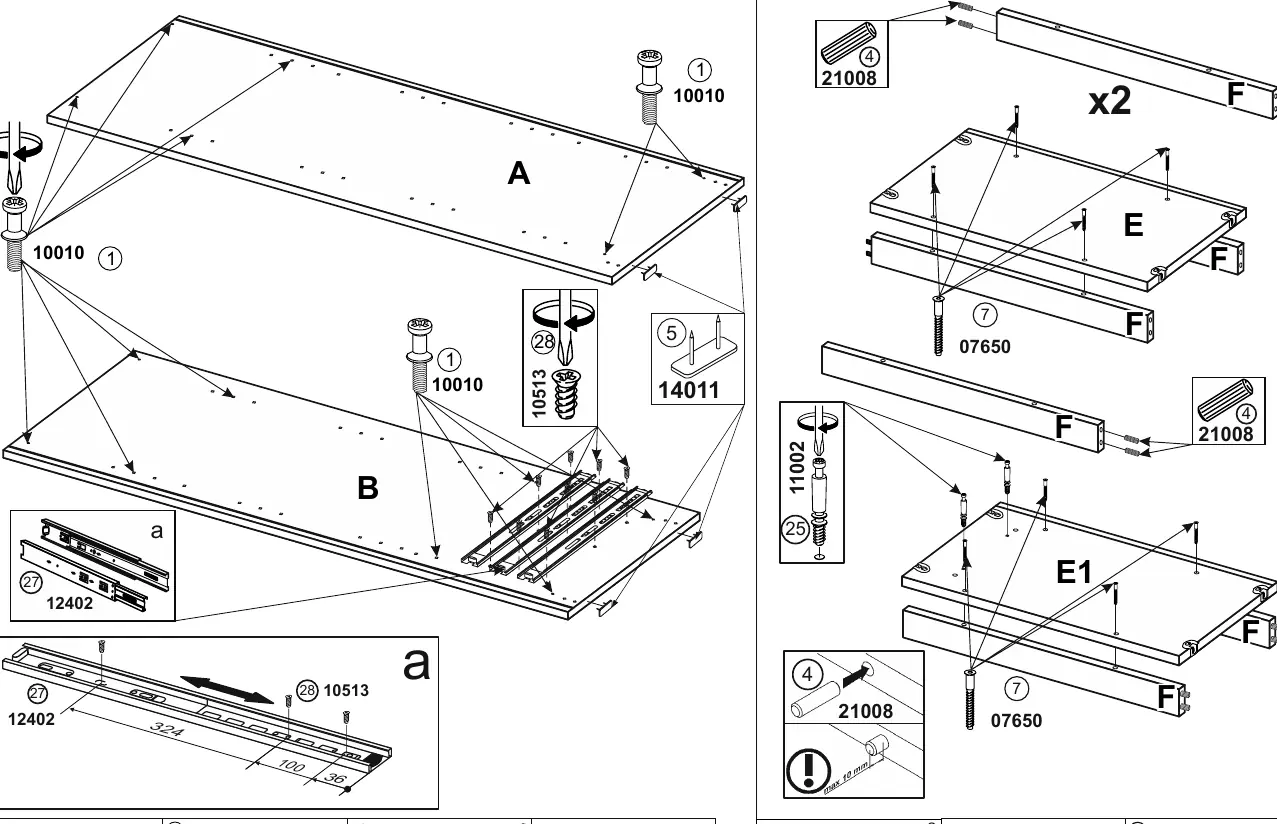
Begin by preparing the side panels (A, B, C) by inserting cam bolts and dowels. Connect the base and top panels to the side panels. Ensure the back panels (J1, J2) are fully inserted into the grooves before tightening the cam locks to secure the frame. Use the provided hardware (10010, 21850) to connect the panels.
Drawer assembly
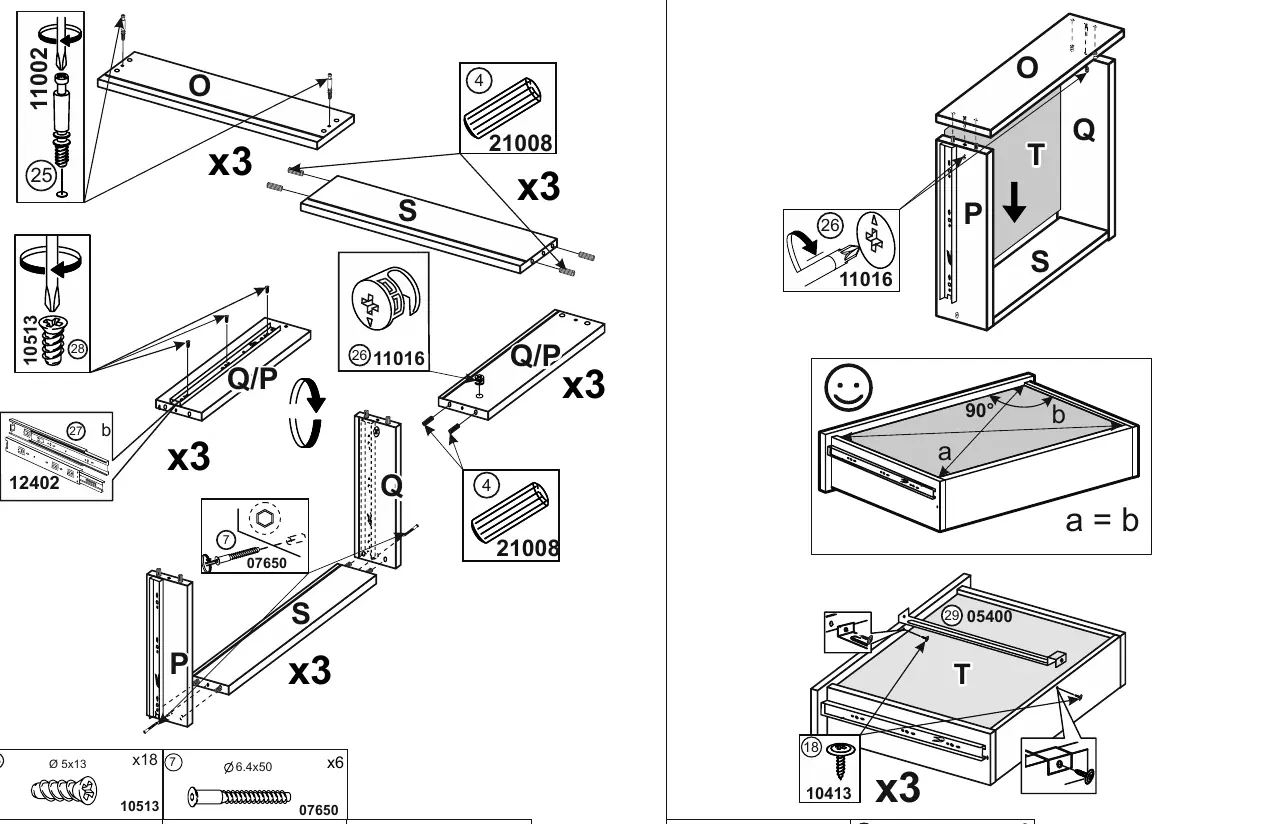
Assemble the drawer box by connecting the sides (P, Q), back (S), and front (O). Attach the drawer runners (12402) to the sides. Secure the drawer bottom (T) using the provided screws. Ensure the drawer is square by checking the diagonal measurements (a=b).
Sliding door installation
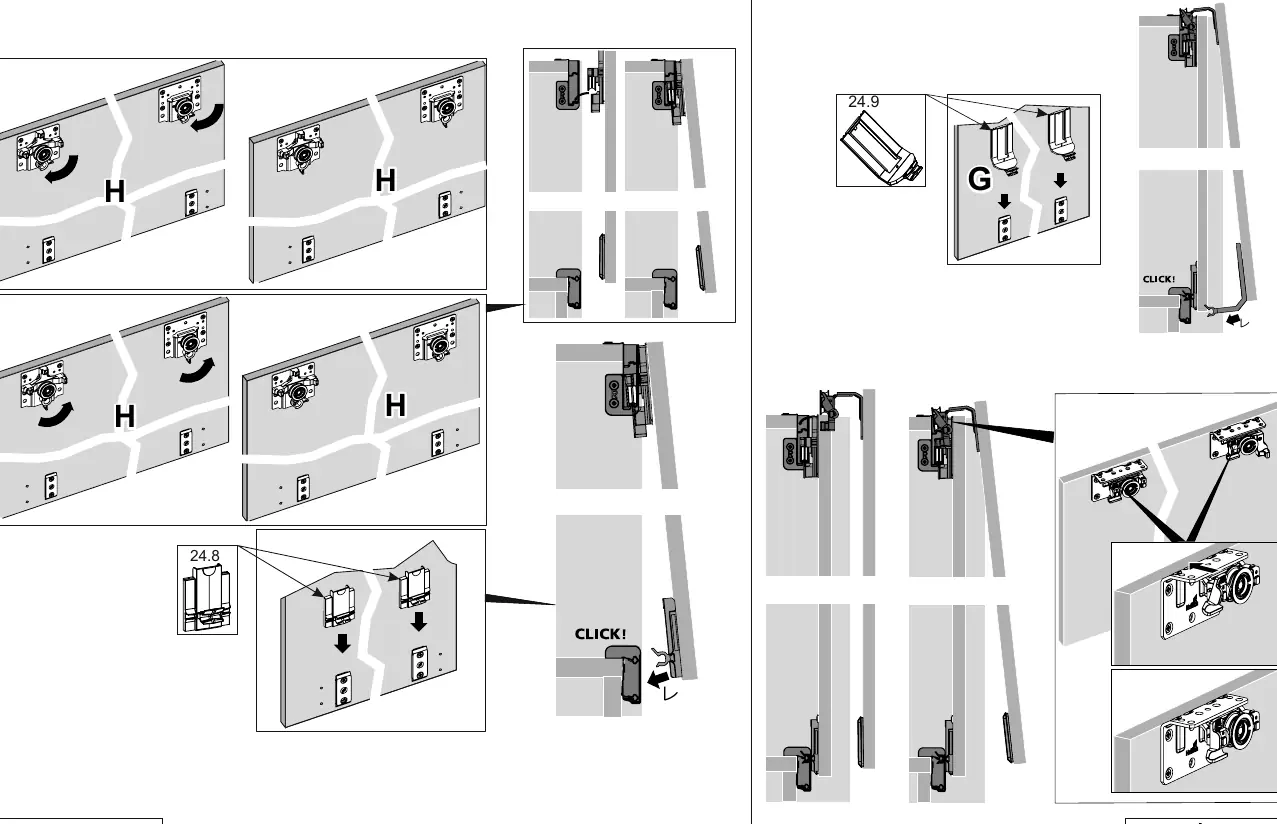
Attach the door rollers and guides (24.1, 24.2, 24.3, 24.4) to the door panels (G, H). Hang the doors onto the top rail and secure the bottom guides. Adjust the rollers to ensure the doors slide smoothly and are level.
Manufacturer information
XXXLutz
Practical help
Common problems
Doors do not slide smoothly
Check if the top rollers are properly seated in the rail and the bottom guides are correctly engaged.
Frame is unstable
Ensure all cam locks are fully tightened and the back panel is fully inserted into the grooves.
Drawer does not fit
Verify that the drawer runners are attached to the correct pre-drilled holes and that the drawer is square.
Before use
- Clear a large workspace
- Identify all parts (A-W1) and hardware (1-29)
- Prepare tools: 8mm drill, screwdriver, hammer, level
- Check that all cam locks are tightened
- Verify floor is level before final positioning
Specs in practice
- Assembly time
- Approximately 100 minutes
Images and diagrams
- The manual uses a letter-based system for panels (A, B, C...) and a number-based system for hardware (1, 2, 3...).
- Arrows indicate the direction of assembly or movement.
- Circles with arrows indicate rotation or tightening of cam locks.
Model compatibility
- Ensure the wall is suitable for the wardrobe weight if anchoring is required.
- Do not use power tools at high torque to avoid damaging the particle board.

Manual page author
Michael Turner
Technical manual editor
Reviews PDF manuals for structure, safety notes, and practical product details so readers can find the right information quickly.