Lighting / Fixtures
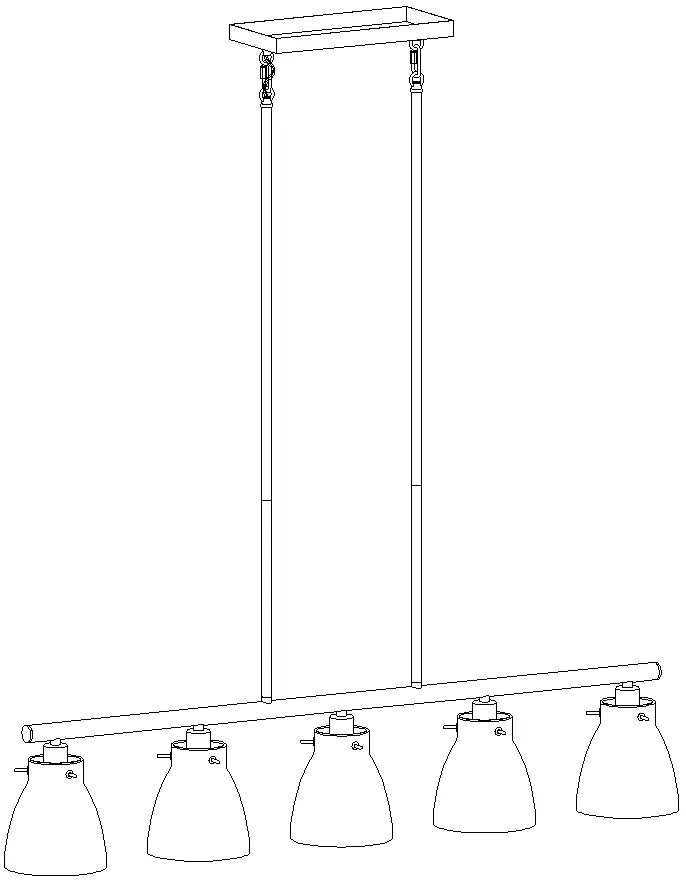
User Manual for Zevni A04686 5-Light Chandelier
Quick installation and user guide for the Zevni A04686 5-Light Chandelier. Includes wiring diagrams, assembly steps, safety warnings, and maintenance instructions.
Table of contents
Manual images
Click an image to enlargeImportant Safety Information
Before beginning installation, ensure the main power is turned off at the circuit breaker or fuse box. The manufacturer strongly recommends installation by a licensed electrician. Ensure the mounting surface is clean, dry, flat, and capable of supporting the weight of the lamp. The fixture is designed for 120V systems with a maximum wattage of 40W per bulb.
Tools Required
Before starting assembly, ensure you have the following tools available:
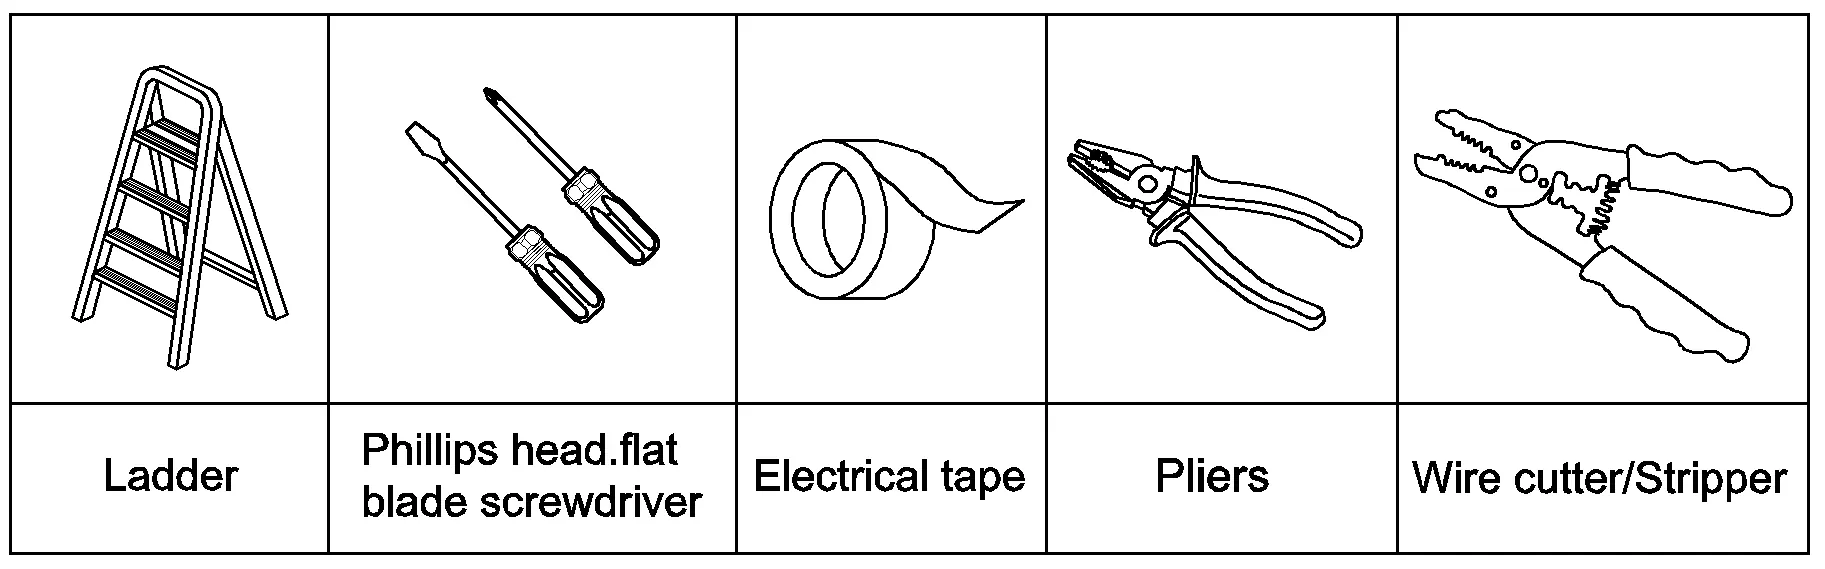
- Ladder
- Phillips head and flat blade screwdrivers
- Electrical tape
- Pliers
- Wire cutter/stripper
Parts Included
Check that all parts are present before beginning:
- Round mounting plate (C)
- Green ground screw (D)
- Canopy (E)
- Loops (F)
- Knob nuts (G)
- Quick links (H)
- Stems (I)
- Arm (J)
- Sockets (K)
- Screws (L)
- Glass shades (M)
- Plastic wire connectors (A)
- Mounting screws (B)
Assembly and Installation
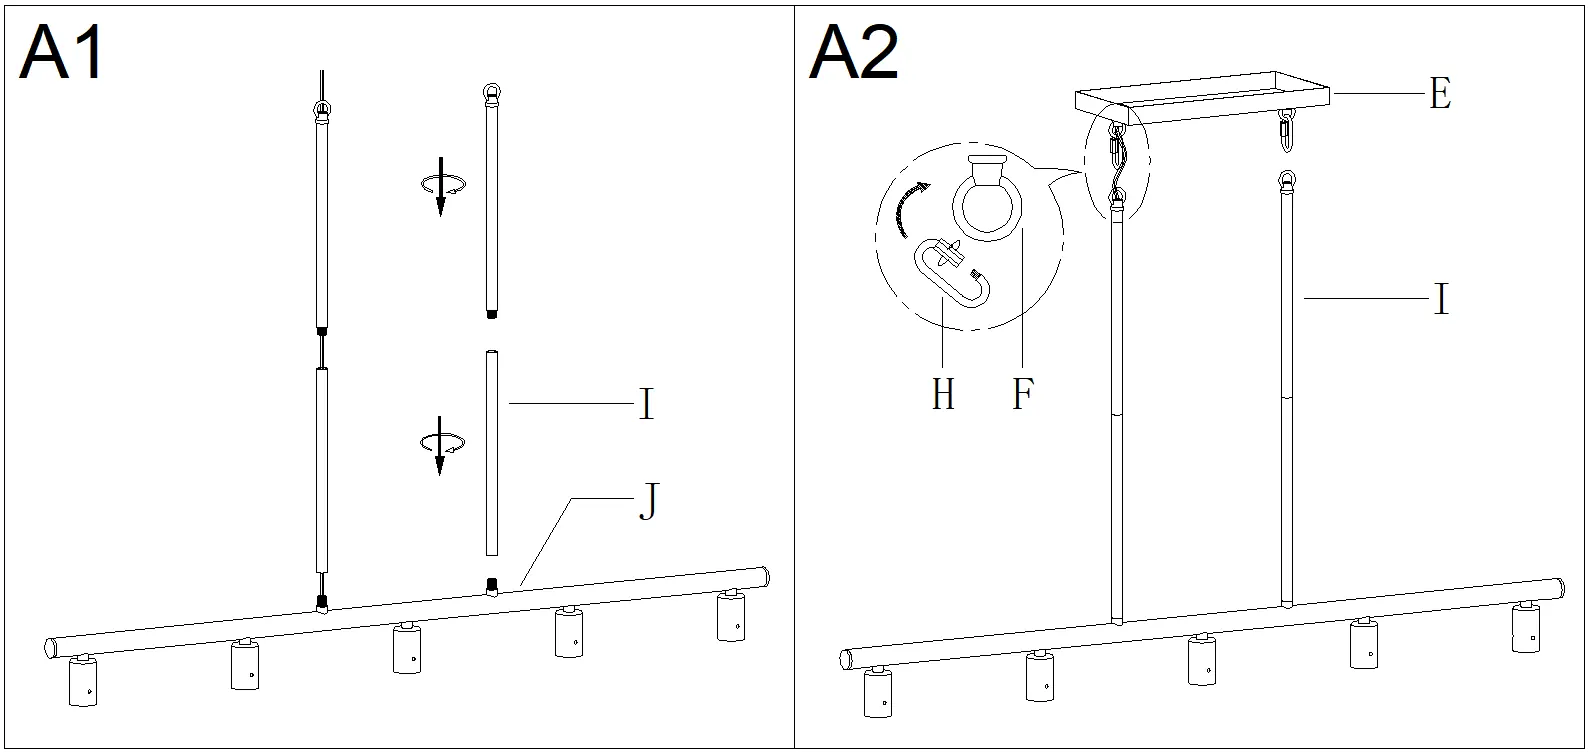
Pre-installation: Choose the desired fixture height and use the appropriate number of stems (I). Pass the fixture wires through one side of the stems and screw them onto the top of the arm (J). Attach quick links (H) to the loops (F) on the canopy (E) and the top of the stems (I), carefully passing the wires through.
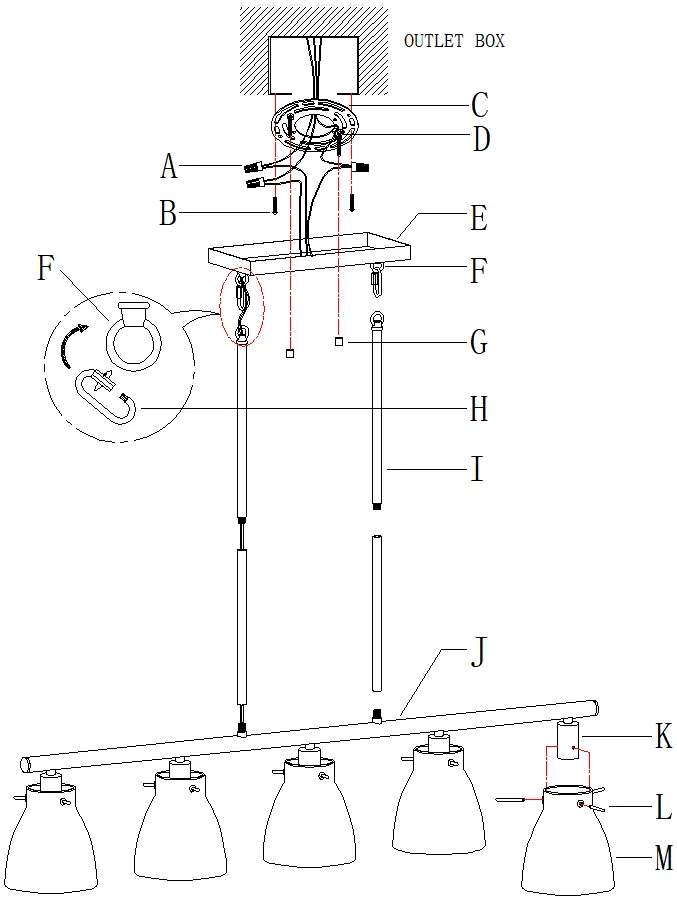
Mounting: Unscrew the knob nuts (G) from the mounting plate (C). Attach the mounting plate to the outlet box using the mounting screws (B). If necessary, shorten the fixture wires, ensuring at least 6 inches of wire remains above the mounting plate.
Wiring Instructions
Connect the fixture wires to the supply wires according to the following chart:
- Black or Red Supply Wire: Connect to Black fixture wire, parallel cord (round & smooth), clear/brown/gold/black wire without tracer, or insulated wire (other than green) with copper conductor.
- White Supply Wire: Connect to White fixture wire, parallel cord (square & ridged), clear/brown/gold/black wire with tracer, or insulated wire (other than green) with silver conductor.
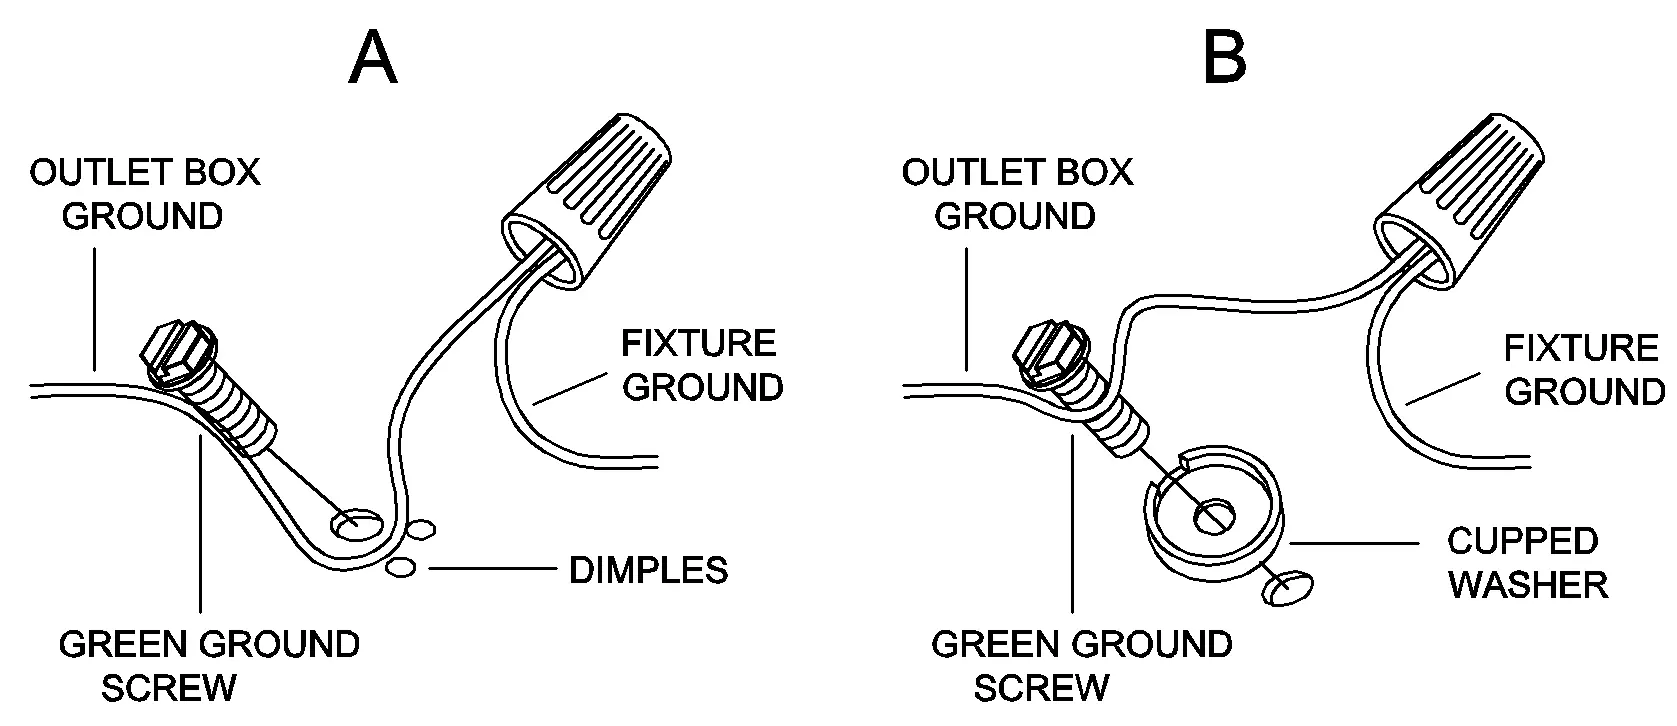
Grounding: Connect the fixture ground wire to the outlet box ground wire using the green ground screw. Never connect other wires to the ground wire. Twist wires together with plastic wire connectors, wrap with electrical tape, and tuck them into the outlet box.
Final Assembly: Raise the canopy (E) to the ceiling and secure it with the knob nuts (G). If the canopy is not snug, adjust the threaded length of the mounting screws on the mounting plate. Finally, place the glass shades (M) on the sockets (K) and secure them with screws (L), then install the bulbs.
Maintenance and Cleaning
To clean the fixture, wipe it with a soft cloth. Clean the glass shades with a mild, non-abrasive soap. Do not use abrasive materials, scouring pads, or powders, as these may damage the surface.
Manufacturer information
ZEVNI
Practical help
Common problems
Canopy is not snug against the ceiling
Remove the canopy, unscrew the pre-assembled hex nuts on the mounting plate, adjust the threaded length of the mounting screws, and re-tighten the hex nuts before re-installing the canopy.
Fixture wires are too long
Shorten the fixture wires, ensuring that at least 6 inches of wire length remains above the mounting plate for connection.
Before use
- Turn off main power at the circuit breaker or fuse box
- Verify the ceiling can support the weight of the lamp
- Ensure the mounting surface is clean, dry, and flat
- Prepare necessary tools: ladder, screwdrivers, electrical tape, pliers, wire cutter/stripper
- Check that all parts listed in the manual are included
Images and diagrams
- The wiring chart provides specific instructions for matching supply wires (Black/Red/White) to fixture wire types (parallel, insulated, etc.).
- The assembly diagram illustrates the sequence of connecting stems to the arm and the canopy using quick links.

Manual page author
Emily Carter
User documentation editor
Prepares concise manual descriptions and highlights the most useful setup, operation, and maintenance information for readers.