Electronics / Networking
Setup Guide for AirLive XGSPON OLT and ONU in Bridge Configuration
A comprehensive setup guide for configuring AirLive XGSPON OLT-2XGS and compatible ONUs (ONU-10XG(S)-AX304P-2.5G, ONU-10XG(S)-1004-10G) in Bridge Mode. Includes step-by-step instructions for VLAN configuration, ONU discovery, and network...
Table of contents
Manual images
Click an image to enlargeQuick guide from the manual
This guide covers the bridge mode configuration for AirLive XGSPON OLT-2XGS and compatible ONUs. There are two setup methods: Setup 1 applies to all supported ONU models, while Setup 2 is required specifically for the ONU-10XG(S)-1004-10G model to change its device type from HGU to SFU before proceeding with the standard configuration.
Setup Overview
The system requires a connection between the Router, OLT, and ONU. Ensure you do not use the following restricted VLAN IDs: 0, 1, 2, 9, 8, 10, 4000, 4005, 4012-4017, 4095.
Setup 1: Bridge Configuration
Follow these steps to configure the OLT and ONU for bridge mode:
- Login: Access the OLT management web interface via the AUX port using the default IP 192.168.8.200.
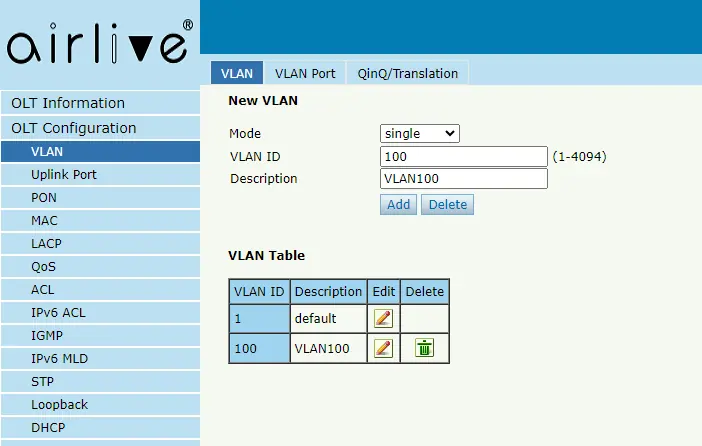
- VLAN Creation: Create a VLAN (e.g., VLAN 100) in the OLT configuration.
- Uplink Binding: Bind the Uplink GE port to the created VLAN and ensure the Uplink is set to Untag mode. Configure the PVID for the uplink to match the VLAN ID (e.g., 100).
- ONU Discovery: Connect the ONU via the PON port and Splitter. Use the OLT's ONU Autofind feature to detect and add the ONU.
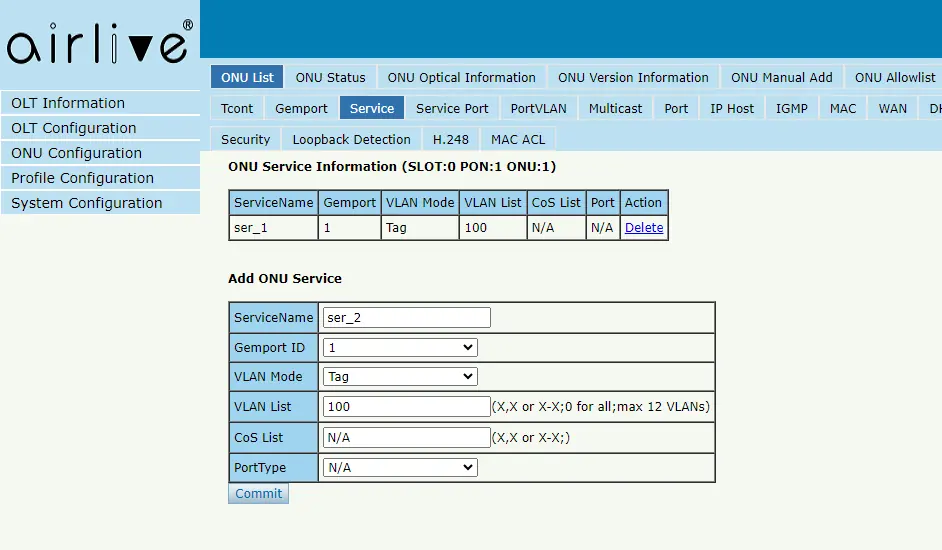
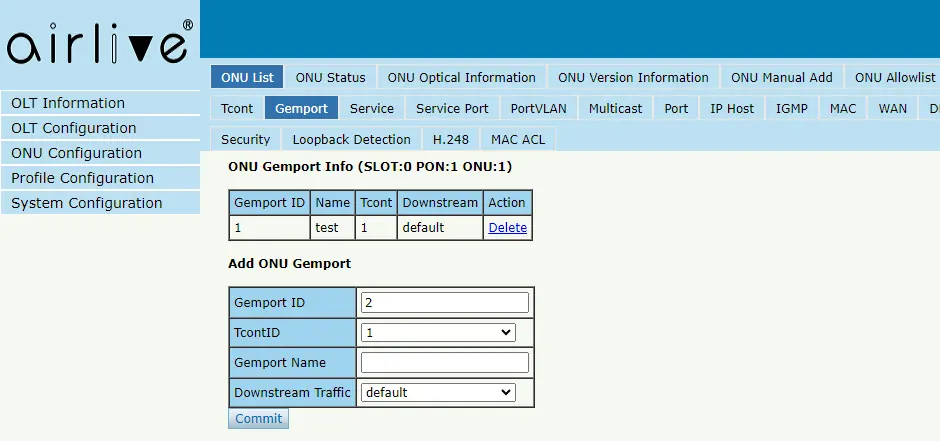
- ONU Configuration: In the ONU list, select the online ONU and configure the following parameters: tcont, gemport, Service, and Service Port.
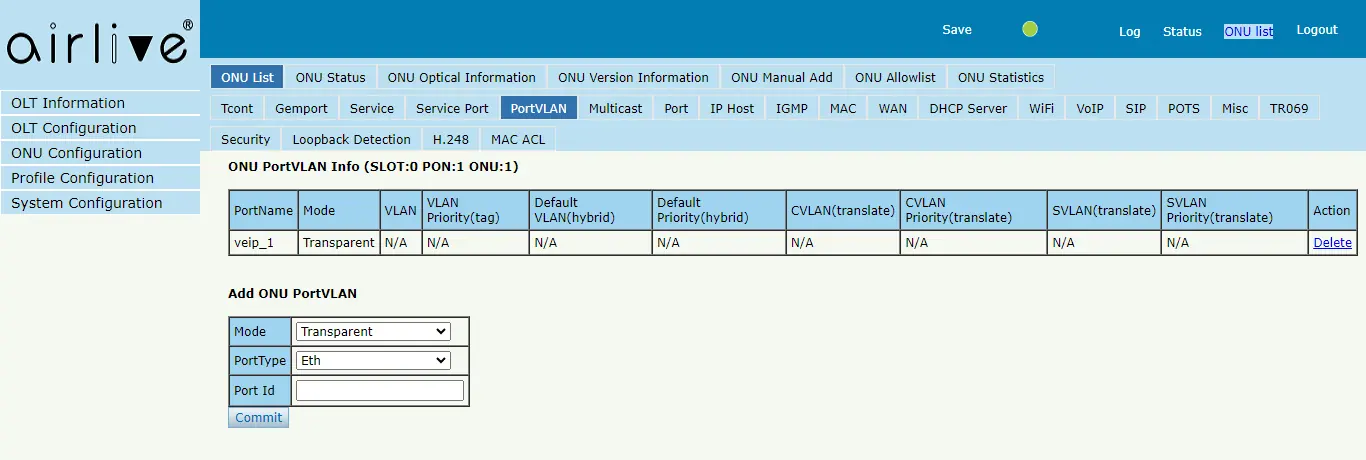
- Port VLAN: Configure the Port VLAN mode to transparent, Port Type to veip, and Port Id to 1.
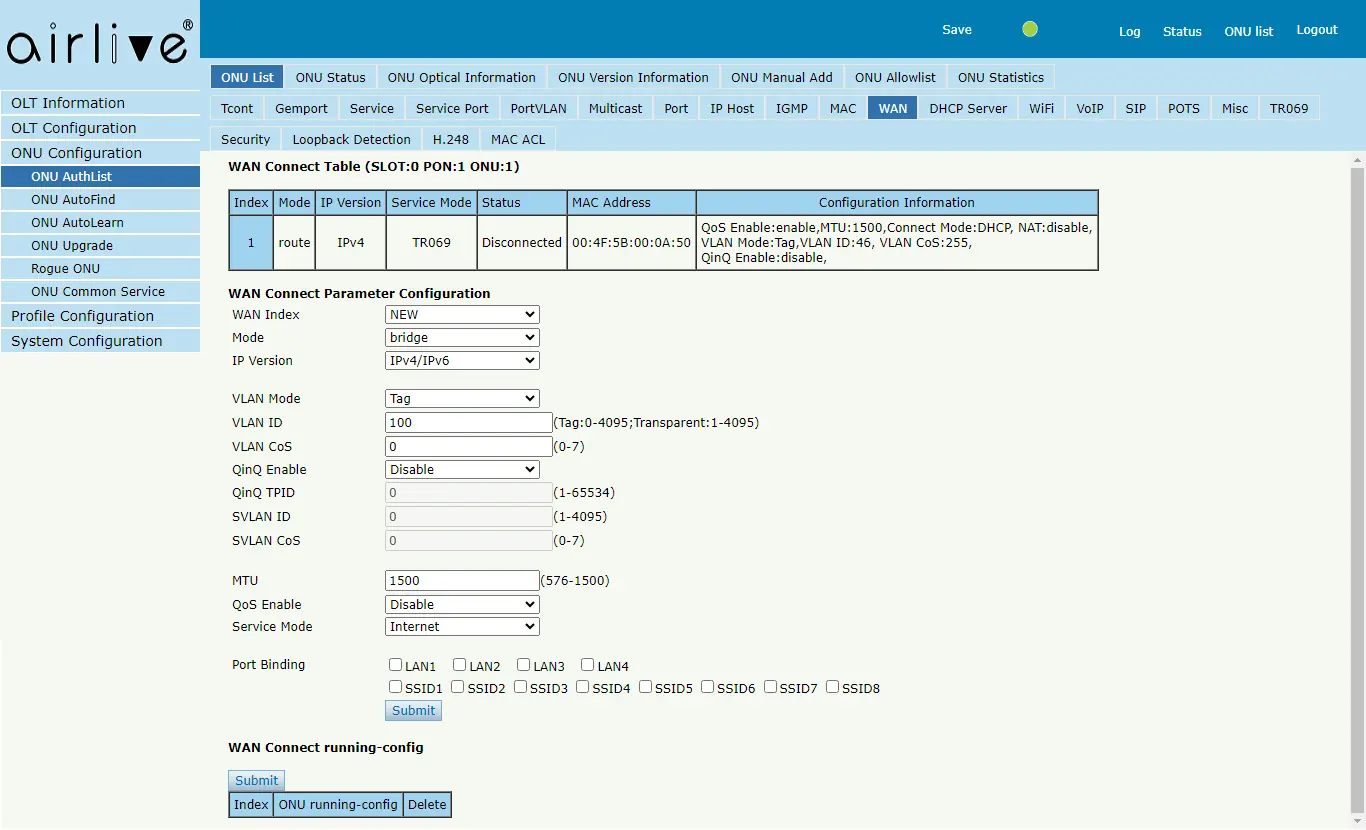
- WAN Setup: Navigate to the WAN page. Select Bridge mode, set VLAN mode to Tag, enter the VLAN ID (e.g., 100), and set Service mode to Internet. Click Submit twice to apply the configuration.
- DHCP Settings: Disable the DHCP server on the ONU to allow the router to assign IP addresses to connected computers.
- Save: Press SAVE in the top bar of the OLT to finalize the configuration.
Setup 2: HGU to SFU Conversion
This method is exclusively for the ONU-10XG(S)-1004-10G model:
- Before starting the OLT setup, log in to the ONU (default IP 192.168.1.1).
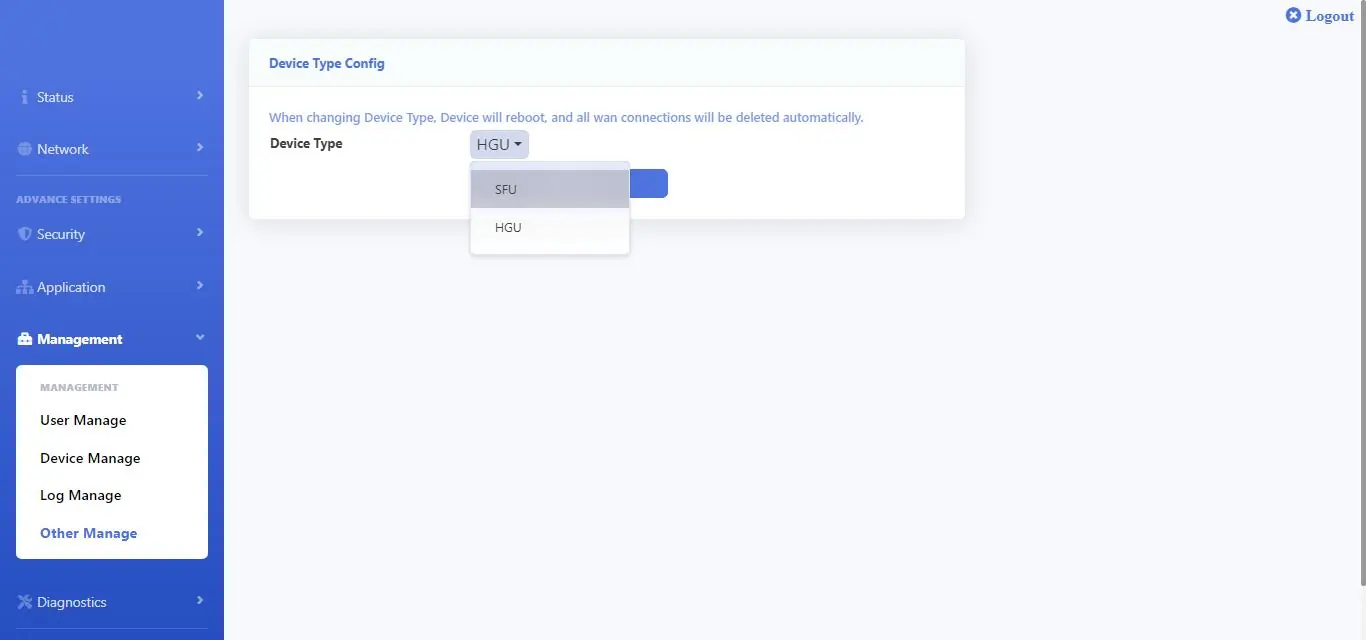
- Navigate to Management > Other Manage.
- Change the Device Type from HGU to SFU and click Submit. The ONU will reboot.
- Once rebooted, proceed with Setup 1 steps 1 through 6.
- For the PortVLAN settings, configure each of the 4 LAN ports individually by setting the Port Id to 1, 2, 3, and 4 respectively, and committing each change.
Important Configuration Notes
Always ensure the DHCP server on the ONU is disabled when using bridge mode; otherwise, connected computers will receive an IP from the ONU instead of the router, preventing internet access. If the configuration does not apply, ensure you click the Submit button twice as indicated in the interface. If the computer does not receive an IP address after setup, try unplugging and replugging the RJ-45 cable.
Manufacturer information
AirLive Technology
Practical help
Common problems
Internet connection not working
Ensure the DHCP server on the ONU is set to 'Disable'. If enabled, the computer receives an IP from the ONU instead of the router.
ONU not detected in OLT
Verify the physical connection via the PON port and Splitter. Ensure the ONU is powered on and use the 'ONU Autofind' feature.
Configuration changes not applying
Click the 'Submit' button twice: once to add the configuration to the running-config list, and a second time to send the configuration to the ONU.
Before use
- Verify physical connection between OLT and ONU via PON port and Splitter.
- Identify if you need Setup 1 or Setup 2 (Setup 2 is for ONU-10XG(S)-1004-10G only).
- Ensure OLT is accessible via AUX port (Default IP: 192.168.8.200).
- Note the restricted VLAN IDs: 0, 1, 2, 9, 8, 10, 4000, 4005, 4012-4017, 4095.
Images and diagrams
- The setup diagram illustrates the connection flow: Router (DHCP Server) -> OLT (GE3/VLAN 100) -> Splitter -> ONU -> PC.
Model compatibility
- Setup 2 is exclusively for model ONU-10XG(S)-1004-10G.

Manual page author
Michael Turner
Technical manual editor
Reviews PDF manuals for structure, safety notes, and practical product details so readers can find the right information quickly.