Automotive / Exhaust Systems
Installation Manual for Akrapovič Slip-On Line Exhaust System for Kawasaki Ninja 1000SX / 1100SX
A comprehensive installation guide for the Akrapovič Slip-On Line exhaust system on Kawasaki Ninja 1000SX and 1100SX motorcycles. Includes safety warnings, required tools, step-by-step installation procedures, torque specifications, and...
Table of contents
Manual images
Click an image to enlargeQuick Guide and Safety Information
Before beginning the installation, ensure the motorcycle is securely positioned to prevent tipping. Allow the engine and stock exhaust system to cool completely, as they can become extremely hot. Verify that you have all necessary parts by checking the parts list on the official Akrapovič website. Ensure the exhaust system is compatible with your specific motorcycle model (Kawasaki Ninja 1000SX or 1100SX). Always verify the authenticity of the product using the serial number located on the muffler's inlet pipe.
Tools Required
- T-handle 4 mm hexagon wrench
- T-handle 6 mm hexagon wrench
- T-handle 12 mm wrench
- Torx 30 wrench
- Combination 14 mm wrench
- Flat screwdriver
- Spring puller
Removal of Stock Exhaust
- Place the motorcycle on a side stand or, preferably, a central racing stand on a solid, flat surface.
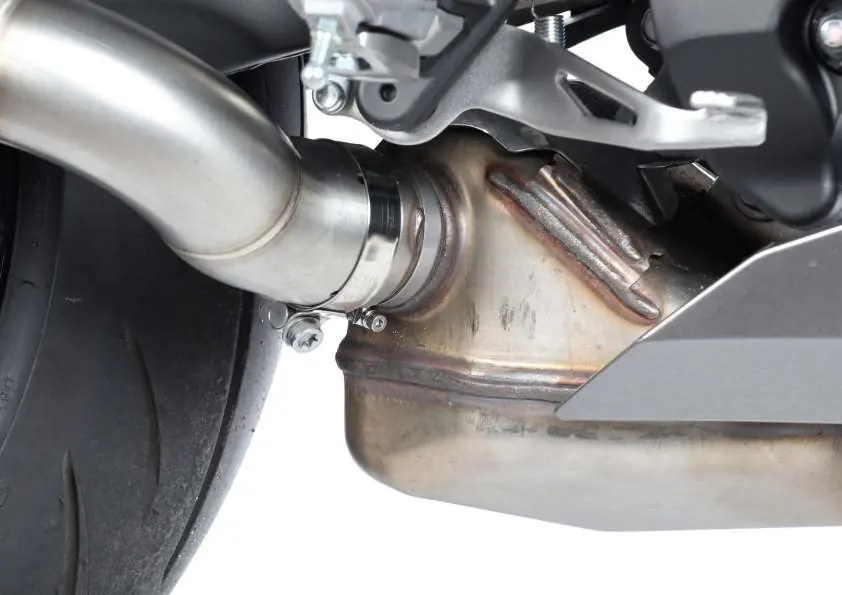
- Loosen the marked clamp, unscrew the muffler's bracket bolt, and carefully remove the stock muffler from the motorcycle.
Installation of Akrapovič Exhaust
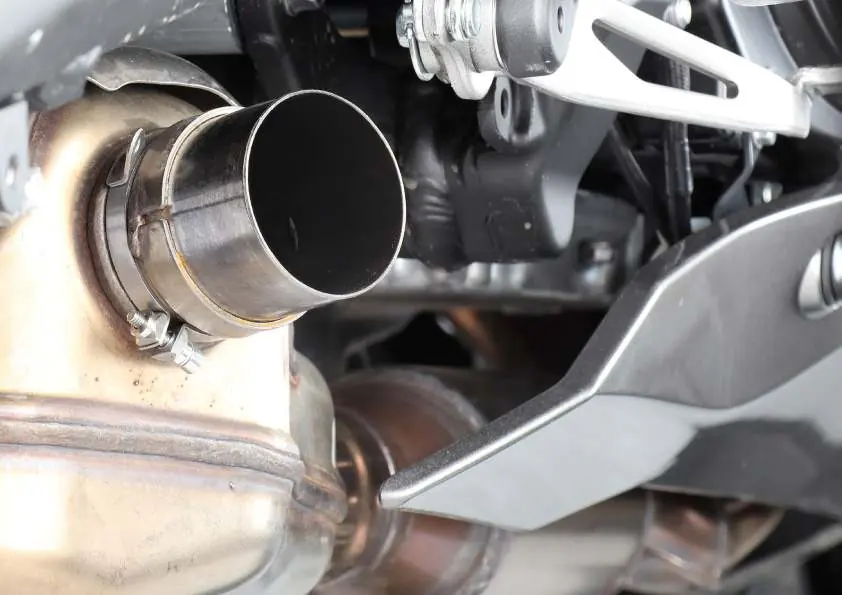
- Install and hand-tighten the clamp with the spring hook. Do not fully tighten it yet.
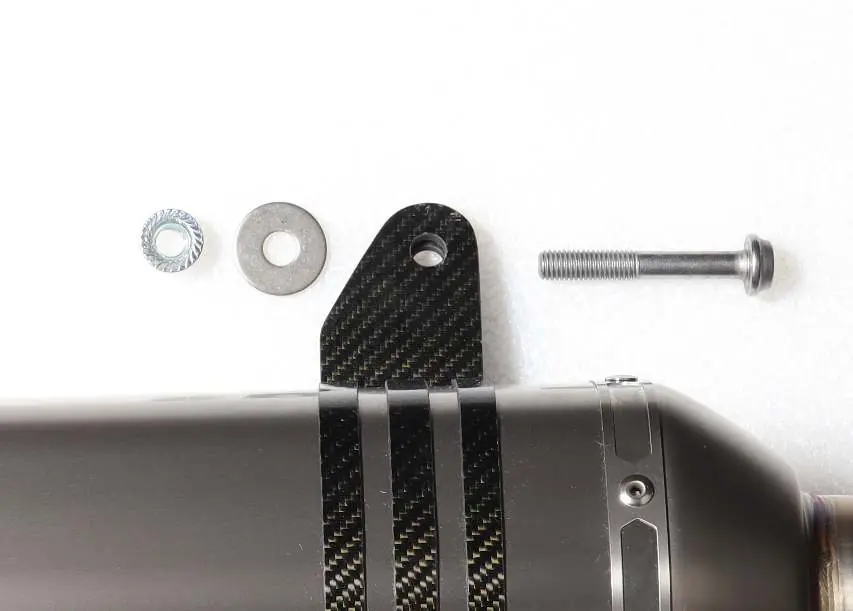
- Loosen the bolts on the carbon-fiber clamp, position it correctly on the muffler, and install the gasket and clamp from the Akrapovič kit.
- Slide the muffler onto the cat box outlet, attach the spring, and hand-tighten the carbon-fiber clamp onto the bracket using the provided bolt, washer, and nut.
- Align the spring clamp with the spring and tighten both marked clamps to the specified torque (14Nm and 2.1Nm).
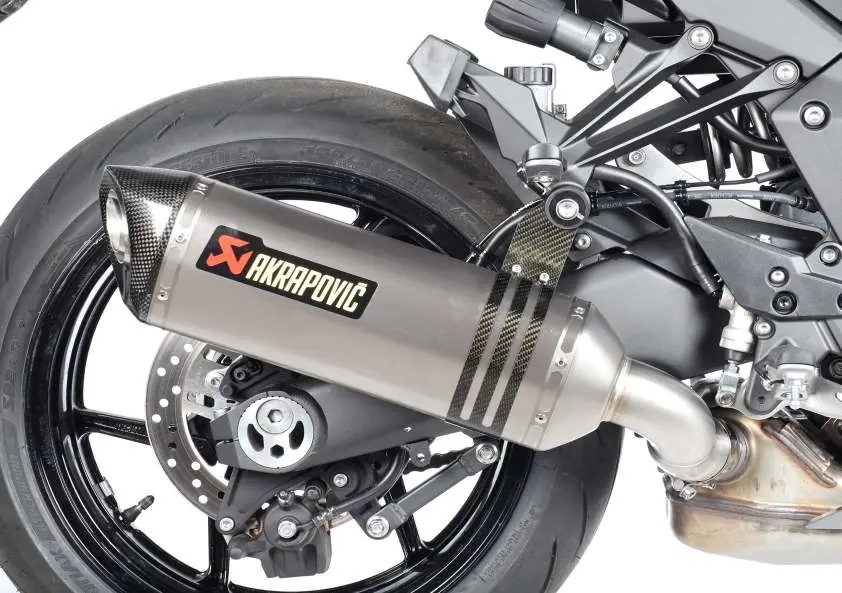
- Align the muffler with the motorcycle and tighten the carbon-fiber clamp bolts to the specified torque (34Nm and 4.9Nm).
Final Installation and Maintenance
Clean any grease spots off the exhaust surfaces after installation to prevent them from burning onto the finish. Do not use aggressive chemical cleaners.
- Titanium outer sleeve: Use a soft cloth sprayed with a multi-purpose spray lubricant (e.g., WD-40).
- Carbon-fiber outer sleeve/outlet cap: Use a soft dry cloth sprayed with all-purpose foam cleaner, then wipe with a soft dry cloth.
- Painted/Chrome parts: Use a soft cloth sprayed with all-purpose foam cleaner, then wipe with a soft dry cloth.
- Stainless steel pipes: Use a soft cloth sprayed with a contact cleaner, then wipe with a soft dry cloth.
- Titanium pipes: Use a soft cloth sprayed with a multi-purpose spray lubricant.
Periodically check that all bolts and springs are sufficiently tight. Note that white smoke from the muffler during the first 100 km and color changes due to high temperatures are normal.
Troubleshooting
If exhaust gas leaks occur at the muffler/pipe clamp connections, ensure the connection is fully joined and tighten the clamp to the specified torque.
Practical help
Common problems
Exhaust gas leaks at muffler/pipe clamp connections
Ensure the connection is fully joined and tighten the clamp to the specified torque.
Before use
- Ensure the motorcycle is securely positioned
- Allow engine and exhaust to cool completely
- Verify all parts are present against the parts list
- Check ground clearance
- Verify serial number authenticity on the muffler inlet pipe
Images and diagrams
- F01: Removal of stock muffler
- F02: Installing clamp with spring hook
- F03: Positioning carbon-fiber clamp
- F07: Torque specifications for clamps
- F08: Torque specifications for muffler bracket
Model compatibility
- Compatible with Kawasaki Ninja 1000SX
- Compatible with Kawasaki Ninja 1100SX

Manual page author
David Miller
Documentation analyst
Organizes user manual content into clear summaries, with attention to model details, product context, and everyday usability.