Garden / Outdoor Furniture
Assembly Instructions for allen + roth Avent Ferry 2-CT Chairs FRS81098RS
Quick assembly guide and safety instructions for the allen + roth Avent Ferry 2-CT Chairs (FRS81098RS). Includes step-by-step installation, maintenance tips, and weight limits.
Quick answers from the manual
Quick answer
- The Avent Ferry 2-CT Chairs are designed for residential use with a weight capacity of 250 lbs per chair. Assembly takes approximately 15 minutes and requires no additional tools. p. 1, 2
Key actions
- Assemble the chair frame and base using the provided hardware, ensuring all bolts are started before final tightening. p. 2
Problems and fixes
Bolts do not fit or threads are damaged
Do not overtighten any of the bolts as this may damage the threads.
p. 1Maintenance and reset
- Periodically check all bolted connections on the furniture to make sure they are tight and secure. p. 1
Technical specifications
| Parameter | Value | Meaning | Pages |
|---|---|---|---|
| Weight Capacity | 250 lbs | Maximum weight per chair | p. 1 |
Where to find it in the PDF
- Safety, Care, and Warranty p. 1
- Assembly Instructions p. 2
Table of contents
Manual images
Click an image to enlargeQuick guide from the manual
The allen + roth Avent Ferry 2-CT Chairs are designed for residential, non-commercial use. Assembly takes approximately 15 minutes and requires no additional tools, as the necessary hardware is included. The maximum weight capacity is 250 lbs per chair.
Safety Information
- Weight Limit: Do not exceed 250 lbs per chair.
- Usage: For single-person seating only. Do not stand on the chair or use it as a step ladder.
- Assembly: Keep children out of the assembly area. This set is heavy and may require two adults for safe assembly.
- Maintenance: Periodically check all bolted connections to ensure they are tight and secure.
Assembly Instructions
Before beginning, ensure all parts are present and undamaged. Do not fully tighten bolts until all are started.
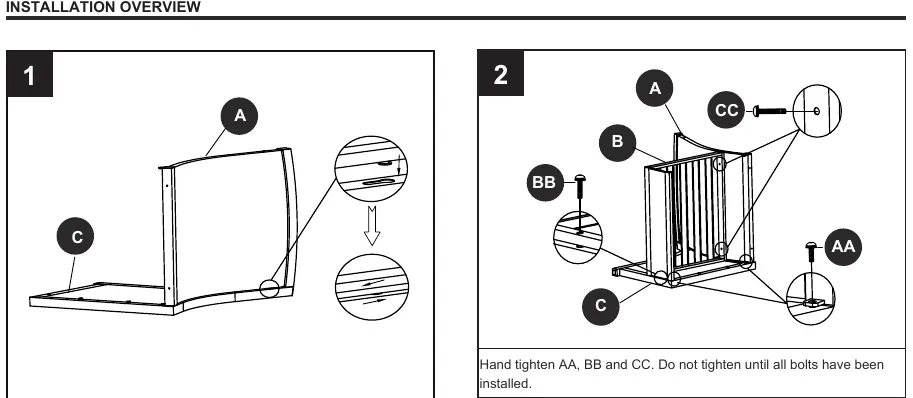
- Steps 1-2: Connect the chair frame (C) to the side panels (A) using bolts (AA, BB, CC). Hand tighten only.
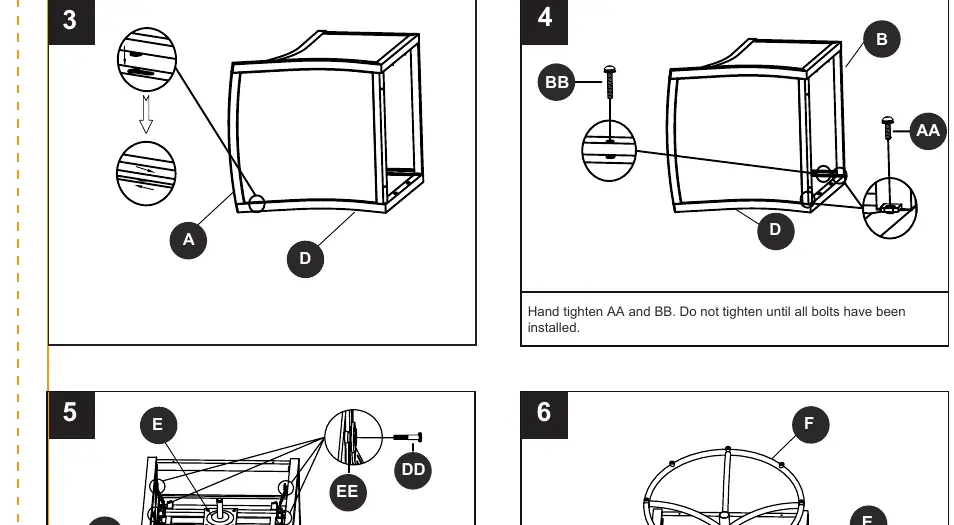
- Steps 3-4: Attach the remaining frame components (D) to the assembly. Hand tighten bolts (AA, BB).
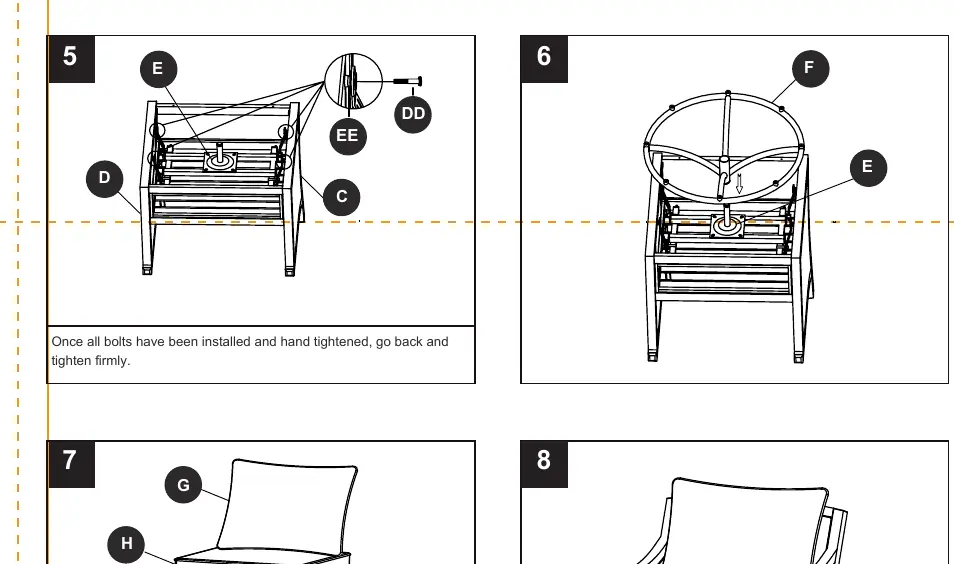
- Steps 5-6: Secure the base mechanism (E, F) to the chair frame using bolts (DD, EE).
- Final Tightening: Once all bolts are installed and hand-tightened, go back and tighten all bolts firmly.
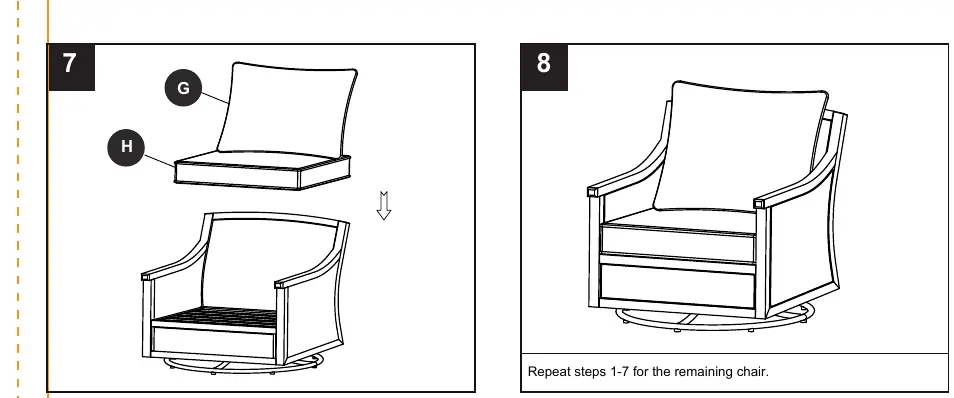
- Steps 7-8: Place the seat cushion (G) and back cushion (H) onto the assembled chair. Repeat the process for the second chair.
Care and Maintenance
- Clean the product with a soft, dry towel.
- When not in use, wipe away dirt and wash with a mild solution of soap and water; rinse and dry completely.
- Do not use strong detergents or abrasive cleaners.
- Store in a cool, dry location away from sunlight.
Warranty
The warranty covers defects in materials and workmanship for the original purchaser for residential use. Frames, cushions, straps, and wicker weaves are warranted for a period of three (3) years.
Practical help
Common problems
Parts missing or damaged
Do not attempt to assemble the product; contact customer service.
Bolts are difficult to tighten
Do not overtighten bolts as this may damage the threads. Ensure all bolts are started before tightening fully.
Before use
- Verify all parts are present against the package contents list.
- Ensure you have a clear, safe area for assembly.
- Check for any missing or damaged parts.
- Prepare a soft surface to prevent scratching the furniture during assembly.
Specs in practice
- Weight Capacity
- Maximum 250 lbs per chair.
- Assembly Time
- Approximately 15 minutes.
Images and diagrams
- The manual provides an exploded view of parts and a step-by-step sequence for assembly.
- Steps 1-6 detail the connection of the chair frame, base, and swivel mechanism.
- Steps 7-8 involve placing the cushions.
Model compatibility
- Residential use only.
- Not intended for commercial use.

Manual page author
David Miller
Documentation analyst
Organizes user manual content into clear summaries, with attention to model details, product context, and everyday usability.