Furniture / Sofas & Couches
Assembly Instructions for Wayfair Latitude Run Archlebov Swivel Rocker Chairs
Comprehensive assembly guide for the Wayfair Latitude Run Archlebov swivel rocker chairs. Includes step-by-step instructions, parts list, safety warnings, and troubleshooting tips.
Quick answers from the manual
Quick answer
- This manual provides assembly instructions for the Wayfair Latitude Run Archlebov swivel rocker chairs. Key advice is to not fully tighten bolts until the final step to ensure proper alignment. p. 1, 5, 11
Key actions
- Assemble the chair frame and base p. 5, 6, 7, 8
Problems and fixes
Frame holes not aligning
Loosen bolts, adjust parts, and re-tighten.
p. 13
Swivel plate not working well
Perform 10-20 cycles to break in the mechanism.
p. 14Where to find it in the PDF
- Parts List p. 3, 4
- Assembly Steps p. 5, 6, 7, 8
- Safety Warnings p. 12
Table of contents
Manual images
Click an image to enlargeQuick guide from the manual
This document provides assembly instructions for the Wayfair Latitude Run Archlebov swivel rocker chairs. The most important rule for assembly is do not fully tighten any bolts until the very end of the process. A cordless drill is recommended to speed up the assembly process. Ensure you have a clear space to lay out all parts before beginning.
Parts list
Before starting, verify you have all components:
- A1: Left Arm
- A2: Right Arm
- B: Arm (2pcs)
- C: Seat
- D: Back
- E: Front
- F: U-shape fitting
- G: Base
- H+I: Support Bar
- S+T: Seat and Back Cushion
- Hardware: Bolts (J, K, L, M), Nuts (O), Washers (N), Spring Washers (P), Allen Wrench (Q), Wrench (R)
Assembly instructions
Follow these steps to assemble the chair:
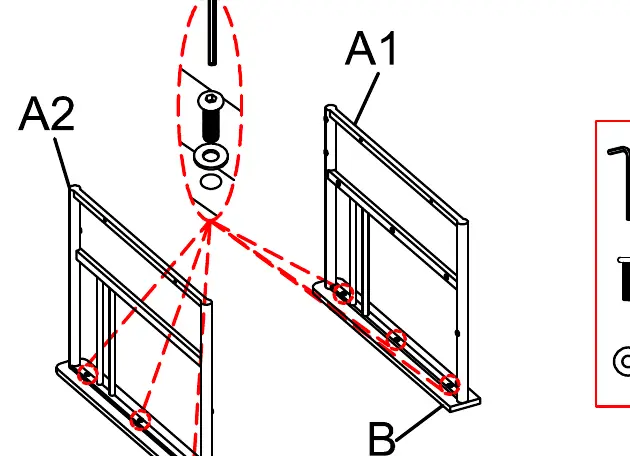
- Step 1: Attach A1 and A2 to arm B using 6 bolts K and 6 washers N.
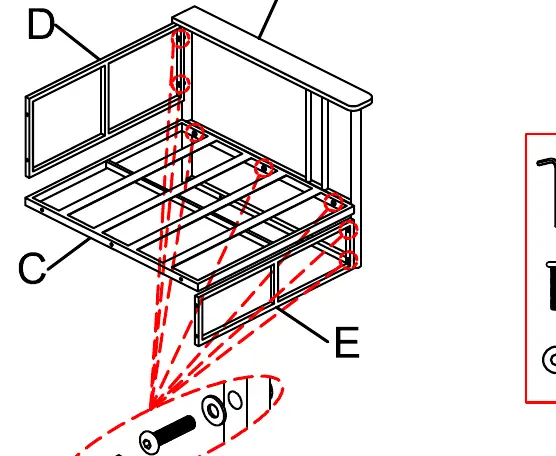
- Step 2: Attach A1 to C, D, and E using 7 bolts L and 7 washers N.
- Step 3: Attach A2 to C, D, and E using 7 bolts L and 7 washers N.
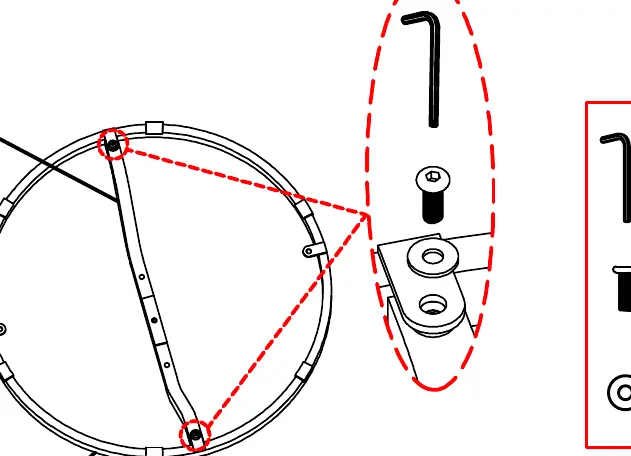
- Step 4: Attach H to G using 2 bolts J and 2 washers N.
- Step 5: Attach I to H and G using 3 bolts J and 3 washers N.
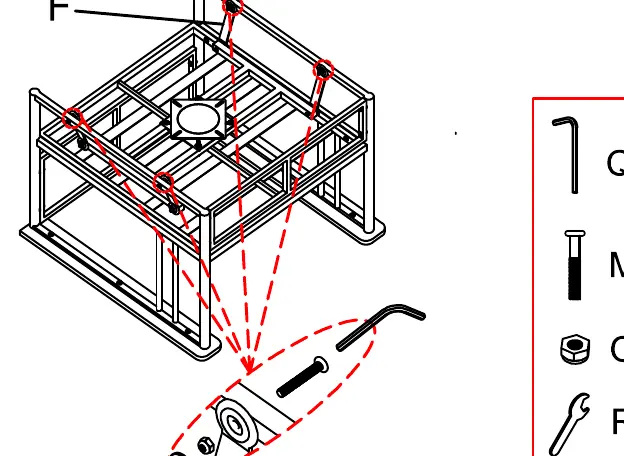
- Step 6: Attach F to A1 and A2 using 4 bolts M and 4 nuts O.
- Step 7: Attach base G to F using 4 bolts M, 8 washers N, 4 spring washers P, and 4 nuts O. Tighten all bolts fully at this stage.
- Step 8: Place the back cushion T and seat cushion S on the chair.
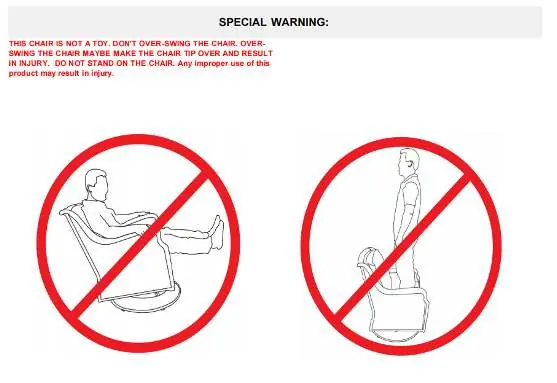
Safety warnings
This chair is not a toy. Do not over-swing the chair, as it may tip over and result in injury. Do not stand on the chair. Any improper use of this product may result in injury.
Troubleshooting and Q&A
If you encounter issues during assembly or use, refer to these solutions:
- Frame holes not aligning: If the discrepancy is less than 1/8 inch, loosen other relative bolts, adjust the parts, and re-tighten. If the discrepancy is more than 1/4 inch, it may be due to deformation during transport; contact support for replacement parts.
- Swivel plate not working well: The plate may need a running-in period of 10-20 cycles.
- Cushion flat: The cushions are shrink-packed to save transport costs. They will rebound over time.
- Wicker color differences: Wicker stripes are hand-woven and may vary in color, which is normal.
Manufacturer information
Wayfair LLC
Practical help
Common problems
Frame drilling holes do not align
Loosen other relative bolts first, adjust the position of the parts, then re-tighten all bolts. If the gap is larger than 1/4 inch, contact support for replacement parts.
Swivel plate is stiff or does not work well
The swivel plate may require a running-in period of 10-20 cycles to function smoothly.
Cushions appear flat or deformed
The cushions are shrink-packed for shipping. Allow them time to fully rebound.
Before use
- Clear a large space for assembly.
- Lay out all parts and hardware according to the parts list.
- Ensure you have a cordless drill (recommended) and the included tools.
- Do not fully tighten any bolts until the final assembly step.
Images and diagrams
- Steps 1-3: Frame assembly connecting arms to the seat and back.
- Steps 4-5: Base and support bar assembly.
- Steps 6-7: Connecting the swivel mechanism to the frame and base.

Manual page author
Emily Carter
User documentation editor
Prepares concise manual descriptions and highlights the most useful setup, operation, and maintenance information for readers.