Furniture / Sofas & Couches
Assembly Instructions for Christopher Knight Home 365203 Outdoor Table
Quick assembly guide for the Christopher Knight Home 365203 outdoor table. Includes parts list, step-by-step assembly instructions, and care tips.
Quick answers from the manual
Quick answer
- This manual provides assembly instructions for the Christopher Knight Home 365203 outdoor table. It requires two adults and approximately 10 minutes to assemble. p. 5
Key actions
- Attach legs to the table top using the provided bolts and washers, but do not fully tighten them until the table is upright and leveled. p. 6, 7
First start
- Unpack all parts on a clean, non-marring surface. Assemble with two adults. Attach legs to the table top, stand the table up, check for wobbles on a level surface, and then tighten all bolts sequentially. p. 5, 6, 7
Problems and fixes
Table wobbles
Ensure the table is on a level surface. If it wobbles, loosen the bolts, re-align, and tighten them sequentially.
p. 7Where to find it in the PDF
- Care & Maintenance p. 1
- Parts List p. 3
- Assembly Steps p. 5, 6, 7
Table of contents
Manual images
Click an image to enlargeQuick guide from the manual
This manual provides instructions for assembling the Christopher Knight Home 365203 outdoor table. Assembly requires two adults and should take approximately 10 minutes. It is crucial to assemble the table on a clean, non-marring surface and to avoid fully tightening the bolts until the final leveling step to ensure stability.
Parts list
Before beginning, ensure you have all the following components:
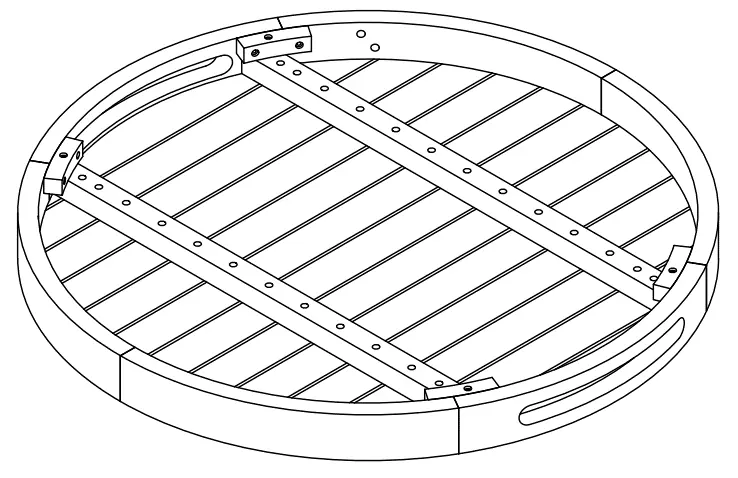
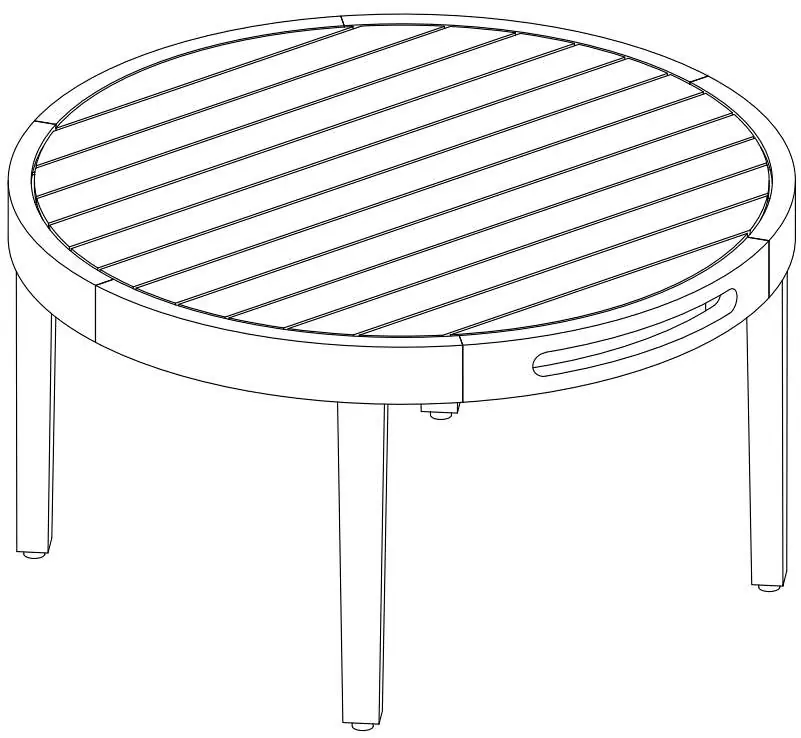
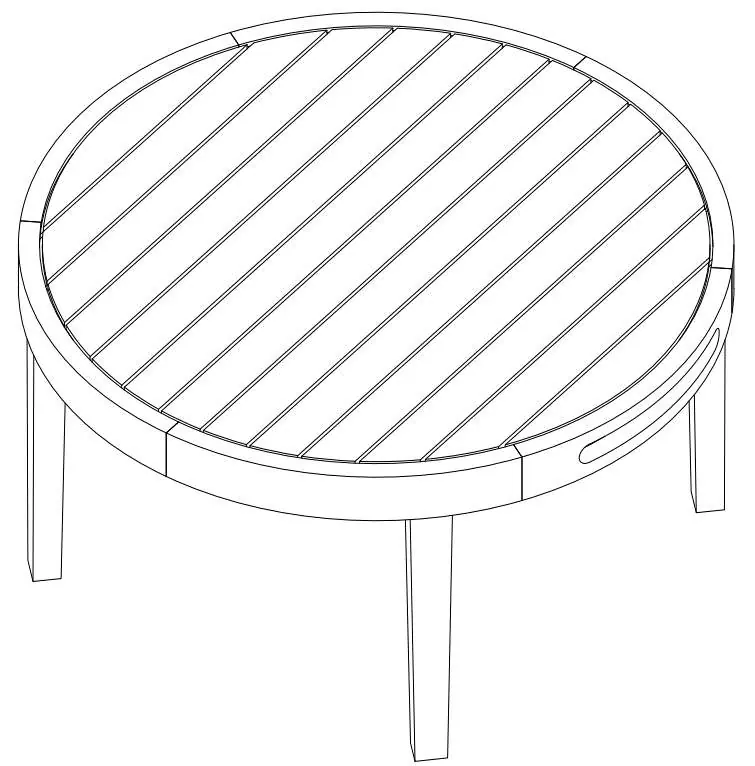
- Table Top (H): 1 piece
- Leg (I): 4 pieces
- Allen Wrench (5): 1 piece
- Bolt (M6x35mm) (6): 9 pieces
- Washer (7): 9 pieces
Assembly preparation
Follow these guidelines before starting the assembly:
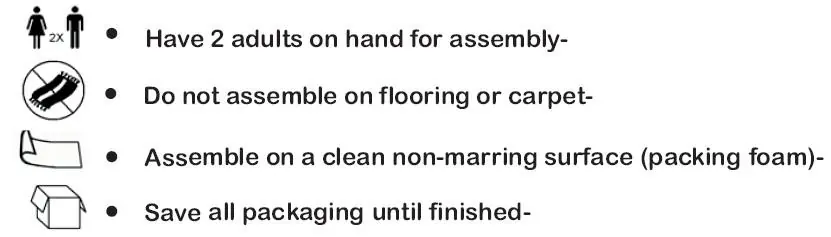
- Read the instructions cover to cover.
- Have 2 adults on hand for assembly.
- Do not assemble on flooring or carpet.
- Assemble on a clean, non-marring surface (e.g., packing foam).
- Save all packaging until the assembly is finished.
Assembly steps
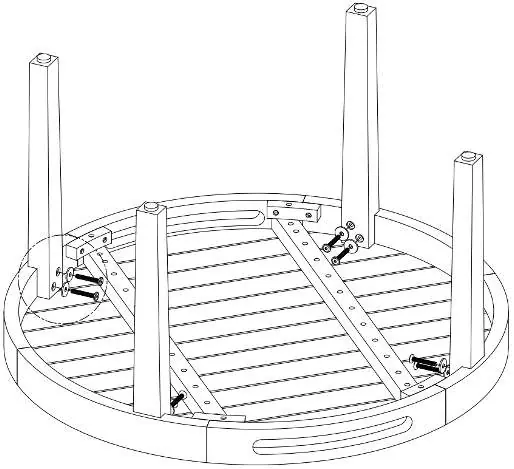
Step 1: Unpack
Unpack and place all parts on a clean, non-marring surface.
Step 2: Attach legs
With the assistance of an adult partner, turn the Table Top (H) facing down. Attach the Legs (I) to the Table Top (H) using the Bolts (6), Washers (7), and the provided Allen Wrench (5). Important: Do not fully tighten the bolts at this stage.
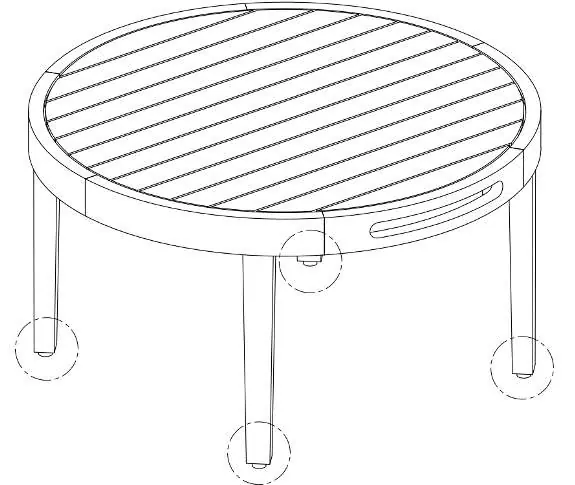
Step 3: Leveling
With the help of your partner, stand the table up. Exert pressure floorwards onto the table with both hands to help the legs and table top reach full alignment. Check for wobbles on a level surface. If the table is stable, proceed to tighten the bolts in a sequential manner until evenly secured. If wobbles persist, loosen the bolts and repeat the alignment process. Adjust the pre-installed levelers on the feet as needed for balance.
Care and maintenance
- For residential use only; not for commercial use.
- Do not place hot items directly on the furniture surface.
- Do not clean with harsh cleansers or polish.
- Avoid extended exposure to rain, snow, and direct sunshine; cover the product or place under a patio/awning when possible.
- Children should not climb or jump on the furniture.
- Do not write on the furniture without a padded barrier.
- Stains may be removed with a mild soap solution and a damp cloth.
- Dust and pick up spills using a clean, non-colored, lint-free cloth.
Practical help
Common problems
Table wobbles
Ensure the table is on a level surface. If it wobbles, loosen the bolts, re-align the legs by exerting downward pressure, and tighten the bolts sequentially.
Before use
- Have 2 adults available for assembly
- Assemble on a clean, non-marring surface (e.g., packing foam)
- Do not assemble on flooring or carpet
- Save all packaging until finished
Specs in practice
- Bolt (M6x35mm)
- The primary fastener used to secure the legs to the table top.
Images and diagrams
- The table features adjustable levelers on the bottom of each leg to ensure stability on uneven surfaces.
Model compatibility
- For residential use only.
- Not for commercial use.

Manual page author
David Miller
Documentation analyst
Organizes user manual content into clear summaries, with attention to model details, product context, and everyday usability.