Garden / Outdoor Cooking
User Manual for Burnhard WAYNE Jr. 1-Burner Gas Grill
Quick guide and user manual for the Burnhard WAYNE Jr. 1-burner gas grill. Includes assembly instructions, safety guidelines, operation, cleaning, and troubleshooting.
Table of contents
Manual images
Click an image to enlargeQuick guide from the manual
The Burnhard WAYNE Jr. is a portable 1-burner gas grill designed for outdoor use. Before first use, ensure the grill is assembled correctly, perform a leak test, and burn in the cast iron grids. Always operate on a flat, stable, and fire-resistant surface with at least 1.5 meters of clearance from flammable materials.
Safety instructions
- Outdoor use only: Never operate the grill inside a building, garage, or enclosed area.
- Gas safety: Use only EN 417 screw-top gas cartridges (propane/butane mixture).
- Clearance: Maintain a minimum distance of 1.5 meters from flammable materials and 7.5 meters from flammable liquids.
- Leak test: Always perform a leak test before the first use and after every gas cartridge change using soapy water or leak detection spray.
- Hot surfaces: Accessible parts can become very hot. Keep children and pets away.
Assembly
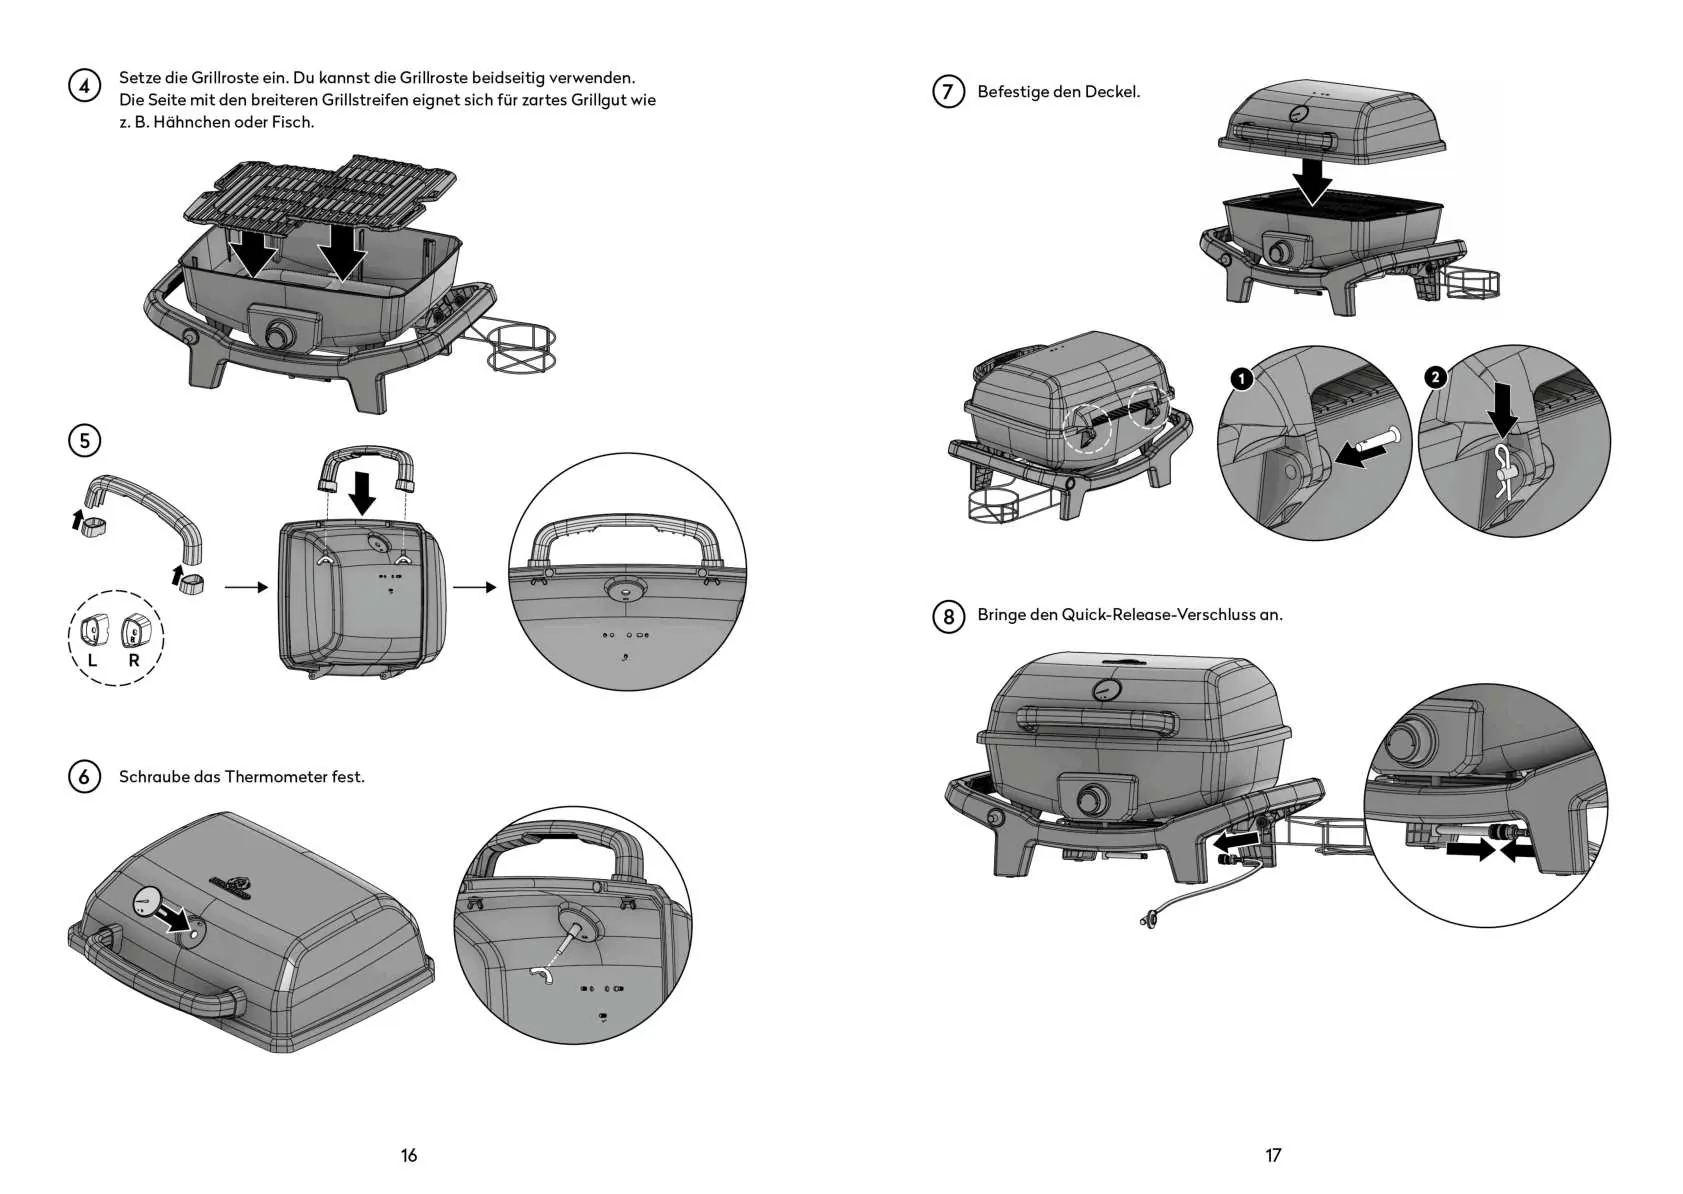
- Attach the gas cartridge holder to the frame using the provided screws.
- Insert the grease tray and the oil outlet protective cover.
- Place the grill racks into the combustion chamber.
- Attach the lid handle and hinges.
- Secure the thermometer with the wing screw.
- Attach the quick-release fastener for the gas hose.
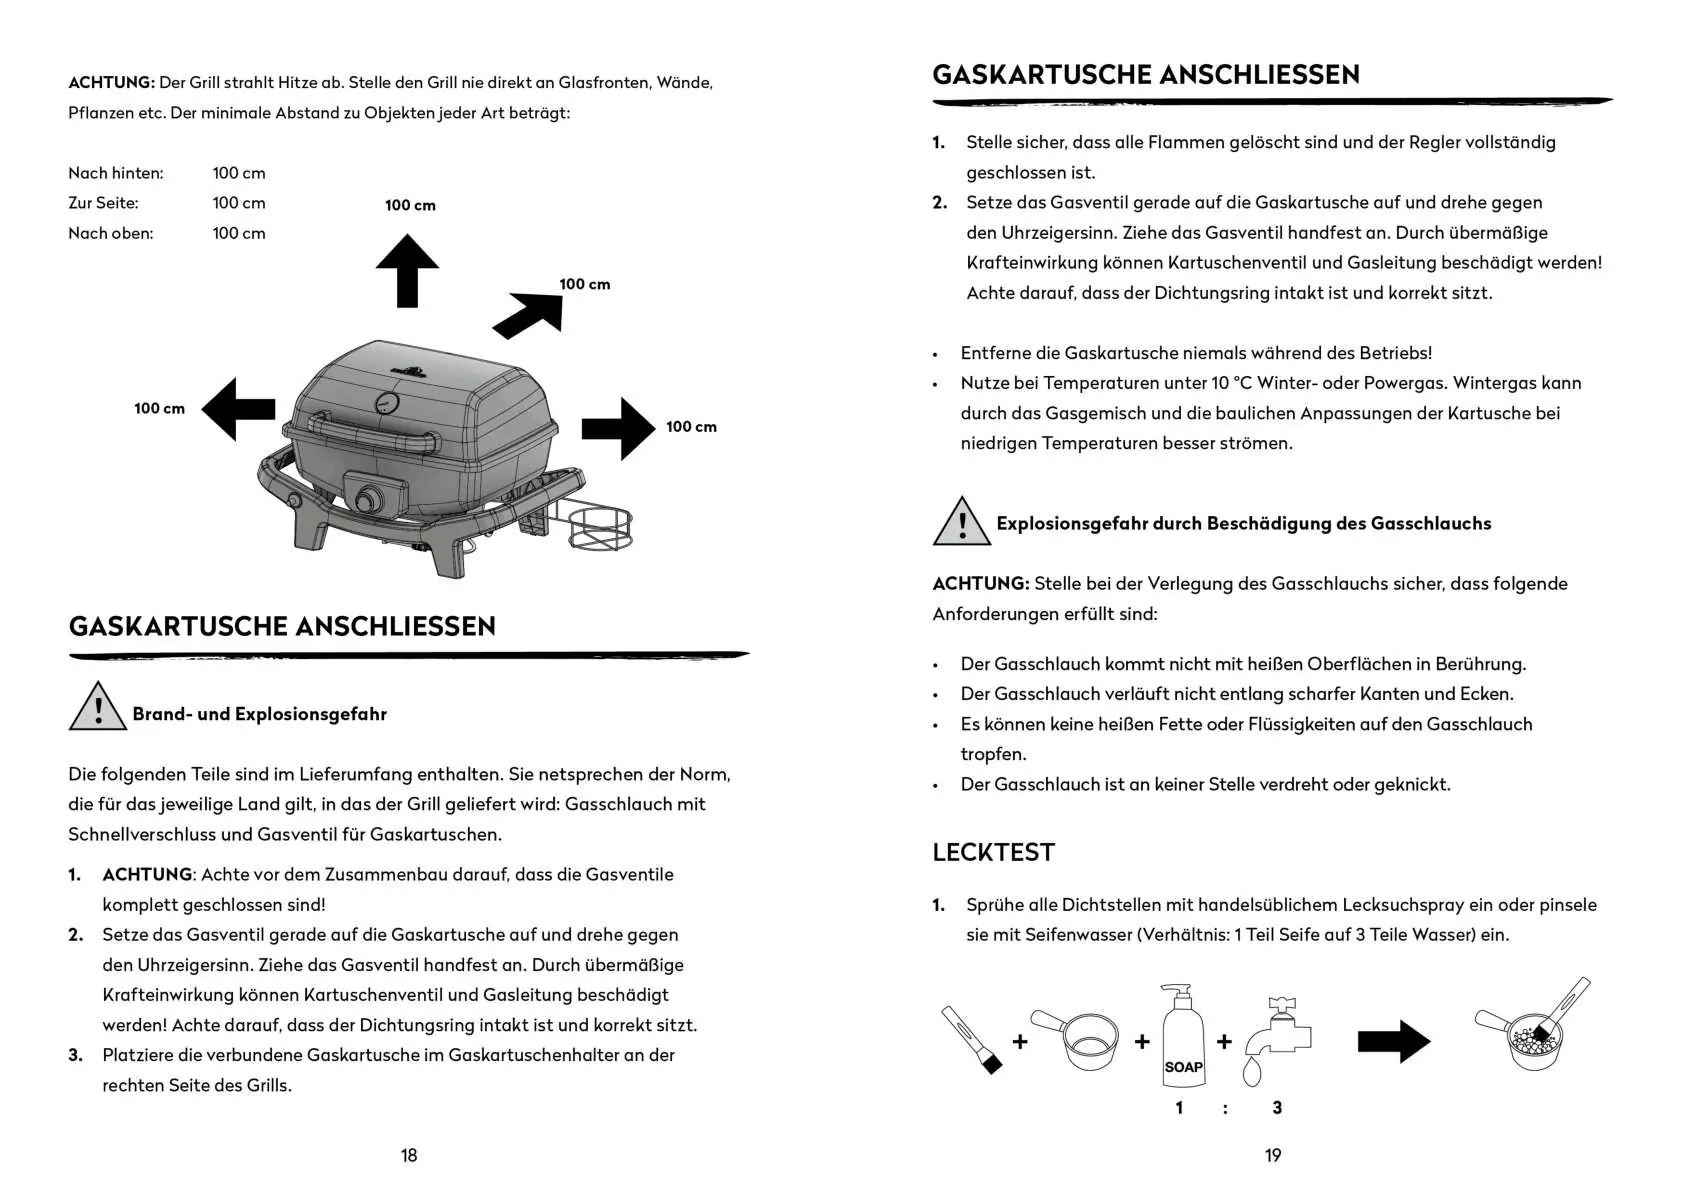
Connecting the gas cartridge
Ensure all flames are extinguished and the regulator is fully closed. Align the gas valve straight onto the gas cartridge and turn counter-clockwise until hand-tight. Do not use excessive force. Place the connected cartridge in the holder on the right side of the grill.
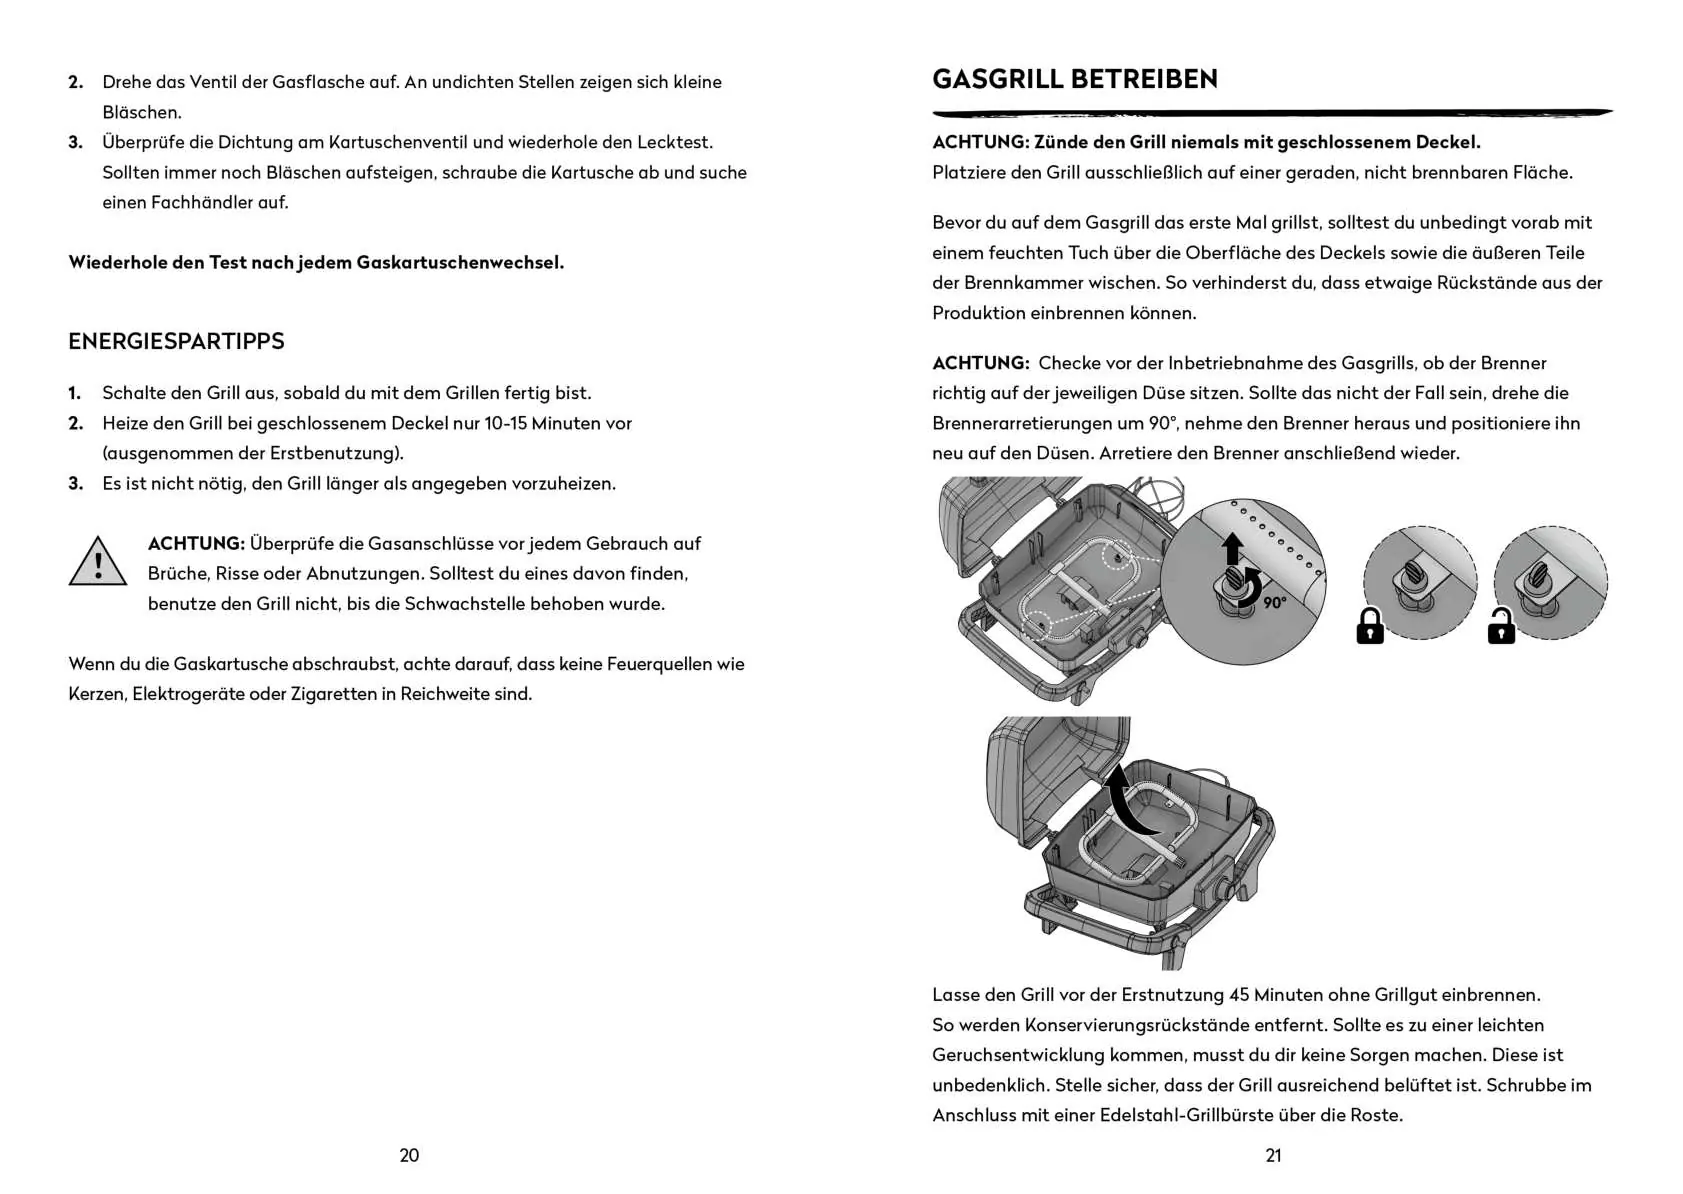
Operating the gas grill
Ignition: Open the lid. Ensure the regulator is closed (clockwise). Screw the cartridge onto the valve. Open the regulator (counter-clockwise) and press the ignition button on the right side of the frame. If it does not ignite, wait 5 minutes and try again.
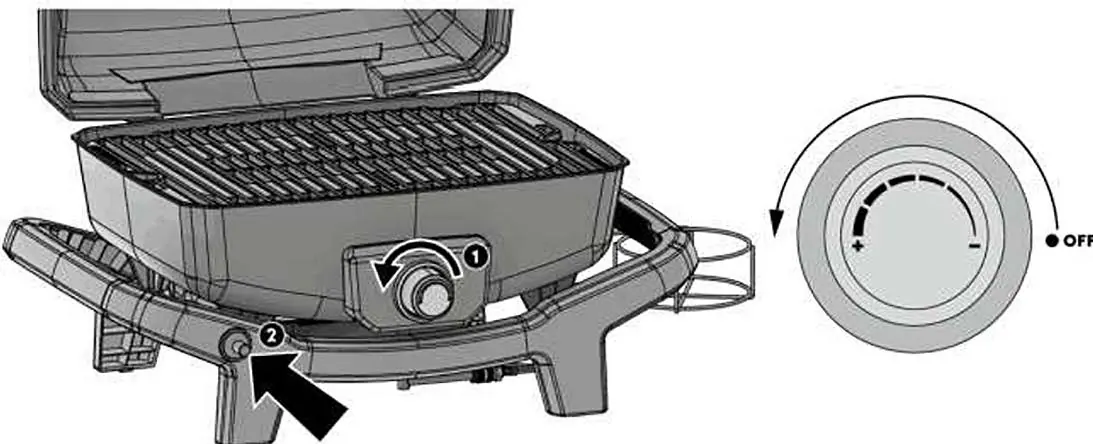
Heat regulation: Adjust the heat by turning the control knob.
Cleaning and maintenance
- Burn-in: Before first use, burn the grill for 45 minutes without food to remove production residues.
- Cleaning after use: Burn off residue for 15-30 minutes after grilling, then scrub grids with a stainless steel brush.
- Regular maintenance: Clean the grill thoroughly every 3-4 months. Check the Venturi tube for insect or spider webs.
- Cast iron grids: Season the grids by cleaning, greasing with high-smoke-point oil, and burning for 45 minutes with the lid closed.
Troubleshooting
If the burner does not ignite, check if the gas cartridge is empty, clean the burner and ignition system, or replace the piezo ignition. If there is a small flame or hissing noise, clean the burner or ensure it is seated correctly.
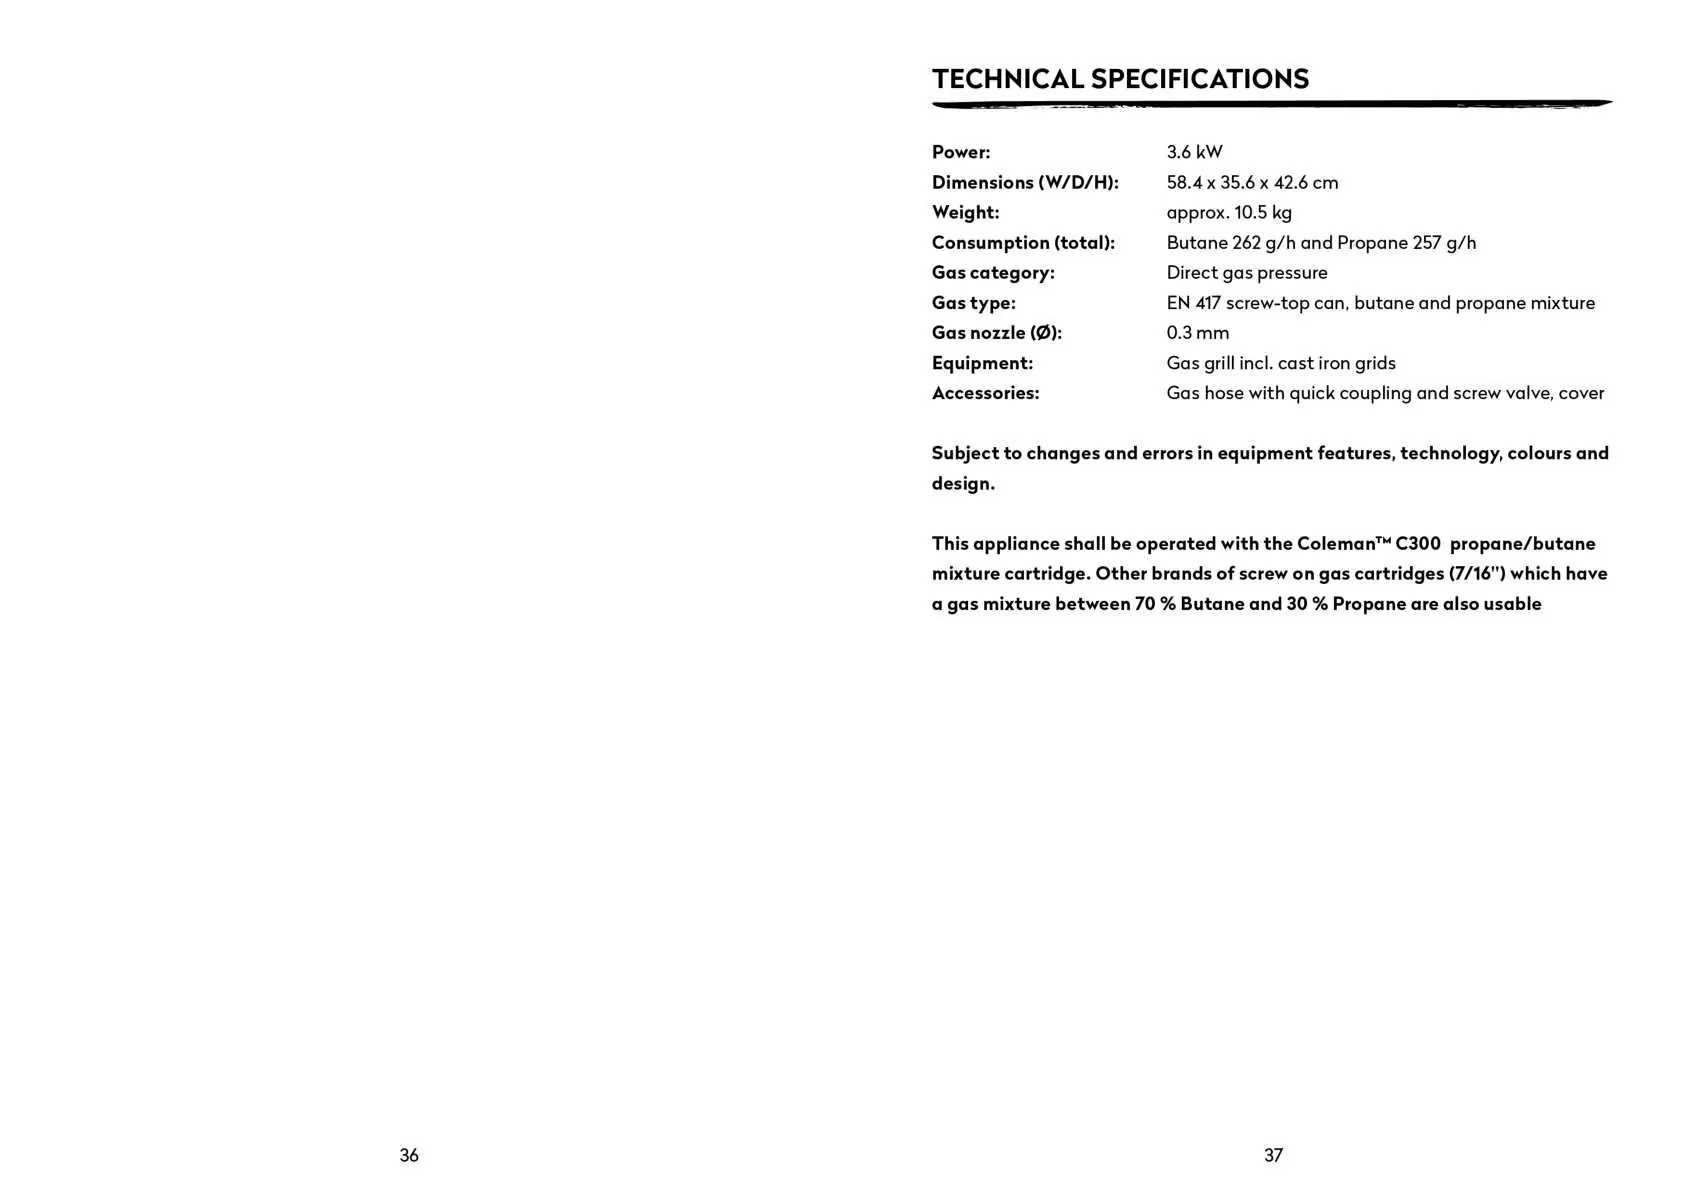
Technical specifications
- Power: 3.6 kW
- Dimensions: 58.4 x 35.6 x 42.6 cm
- Weight: Approx. 10.5 kg
- Gas type: EN 417 screw-top can (Butane/Propane)
Manufacturer information
Burnhard
Practical help
Common problems
Burner does not ignite
Check if the gas cartridge is empty, clean the burner and ignition system, or replace the piezo ignition.
Small flame or deflagration in the burner
Clean the burner and ignition system, or ensure the burner is seated correctly.
Before use
- Check gas connections for cracks or wear.
- Ensure the grill is on a level, stable, fire-resistant surface.
- Maintain 1.5m distance from flammable materials.
- Perform a leak test before first use.
- Ensure the burner is correctly positioned on the nozzle.
Images and diagrams
- Assembly steps show attaching the cartridge holder, grease tray, and lid.
- Ignition diagram shows the control knob and ignition button location.
Model compatibility
- Use only EN 417 screw-top gas cartridges.
- Recommended: Coleman C300 propane/butane mixture.

Manual page author
Emily Carter
User documentation editor
Prepares concise manual descriptions and highlights the most useful setup, operation, and maintenance information for readers.