Garden / Outdoor Cooking
User Manual for Weber 1000N Gas Barbecue
Quick guide for the Weber 1000N gas barbecue. Includes safety instructions, gas connection steps, ignition procedures, cleaning, and troubleshooting.
Table of contents
Manual images
Click an image to enlargeQuick guide from the manual
This manual provides essential instructions for the safe operation and maintenance of your Weber 1000N gas barbecue. Key requirements include using the barbecue outdoors only, ensuring proper ventilation, and performing regular leak checks. Always verify the gas supply is connected correctly and the safety tether is installed before use.
Safety Information
DANGER: If you smell gas, shut off the gas to the appliance, extinguish any open flame, and open the lid. If the odor persists, move away and call the emergency fire services immediately.
- Use outdoors only in well-ventilated areas.
- Do not use in garages, buildings, tents, or beneath overhead combustible construction.
- Keep the cooking area clear of flammable vapors and liquids.
- Do not store or use gasoline or other flammable liquids in the vicinity of the barbecue.
- Accessible parts may be very hot; keep children away.
- Do not move the appliance during use.
Getting Started
Location: The barbecue must be used in an above-ground, open-air situation with natural ventilation. Ensure it is positioned at least 61 cm (24 inches) from any combustible surfaces.
Gas Connection: The barbecue is designed for Natural Gas (NG) only. It features a 1/2 inch BSP thread inlet. The installation should be performed by a professional and conform to local requirements (e.g., AS/NZS 5601).
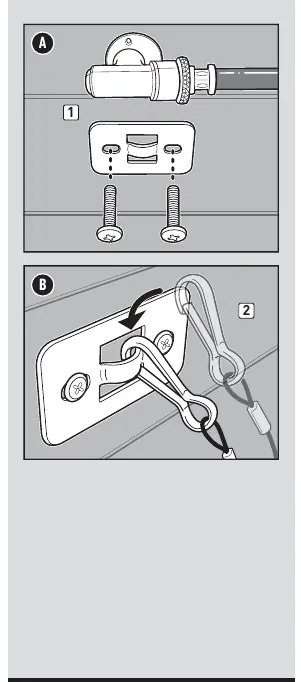
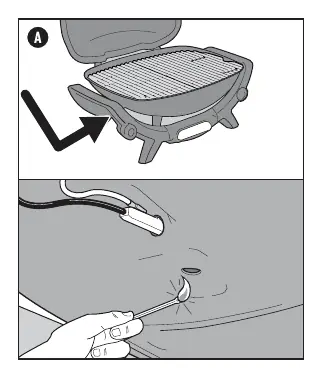
Safety Tether: A safety tether must be installed to protect the gas supply fitting. The bracket must be attached to a rigid structure within 50 mm of the gas supply bayonet fitting.
Operation
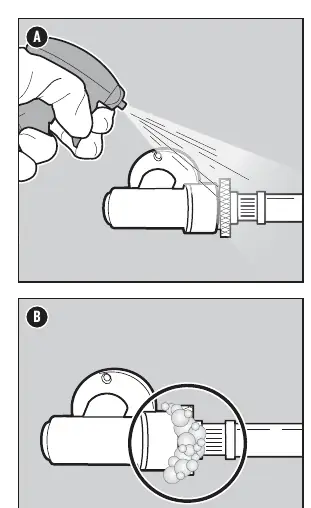
Leak Check: Perform a leak check after assembly and annually. Apply a soap and water solution (20% liquid soap, 80% water) to all fittings. If bubbles appear, there is a leak; turn off the gas immediately and do not operate the barbecue.
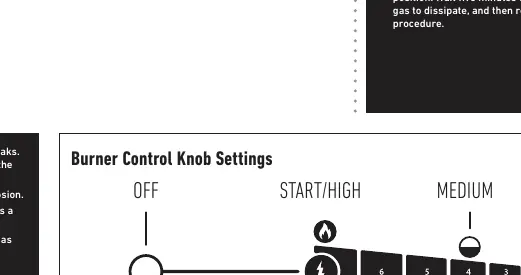
Ignition: Open the lid, ensure gas is connected, and turn the burner control knob to the start/high position. Push the igniter button (or electronic igniter) until the burner lights. If it fails to ignite, turn the knob to off, wait five minutes, and try again.
Preheating: Preheat with the lid closed on high for 10 to 15 minutes or until the thermometer registers 260°C (500°F).
+ Burner (Select Models): Used for searing or low and slow cooking. Always ignite the main burner first, then the + burner.
Cleaning and Maintenance
Cleaning: Clean the inside of the lid, cooking grills, and burners regularly. Use a stainless steel bristle brush for grills and burners. Do not use abrasive cleaners, acid, or mineral spirits.
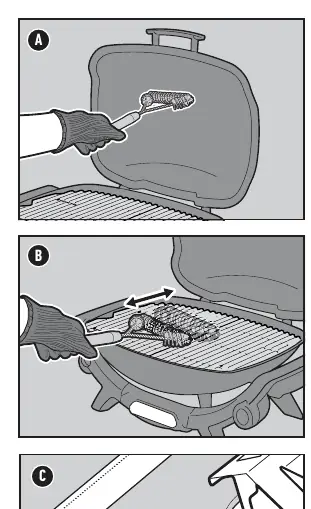
Spider Screens: Keep the combustion air openings (spider screens) clean to prevent insect nests and ensure proper oxygen flow.
Hose Inspection: Routinely inspect the hose for cracks, abrasions, or cuts. If damaged, do not use the barbecue and replace it with a genuine Weber hose.
Troubleshooting
If the barbecue will not ignite, first determine if there is gas flow by using a match to light the burner (refer to the manual for the specific match-lighting procedure). If match lighting is successful, the issue is likely with the ignition system (check battery or wire connections). If match lighting is unsuccessful, check the gas supply.
Practical help
Common problems
Barbecue will not ignite
Check gas flow, check ignition system (battery/wires), or use a match to light the burner to determine if the issue is gas flow or ignition.
Gas leak detected
Turn off gas immediately, do not operate the barbecue, and contact customer service.
Low temperature or uneven heat
Perform a thorough cleaning of the cookbox and burners; check for grease accumulation.
Before use
- Ensure all parts are in place and properly assembled.
- Perform a leak check on all gas connections using soap and water.
- Verify the safety tether is securely attached.
- Ensure the barbecue is in a well-ventilated outdoor area.
- Check that the gas supply is connected correctly.
Specs in practice
- Regulator Pressure
- 1.0 kPa.
Images and diagrams
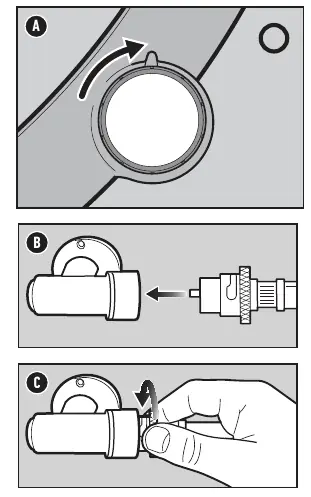
- Bayonet fitting: Push male fitting into socket, align groove, and turn 1/4 turn clockwise to lock.
- Safety tether: Must be attached to a rigid structure within 50mm of the gas fitting.
Model compatibility
- Not suitable for reticulated gas supply.
- Only use with Natural Gas.
- Not intended for installation on recreational vehicles or boats.

Manual page author
Emily Carter
User documentation editor
Prepares concise manual descriptions and highlights the most useful setup, operation, and maintenance information for readers.