General / Accessories
User Manual for Celestron MicroDirect 1080p HD Handheld Digital Microscope
Quick guide for the Celestron MicroDirect 1080p HD Handheld Digital Microscope. Learn how to set up the stand, connect to a display, capture images, use time-lapse, and perform measurements with the included software.
Table of contents
Manual images
Click an image to enlargeQuick Guide
The Celestron MicroDirect 1080p HD Handheld Digital Microscope is designed for observing coins, stamps, rocks, electronics, and insects. It can be used as a handheld device or mounted on the included professional stand. It connects directly to monitors or projectors via HDMI for real-time viewing and can save images to a microSD card.
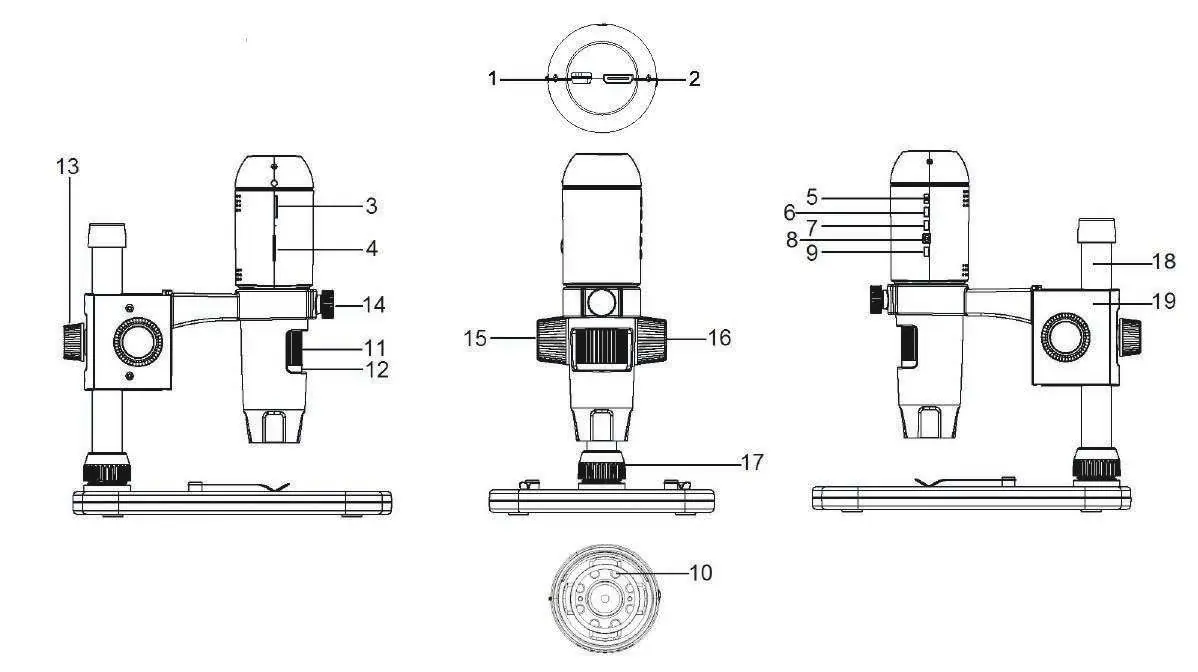
Parts Overview
The microscope features a mini USB port for power, a mini HDMI output, a microSD card slot, and various control buttons including power, mode, menu, shutter/OK, and navigation. The stand includes a height adjustment knob, microscope fixing nut, and support shaft.
Microscope Setup
Stand Assembly: Ensure the microscope holder arm is attached to the support shaft. Secure the shaft and arm assembly to the base using the shaft fixing part.
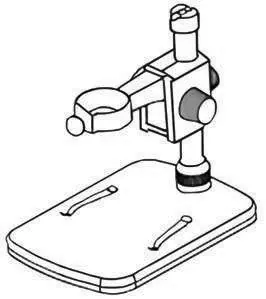
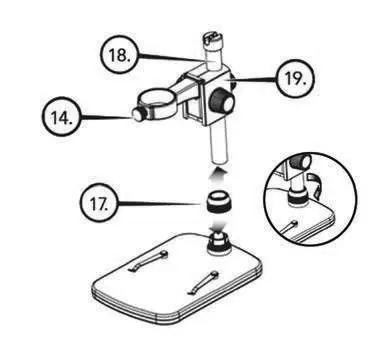
Mounting: Insert the microscope into the holder and tighten the microscope fixing nut to secure it in place.
Operation
Monitor/Projector Connection: Connect the included HDMI cable to the microscope and your display. Connect the USB cable to the microscope and a USB power source (monitor USB port or 5V/1A wall charger). Press the power button to turn on.

Capturing Images: Insert a microSD card (up to 32GB). Use the height adjustment knob to focus on the specimen. Press the shutter button to save the image to the card.
PC Transfer: Connect the microscope to a PC using the USB cable. The PC will recognize the microscope as a storage device, allowing you to transfer files like a standard digital camera.
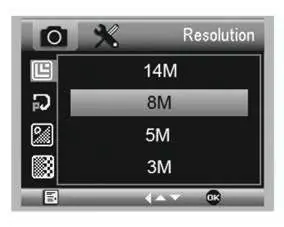
Settings Menu
Access the menu by pressing the Menu button. The menu is divided into two screens:
- Menu 1: Resolution, Time-lapse capture, Quality, Sharpness, Exposure, Date Stamp.
- Menu 2: Date/Time, Auto Power Off, Language, TV mode, Frequency, Format, Default Setting, Version.
Time-lapse: Allows for automated image capture at set intervals. Ensure the Auto Power Off setting is longer than the total time-lapse duration.
Software
The included Portable Capture HD software (Windows only) allows for advanced features:
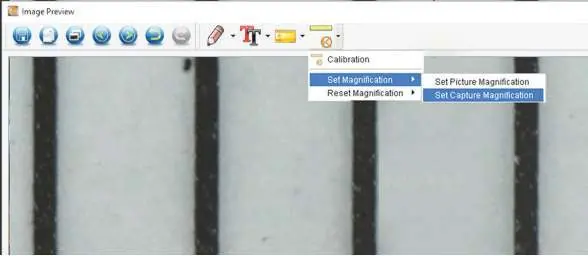
- Calibration: Essential for accurate measurements. Place the calibration ruler under the microscope, capture an image, and use the calibration tool to define a known distance.
- Measurement: Once calibrated, use the measurement tools to calculate lines, radii, diameters, and angles.
- Drawing/Text: Add shapes, arrows, or text to captured images for documentation.
Maintenance and Safety
Keep the microscope in a clean, dry place. Operating temperature is -5°C to 50°C. Avoid rapid temperature changes to prevent moisture buildup. Keep away from water and liquids. Clean the exterior with a dry, soft cloth; use an air duster for dust removal.
Manufacturer information
Celestron
Practical help
Common problems
Blue screen on monitor
Do not connect the USB cable to a PC for power; use a wall charger or a powered USB port on the monitor.
Microscope not detected by PC
Ensure the USB cable is securely connected and the Portable Capture HD software is running.
Measurement inaccurate
Calibration must be performed using the calibration ruler before taking measurements. Do not change the microscope height or focus after calibration.
Before use
- Check that all accessories are present.
- Assemble the stand and mount the microscope securely.
- Insert a microSD card (up to 32GB).
- Connect to a power source (USB charger or monitor).
- Set the correct frequency (50Hz/60Hz) for your region.
Specs in practice
- Magnification
- 24x to 220x (based on a 20-inch screen).
Images and diagrams
- Parts diagram identifies the microscope, stand, and control buttons.
- Setup diagram illustrates connecting HDMI and USB cables.
- Calibration diagram shows the measurement interface.
Model compatibility
- Compatible with Windows 11/10.
- Not compatible with macOS.

Manual page author
Michael Turner
Technical manual editor
Reviews PDF manuals for structure, safety notes, and practical product details so readers can find the right information quickly.