Furniture / Closet Organizers
Installation Guide for ClosetMaid Multi-Function 2-Drawer Organizer Kit
Comprehensive installation and assembly guide for the ClosetMaid Multi-Function 2-Drawer Organizer Kit. Includes step-by-step assembly instructions, hardware lists, safety warnings, and weight capacity specifications.
Quick answers from the manual
Quick answer
- This manual provides assembly and installation instructions for the ClosetMaid 2-Drawer Organizer Kit. It includes safety warnings, hardware lists, and step-by-step mounting procedures. p. 1, 6, 7, 8
Key actions
- Assemble frame p. 6, 7
- Mount to wall p. 8
- Install baskets p. 9, 10
Problems and fixes
Unit instability
Secure unit to wall studs using provided brackets.
p. 3, 8Technical specifications
| Parameter | Value | Meaning | Pages |
|---|---|---|---|
| Shelf Capacity | 30 lbs / 13.6 kg | Maximum weight when evenly distributed | p. 1 |
| Drawer Capacity | 7.5 lbs / 3.4 kg | Maximum weight when evenly distributed | p. 1 |
Where to find it in the PDF
- Safety Precautions p. 3
- Hardware List p. 4
- Assembly Steps p. 6, 7, 8, 9
Table of contents
Manual images
Click an image to enlargeQuick Guide
This manual provides instructions for assembling and installing the ClosetMaid Multi-Function 2-Drawer Organizer Kit. The unit is designed for floor use and must be secured to a wall stud to prevent tipping. Please read all safety precautions before beginning assembly.
Safety Precautions
- Choking Hazard: Contains small parts; keep away from small children.
- Stability: Always unload the unit before moving it. Do not climb, step, or sit on the unit.
- Wall Mounting: All units must be secured individually to a wall stud using the provided hardware to prevent tipping.
- Weight Limits: Do not overload the unit. If shelves or panels bow, the unit is overloaded.
- Usage: Do not use as a television stand. Do not hang on the wall.
Hardware and Contents
Before starting, verify you have all parts:
- Hardware: 1-1/2 in. Flat Head Screws (H1), Wall Brackets (H2), 10 mm Machine Screws (H3), Channel Stops (H4), and a 2.5 mm Allen Key (H5).
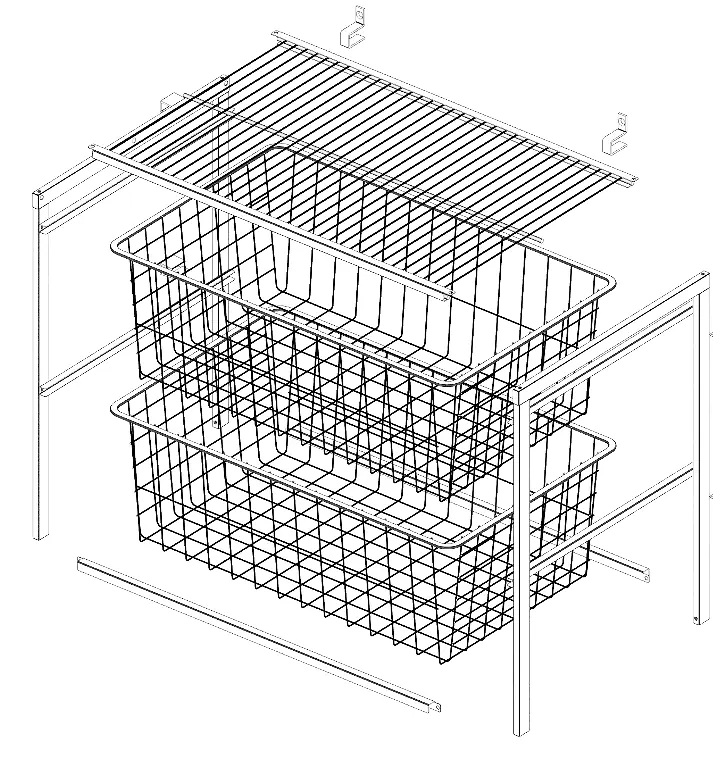
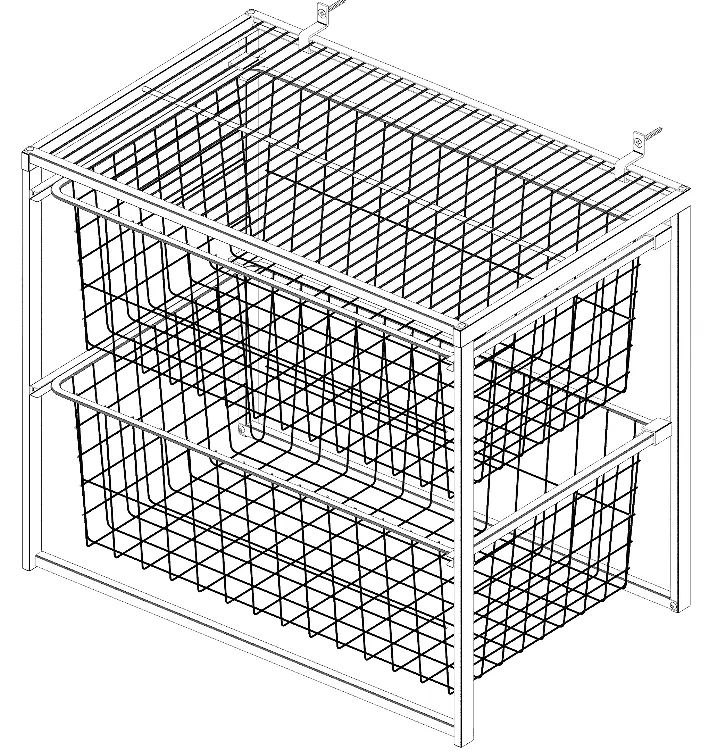
- Product Parts: Side Panels (x2), Wire Shelf (x1), Cross Braces (x2), and Wire Baskets (x2).
Assembly Instructions
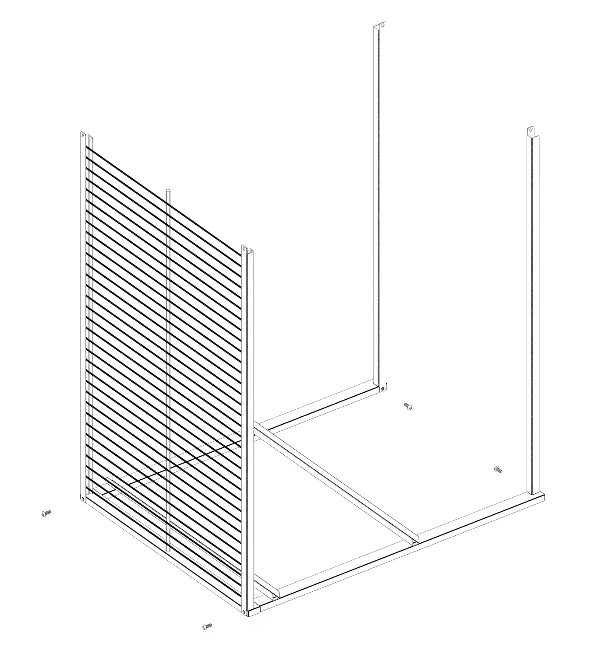
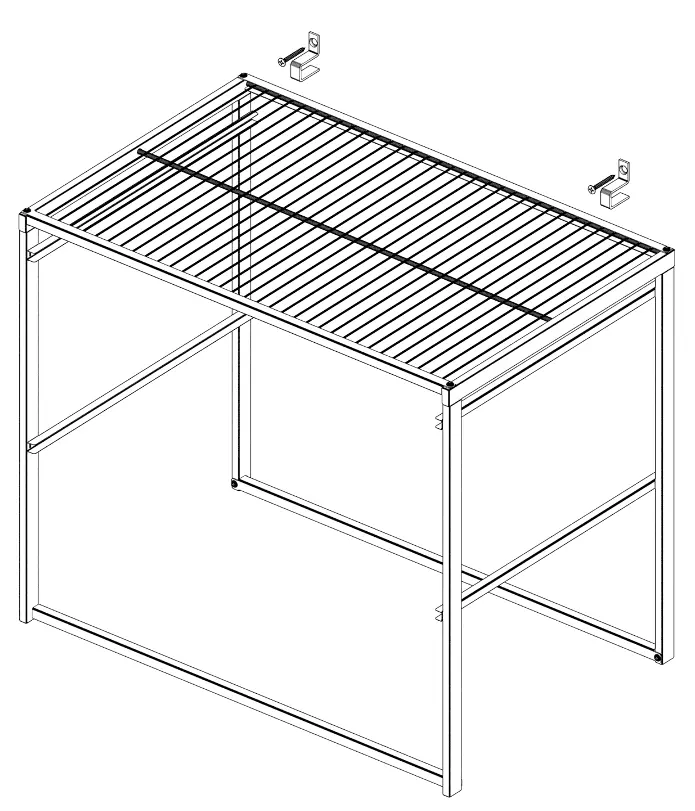
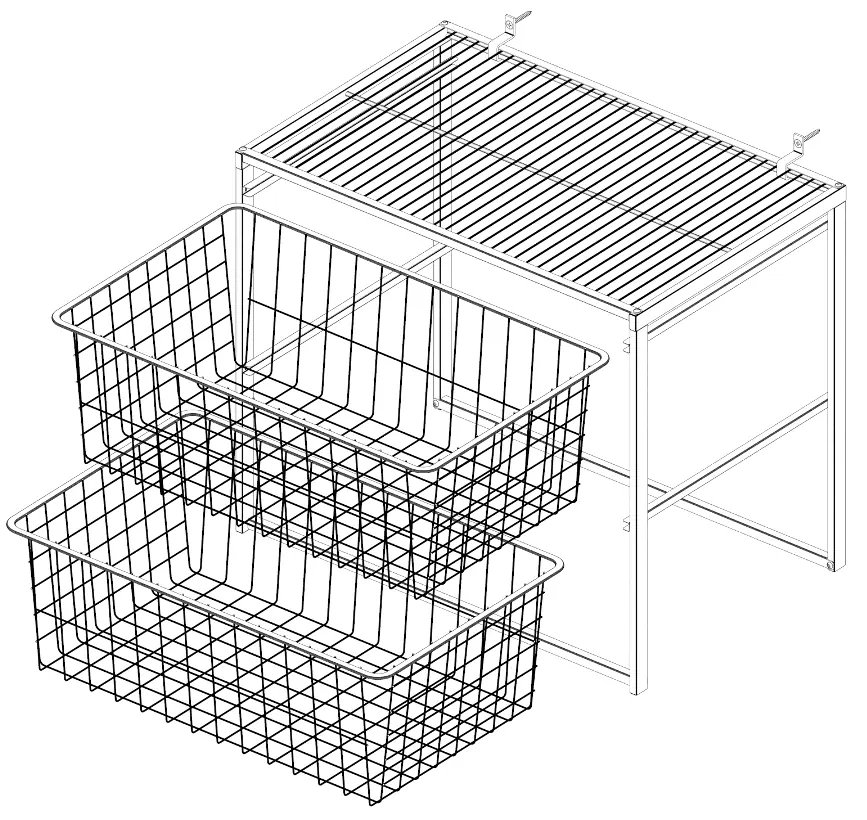
Step 1: Attach Cross Braces and Wire Shelf
Insert the wire shelf ends into the side panel holes. Secure the cross braces using the 10 mm machine screws (H3) and the 2.5 mm Allen key (H5). Ensure the lower cross braces are oriented with the opening facing down.
Step 2: Attach Side Panel
Attach the second side panel to the wire shelf and cross braces using the remaining 10 mm machine screws (H3) and the Allen key (H5).
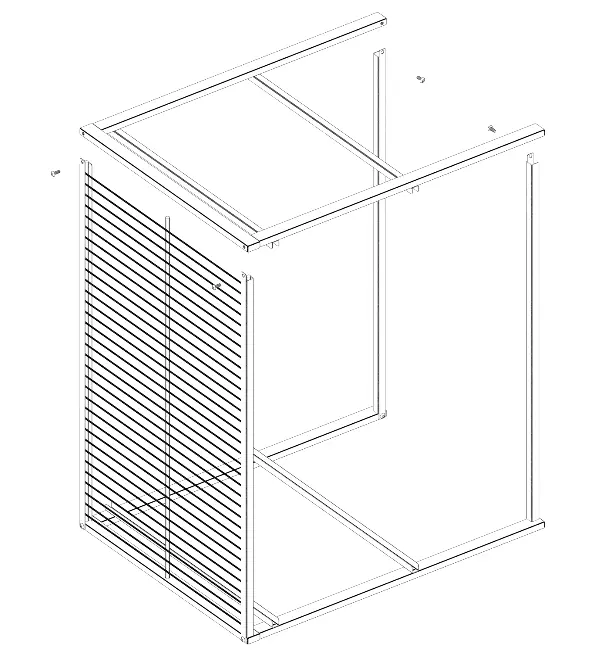
Step 3: Mount Unit to Wall
Attach the wall brackets (H2) to the unit through the wire shelf and around the cross braces. Mount the unit to the wall by fastening the screws (H1) into the wall studs.
Step 4: Install Baskets
Slide the wire baskets into the slide channels located on the side panels.
Step 5: Attach Channel Stops
Clip the channel stops (H4) to the basket slides and baskets at the rear end of each side panel, between the last two basket wires. Ensure the long ends of the channel stops are on the bottom.
Weight Limits
- Shelf: 30 lbs (13.6 kg) when evenly distributed.
- Drawer: 7.5 lbs (3.4 kg) when evenly distributed.
Manufacturer information
ClosetMaid
Practical help
Common problems
Unit is unstable or tips over
Ensure the unit is secured individually to a wall stud using the provided wall brackets and screws.
Shelf or drawer bowing
The unit is overloaded. Remove items to ensure the weight is within the specified limits (30 lbs for shelf, 7.5 lbs for drawer).
Before use
- Check all parts against the contents list
- Ensure you have a drill for wall mounting
- Protect your work surface during assembly to prevent scratching
- Verify wall stud location before mounting
Specs in practice
- Shelf Weight Limit
- 30 lbs (13.6 kg) maximum when evenly distributed
- Drawer Weight Limit
- 7.5 lbs (3.4 kg) maximum when evenly distributed
Images and diagrams
- Step 1-2: Frame assembly showing connection of side panels, cross braces, and shelf
- Step 3: Wall mounting detail showing bracket placement on studs
- Step 4-5: Basket installation and channel stop placement
Model compatibility
- Not designed for wall hanging (must be floor-mounted)
- Do not stack units unless specifically designed for it

Manual page author
David Miller
Documentation analyst
Organizes user manual content into clear summaries, with attention to model details, product context, and everyday usability.