Furniture / Closet Organizers
Assembly Instructions for ClosetMaid 2-Cube Organizer
A comprehensive assembly and installation guide for the ClosetMaid 2-Cube Organizer. This manual includes a complete parts list, step-by-step assembly instructions, and critical safety information regarding wall-mounting to prevent...
Quick answers from the manual
Quick answer
- This manual provides assembly and wall-anchoring instructions for the ClosetMaid 2-Cube Organizer. It is critical to anchor the unit to a wall stud to prevent tipping. p. 1, 8
Key actions
- Assemble the frame using the provided hex screws and dowels. p. 5, 6, 7
- Anchor the unit to a wall stud using the provided L-brackets. p. 8
Problems and fixes
Unit tipping hazard
Install the provided tip-over restraint (L-bracket) to a wall stud.
p. 3, 8Where to find it in the PDF
- Safety Precautions p. 2, 3
- Parts List p. 4
- Assembly Steps p. 5, 6, 7
- Wall Mounting p. 8
Table of contents
Manual images
Click an image to enlargeQuick Guide
This document provides the necessary steps to assemble and safely install your ClosetMaid 2-Cube Organizer. Important: All units must be fastened to a wall to prevent tipping. Do not overload the unit; if shelves or panels bow, the unit is overloaded. Always unload the unit before moving it.
Parts and Hardware
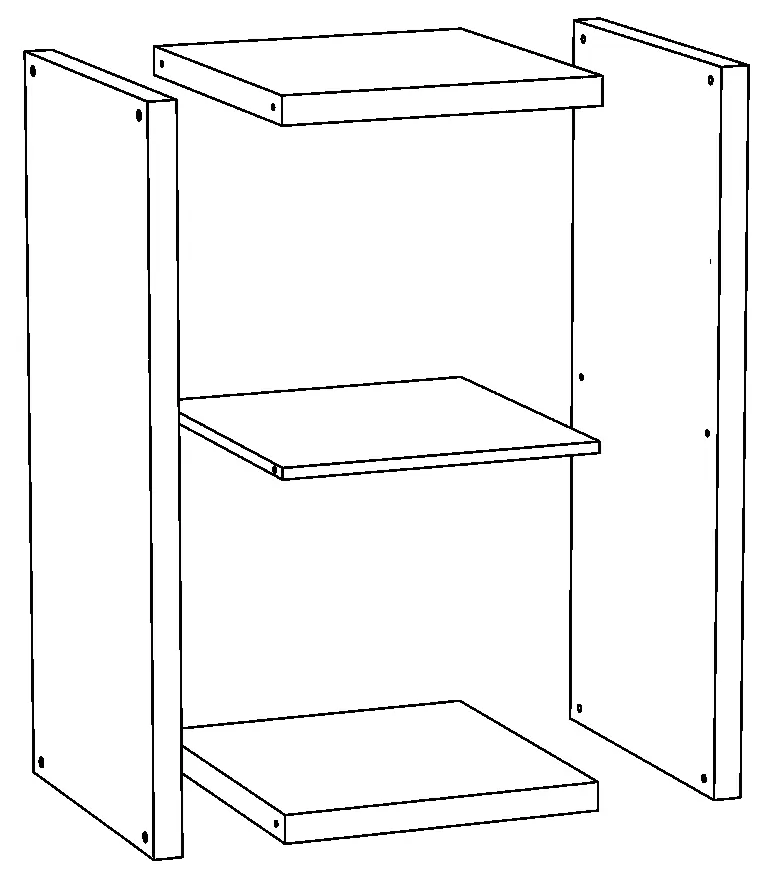
Before beginning, ensure you have all the following components:
- Product Panels: 2 Side Panels, 2 Top/Bottom Panels, 1 Divider Panel.
- Hardware: 4 Dowels, 8 Hex Screws, 2 L-Bracket Screws (#10 x 1/2"), 2 Wall Screws (#10 x 1 1/2"), 2 L-Brackets, Hardware Stickers, and an Allen Wrench.
Assembly Instructions
Follow these steps to assemble your organizer:

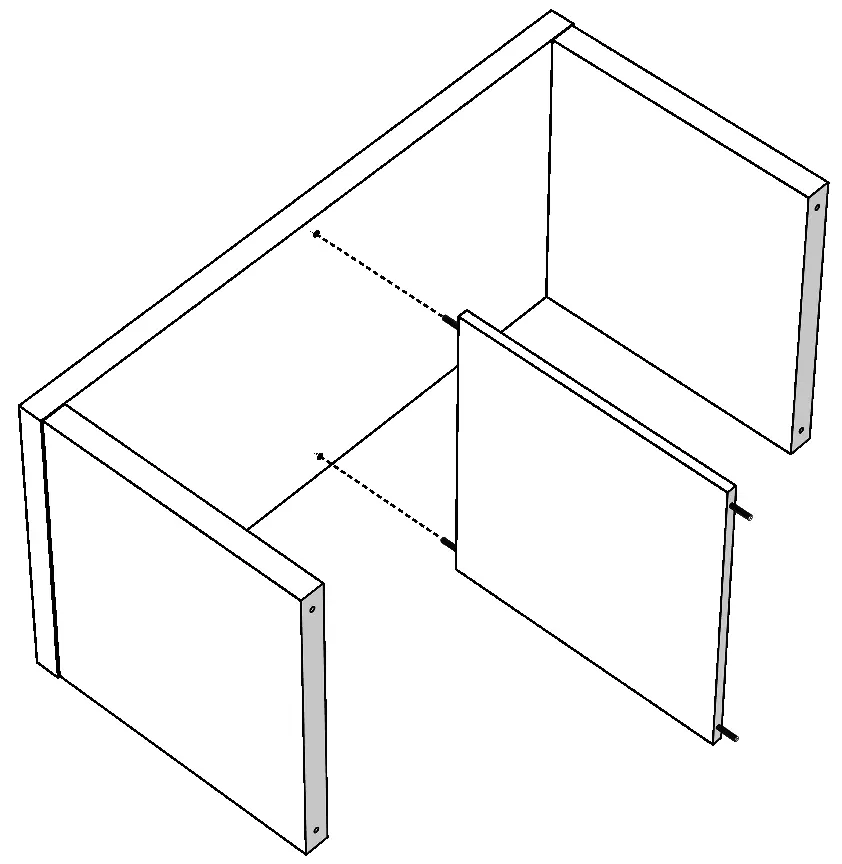
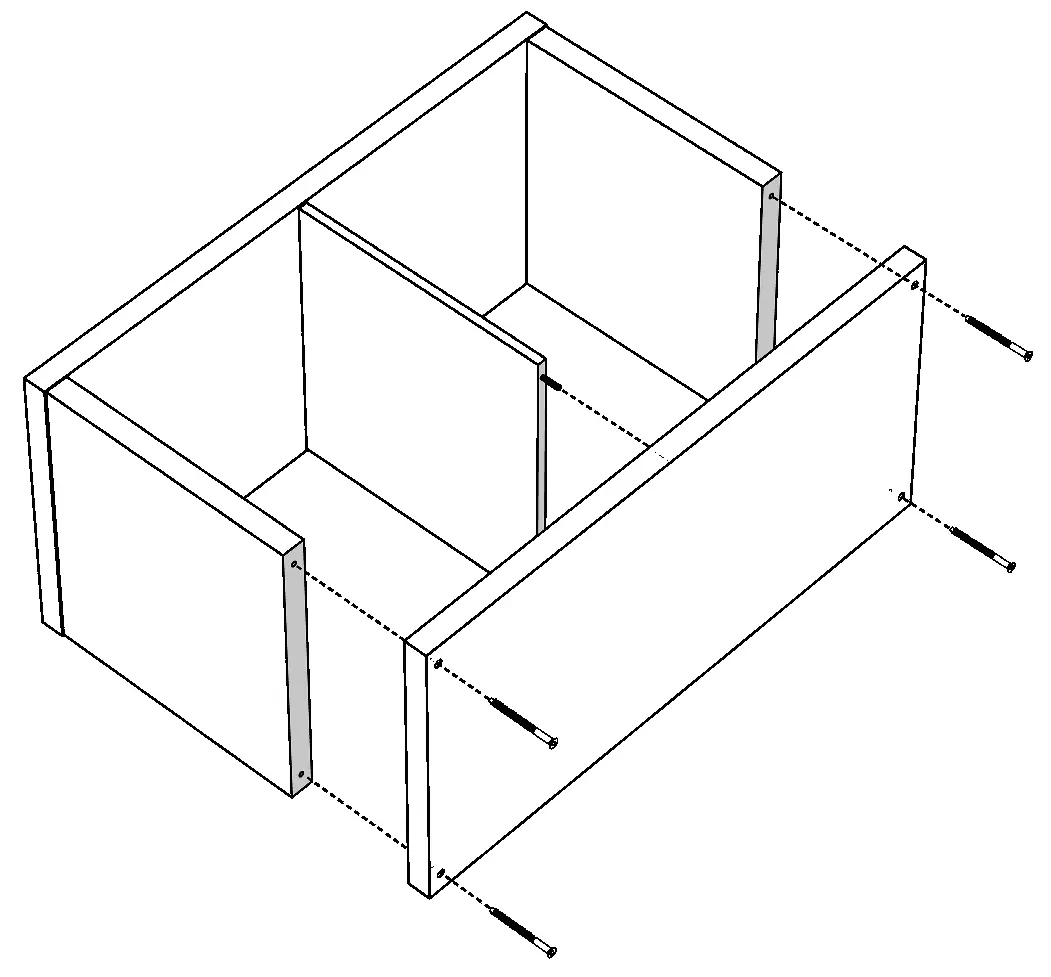
- Step 1: Secure each side panel to the top and bottom panels using the provided Hex Screws.
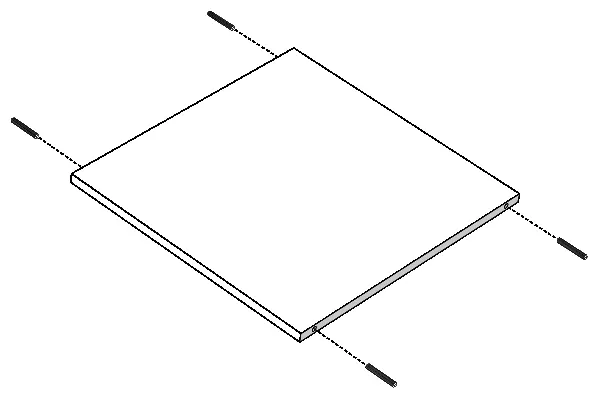
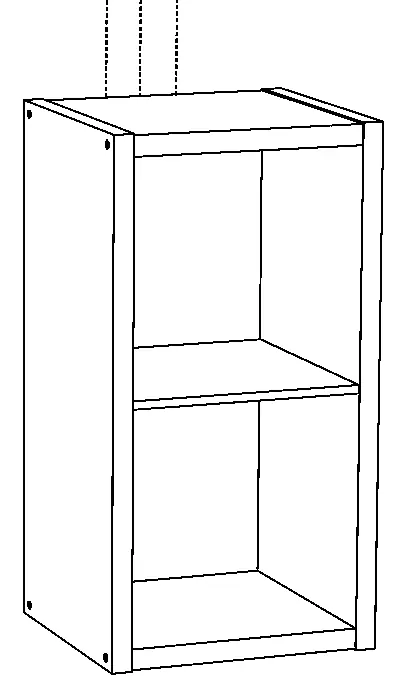
- Step 2: Connect the divider panel to the center of the unit using the provided dowels.
- Step 3: Secure the top and bottom panels to the divider and apply hardware stickers over the exposed screw heads.
Wall Mounting
Warning: Serious or fatal crushing injuries can occur from furniture tip-over. All units must be fastened to a wall.
- Align the unit with a wall stud.
- Place the screw hole end of the L-bracket against the wall stud.
- Use the 1 1/2" wall screw to secure the L-bracket to the wall.
- Use the 1/2" screw to secure the L-bracket to the top panel. The L-bracket must be mounted no more than 1 1/2" from the edge of the panel.
Safety Precautions
- Do not climb or step on the unit.
- Do not use as a television stand.
- Do not stack units.
- Do not hang the unit on the wall (it is not designed for wall-hanging, only wall-anchoring).
- Place heavy items on lower shelves.
Manufacturer information
ClosetMaid
Practical help
Common problems
Unit is unstable or tips over
The unit must be fastened to a wall stud using the provided L-brackets and wall screws.
Shelves are bowing or bending
The unit is overloaded. Remove items immediately to prevent collapse.
Before use
- Verify all parts and hardware are present according to the parts list.
- Clear a workspace and protect the floor/table surface.
- Ensure you have a drill or screwdriver for wall mounting.
- Identify a wall stud for secure mounting.
Images and diagrams
- The manual provides exploded-view diagrams for each assembly step, showing the alignment of panels and the placement of screws.
- The final step illustrates the correct positioning of the L-bracket against a wall stud.
Model compatibility
- Not designed for wall-hanging; must be floor-standing and anchored to the wall.
- Not intended for use as a TV stand.

Manual page author
Emily Carter
User documentation editor
Prepares concise manual descriptions and highlights the most useful setup, operation, and maintenance information for readers.