Furniture / Home Furnishing
Assembly Instructions for Coaster 105072 Side Chair and 115091 Dining Table
Quick assembly guide for Coaster 105072 Side Chair and 115091 Dining Table, including parts identification, hardware lists, and step-by-step assembly procedures.
Table of contents
Manual images
Jump to the sectionQuick guide from the manual
This document provides assembly instructions for two separate products: the 105072 Side Chair and the 115091 Dining Table. Before beginning, ensure all parts and hardware are present and sorted by size. Follow the numbered steps in sequence to ensure a fast and easy assembly. These products are intended for home use only and are not suitable for commercial establishments.
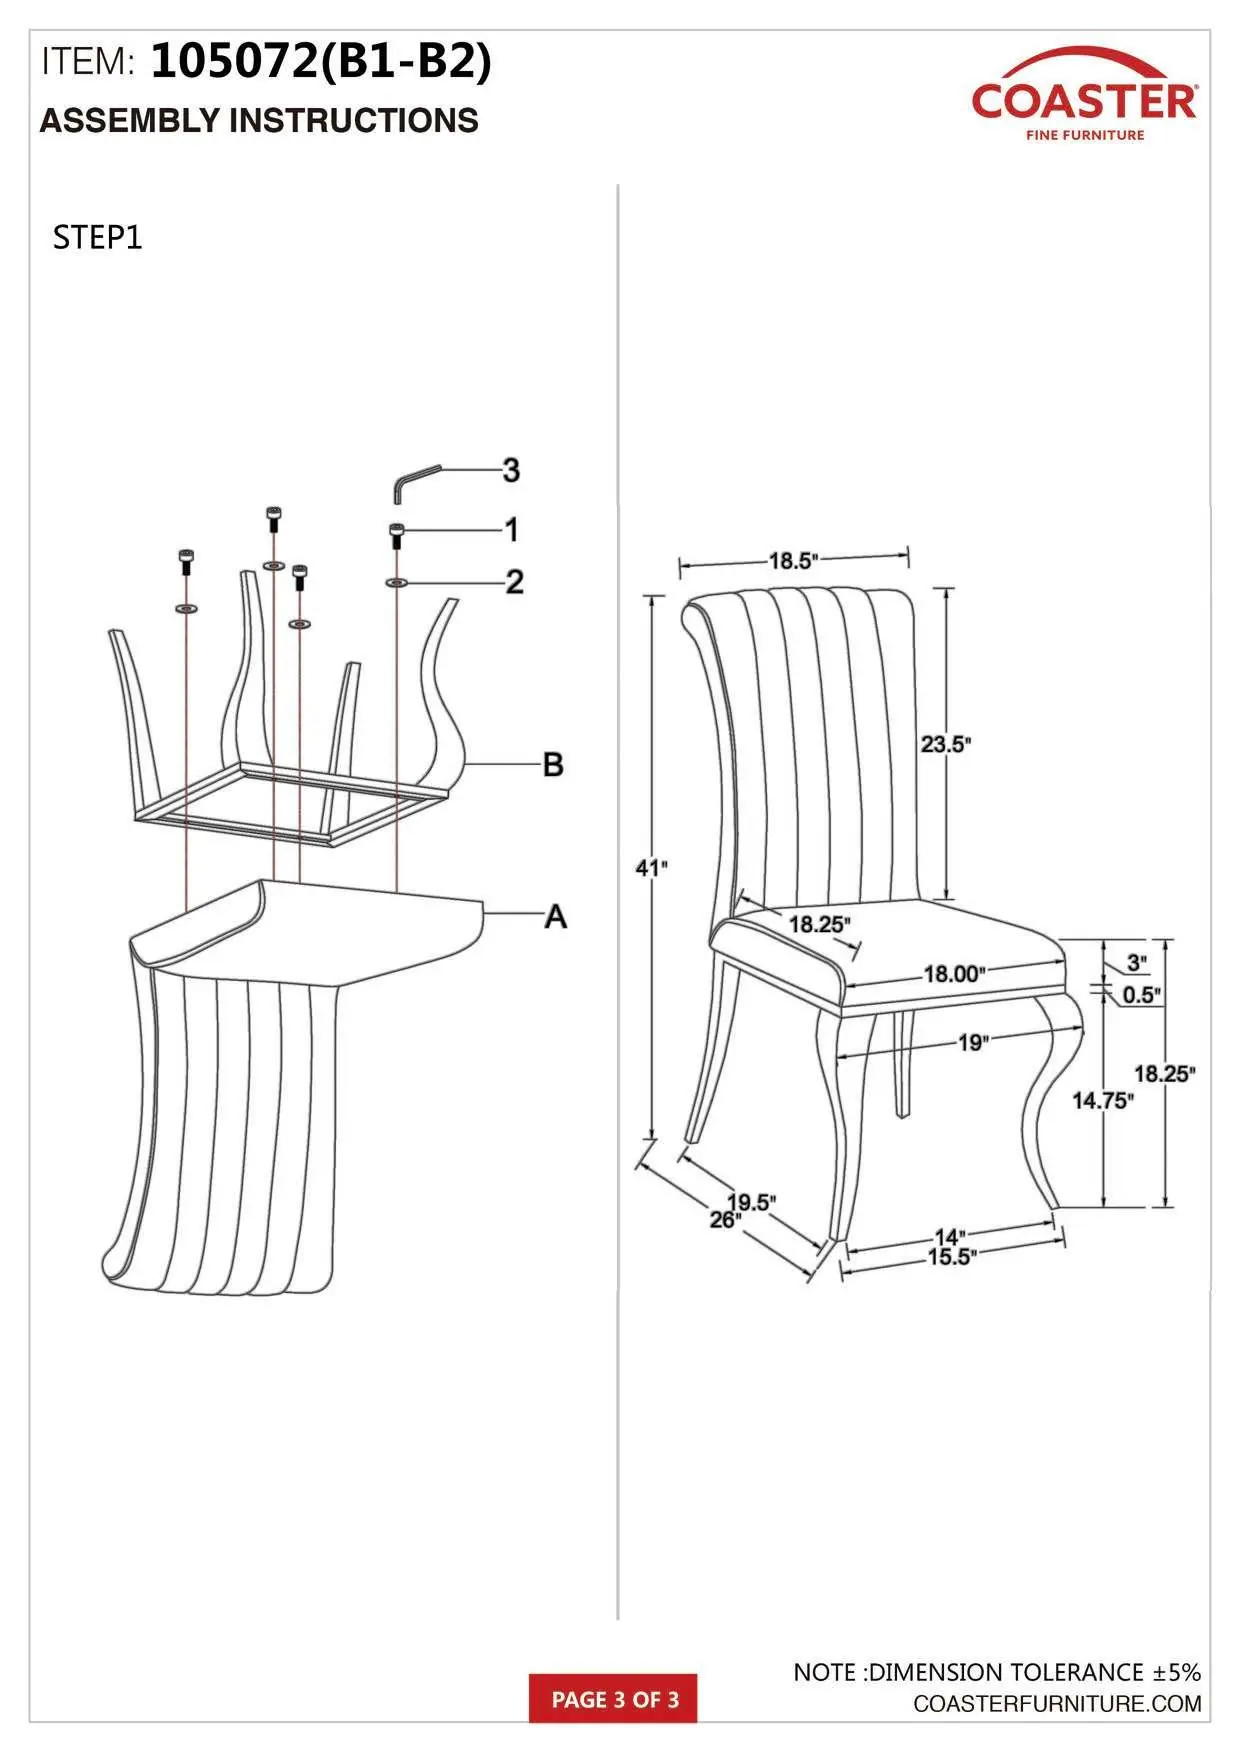
Assembly of 105072 Side Chair
Parts Identification:
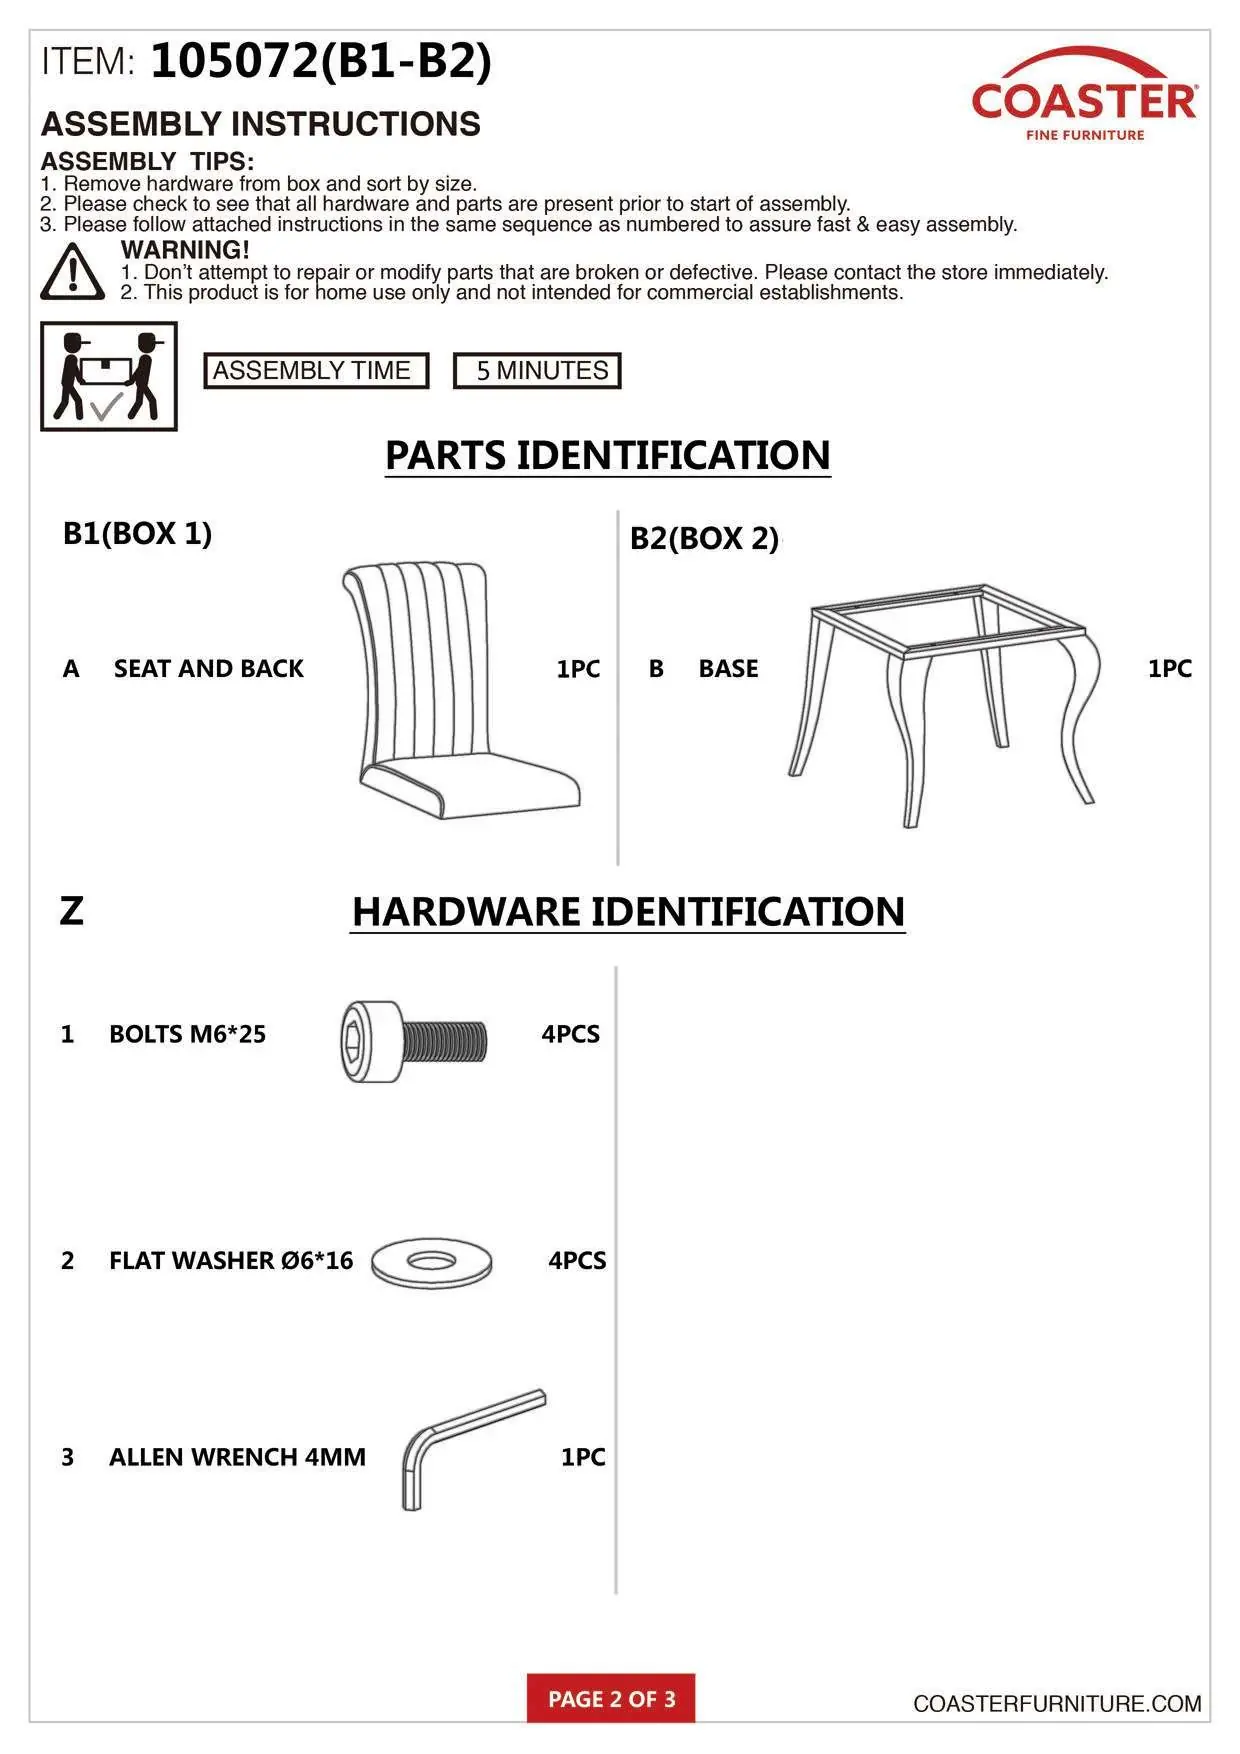


- A: Seat and Back (1pc)
- B: Base (1pc)
Hardware Identification:
- 1: Bolts M6*25 (4pcs)
- 2: Flat Washer Ø6*16 (4pcs)
- 3: Allen Wrench 4mm (1pc)
Assembly Steps:
- Place the Seat and Back (A) upside down on a clean, protected surface.
- Align the Base (B) with the holes on the Seat and Back.
- Secure the base using the Bolts (1) and Flat Washers (2) with the provided Allen Wrench (3).
Assembly of 115091 Dining Table
Parts Identification:
- A: Glass (1pc)
- B: Top Frame (1pc)
- C: Leg (4pcs)
Hardware Identification:
- 1: Bolts M10*12 (12pcs)
- 2: Flat Washer Ø10*20 (12pcs)
- 3: Allen Wrench 8mm (1pc)
- 4: Glass Rest (8pcs)
Assembly Steps:
- Place the Top Frame (B) upside down on a soft surface.
- Attach each Leg (C) to the corners of the Top Frame using the Bolts (1) and Flat Washers (2) with the Allen Wrench (3).
- Once the frame is assembled, turn it upright.
- Place the Glass Rests (4) onto the frame, then carefully position the Glass (A) on top.
Safety and Maintenance
Do not attempt to repair or modify parts that are broken or defective. If you encounter any issues with the hardware or parts, contact the store immediately. Ensure all bolts are tightened securely during assembly.
Manufacturer information
Coaster Fine Furniture
Practical help
Common problems
Missing hardware or parts
Check all boxes thoroughly. Hardware packs are located in specific boxes (105072B2 for the chair, 115091B3 for the table). If parts are missing or damaged, contact the store immediately.
Difficulty during assembly
Ensure you are following the steps in the exact numbered sequence provided in the manual.
Before use
- Unpack all components and sort hardware by size.
- Verify all parts listed in the Parts Identification section are present.
- Ensure you have a clean, soft surface to prevent scratching furniture finishes.
- Check that you have the correct Allen Wrench (4mm for chair, 8mm for table).
Specs in practice
- Assembly Time
- Estimated time is 5 minutes for the chair and 10 minutes for the table.
- Dimension Tolerance
- All dimensions provided in the diagrams have a tolerance of ±5%.
Images and diagrams
- The diagrams illustrate the orientation of parts and the specific placement of bolts and washers.
- The chair diagram shows the base being attached to the underside of the seat.
- The table diagram shows the legs being bolted to the frame before the glass top is added.
Model compatibility
- Products are for home use only.
- Not intended for commercial establishments.

Manual page author
Michael Turner
Technical manual editor
Reviews PDF manuals for structure, safety notes, and practical product details so readers can find the right information quickly.