Computers / Laptops
Owner's Manual for Dell Inspiron 14 Plus 7430
Comprehensive owner's manual for the Dell Inspiron 14 Plus 7430. Includes setup instructions, hardware specifications, port layouts, component replacement guides, BIOS settings, and troubleshooting procedures.
Table of contents
Manual images
Click an image to enlargeQuick Guide from the Manual
This manual provides essential information for setting up, maintaining, and troubleshooting your Dell Inspiron 14 Plus 7430. Key procedures include connecting the power adapter, performing the initial Windows setup, and accessing BIOS settings. For hardware maintenance, the manual covers the removal and installation of Customer Replaceable Units (CRUs) and Field Replaceable Units (FRUs), such as the battery, solid-state drive, and fans.
Views of the Computer
The Inspiron 14 Plus 7430 features various ports and components for connectivity and interaction:
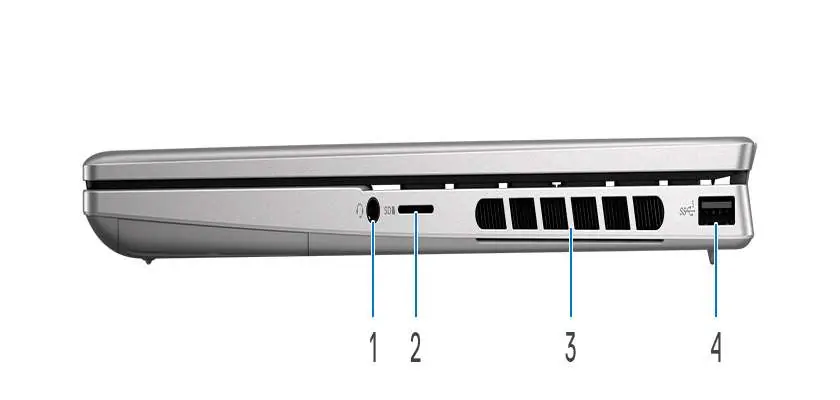

- Right Side: Includes a universal audio jack, microSD-card slot, air vents, and a USB 3.2 Gen 1 port.
- Left Side: Features the power-adapter port, air vents, HDMI 2.0 port, USB 3.2 Gen 1 port, and a Thunderbolt 4 port with Power Delivery and DisplayPort.
- Top: Contains the keyboard, power button (with optional fingerprint reader), and precision touchpad.
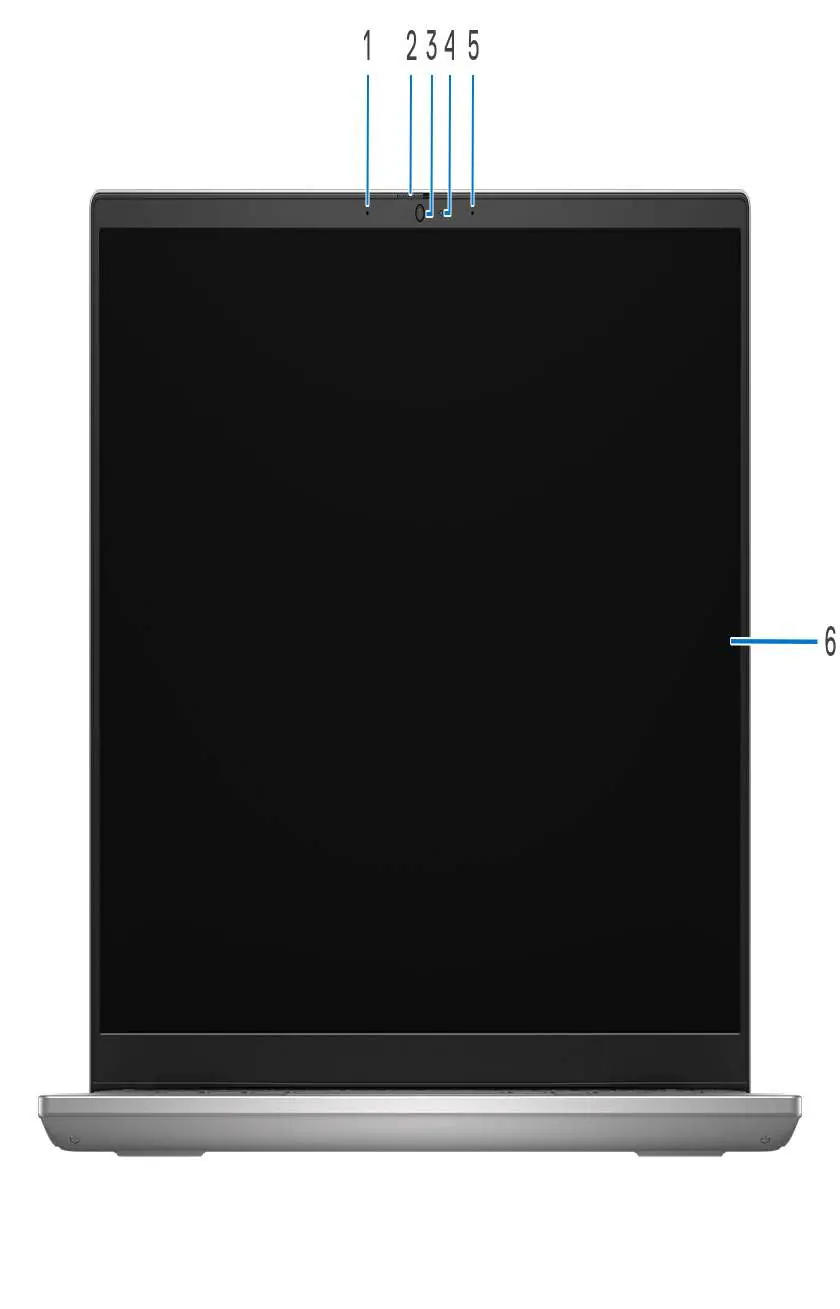
- Front: Houses the camera, microphones, privacy shutter, and display panel.
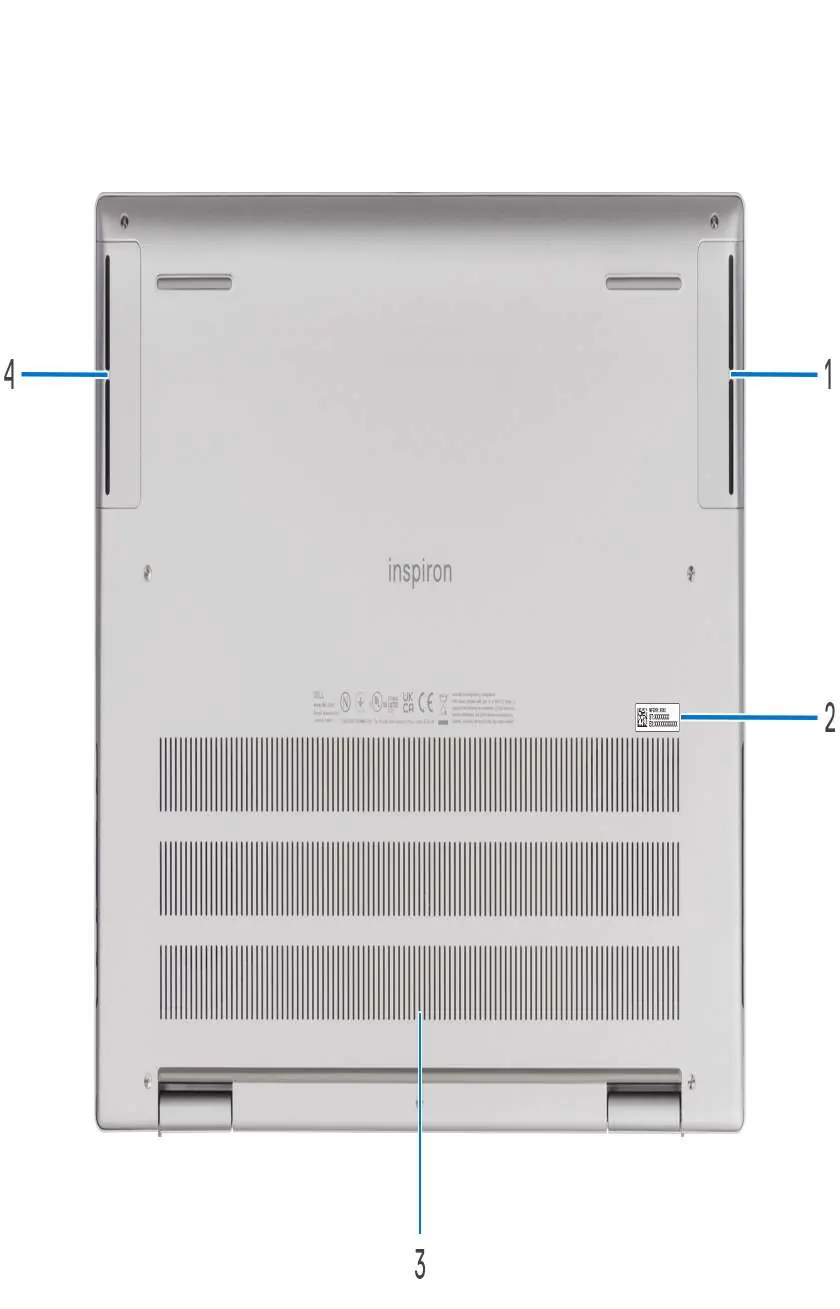
- Bottom: Includes speakers, air vents, and the Service Tag label.
Setting Up Your Computer
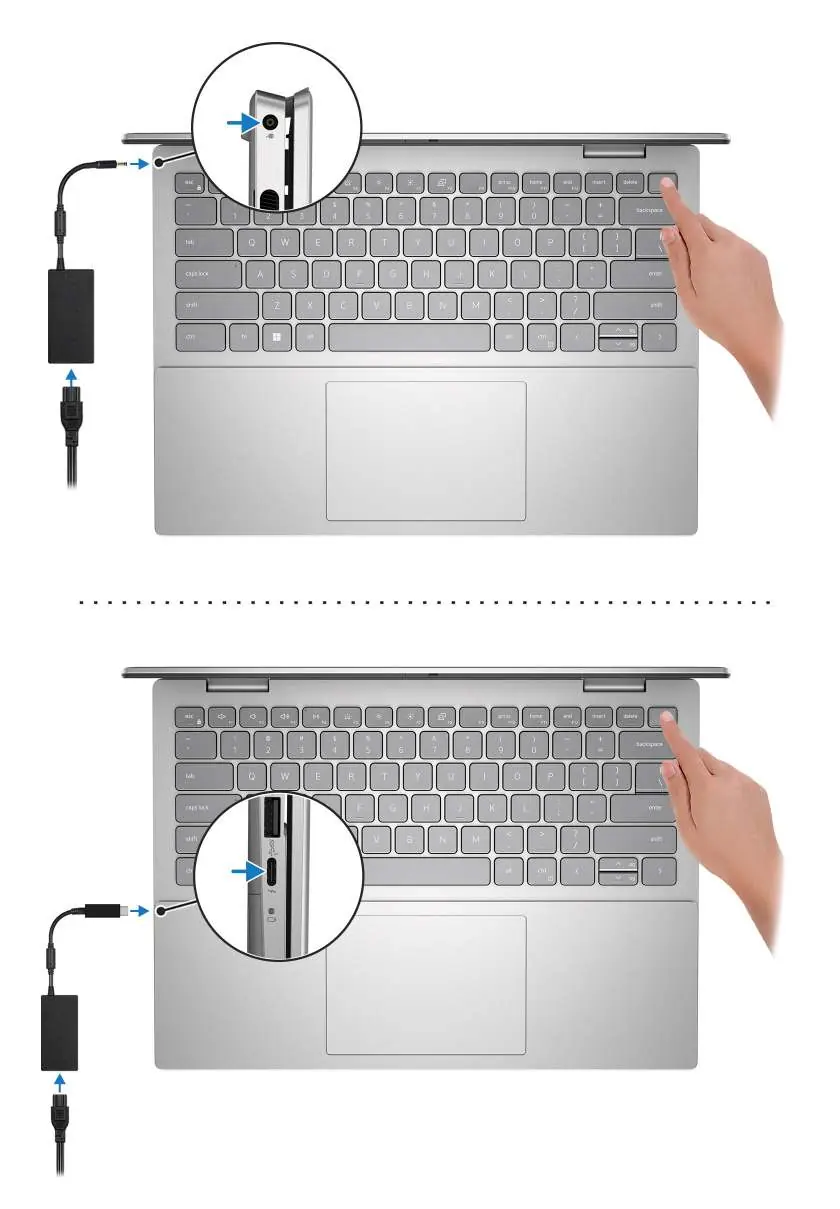
- Connect the power adapter to the computer and a power outlet.
- Press the power button to turn on the computer.
- Follow the on-screen instructions to complete the Windows setup.
- Connect to a network to ensure Windows updates are installed.
Specifications
The laptop supports 13th Generation Intel Core processors and various memory configurations (LPDDR5/LPDDR5x). Storage options include M.2 2230/2280 solid-state drives. The display is a 14-inch 2.5K panel with Dolby Vision and ComfortView Plus technology to minimize blue light.
Working Inside Your Computer
Before performing any internal hardware maintenance, ensure you follow safety precautions, including:
- Disconnecting all power sources.
- Using an Electrostatic Discharge (ESD) field service kit to prevent damage to sensitive components.
- Transporting sensitive components in appropriate packaging.
Troubleshooting
If you encounter issues, utilize the following built-in tools:
- SupportAssist: Proactively identifies hardware and software issues.
- M-BIST: Built-in self-test for system diagnostics.
- L-BIST: LCD power rail test.
- LCD BIST: LCD Built-in Self Test.
- System-diagnostic lights: Use these to identify specific hardware failures.
Manufacturer information
Dell Inc.
Practical help
Common problems
Battery not charging or low charge
Ensure the power adapter is connected. If the status light is solid amber, the battery charge is low or critical (<10%).
Overheating or performance issues
Check air vents for dust or obstructions. Keep vents clear to ensure proper ventilation.
Display issues
Run the LCD Built-in Self Test (BIST) to diagnose potential display hardware failures.
Before use
- Connect the power adapter to charge the battery.
- Press the power button to turn on the device.
- Follow on-screen Windows setup instructions.
- Connect to a secure wireless network for updates.
- Enter contact details on the Support and Protection screen.
Specs in practice
- Thunderbolt 4
- Supports USB4, DisplayPort 1.4, and Power Delivery for external displays and high-speed data.
- ComfortView Plus
- Built-in hardware-based low blue light technology enabled at the factory.
- M.2 2230/2280
- Internal slot type for PCIe solid-state drives.
Images and diagrams
- Right side: Audio jack, microSD slot, air vents, USB 3.2 Gen 1.
- Left side: Power-adapter port, air vents, HDMI 2.0, USB 3.2 Gen 1, Thunderbolt 4.
Model compatibility
- Supports Windows 11 Pro, Pro National Academic, and Home.
- Thunderbolt 4 supports up to two 4K displays or one 8K display.

Manual page author
Michael Turner
Technical manual editor
Reviews PDF manuals for structure, safety notes, and practical product details so readers can find the right information quickly.