Computers / Laptops
Owner's Manual for DELL Precision 3480 Mobile Workstation
Comprehensive owner's manual for the DELL Precision 3480, covering system setup, hardware specifications, component replacement procedures, BIOS configuration, and troubleshooting steps.
Table of contents
Manual images
Jump to the sectionQuick guide from the manual
This document provides essential information for operating and maintaining the DELL Precision 3480. It includes detailed hardware specifications, instructions for setting up the device, and procedures for replacing internal components. Always consult the safety instructions before opening the computer chassis.
System setup
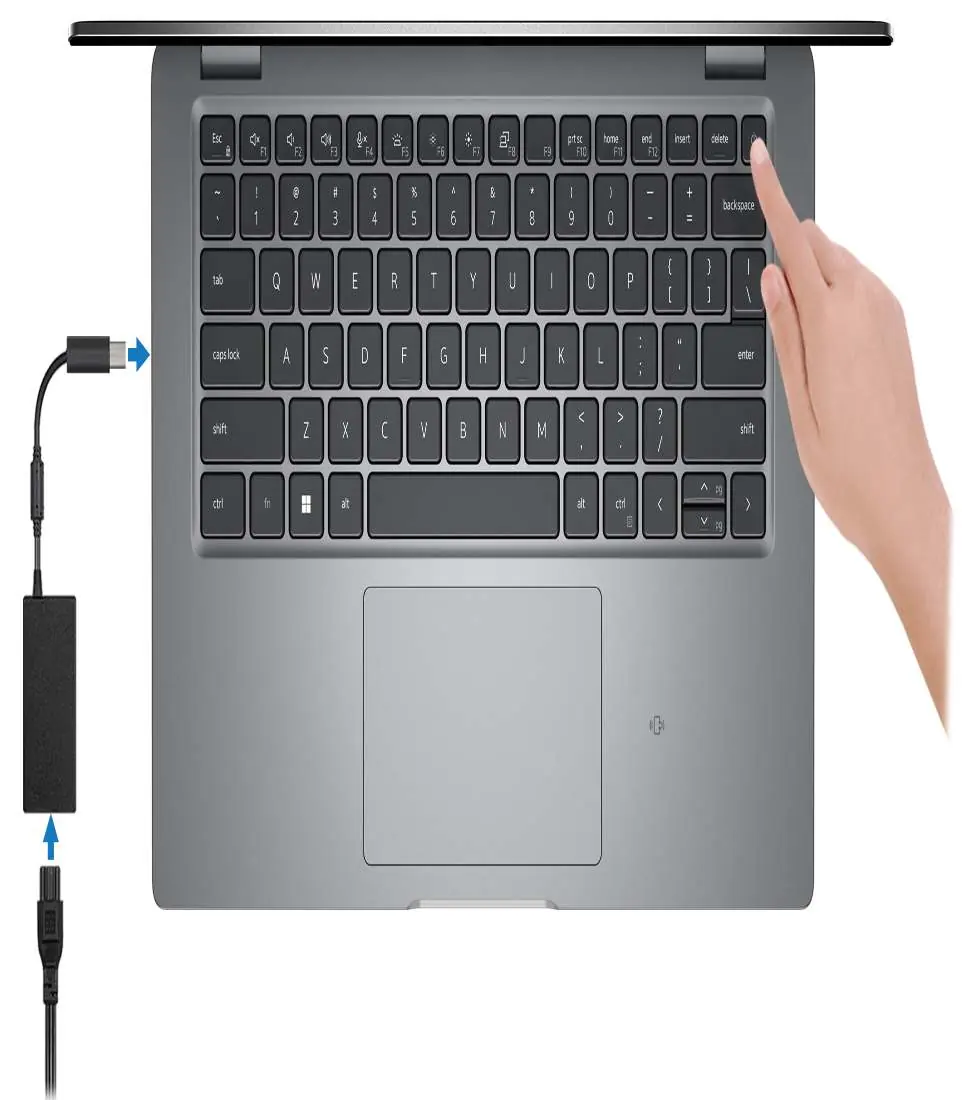
To set up your computer, connect the power adapter and press the power button. Follow the on-screen instructions to complete the operating system configuration for Windows or Ubuntu. It is recommended to connect to a network during setup to receive the latest updates.
Hardware overview
The Precision 3480 features various ports and indicators:

- Right side: Universal audio jack, USB 3.2 Gen 1 port with PowerShare, HDMI port, and security-cable slot.
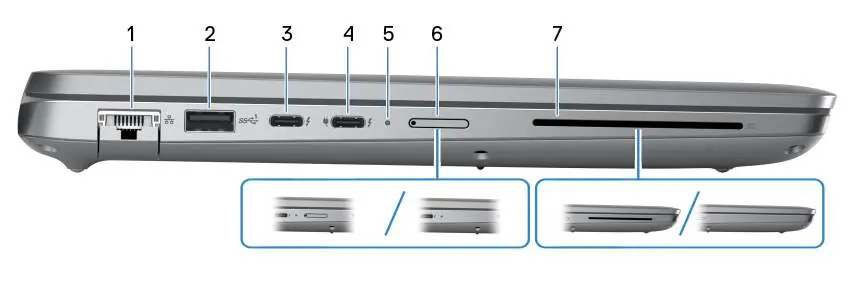
- Left side: Network port, USB 3.2 Gen 1 port, two Thunderbolt 4 ports, power/battery status light, nano-SIM slot, and optional smart-card reader.
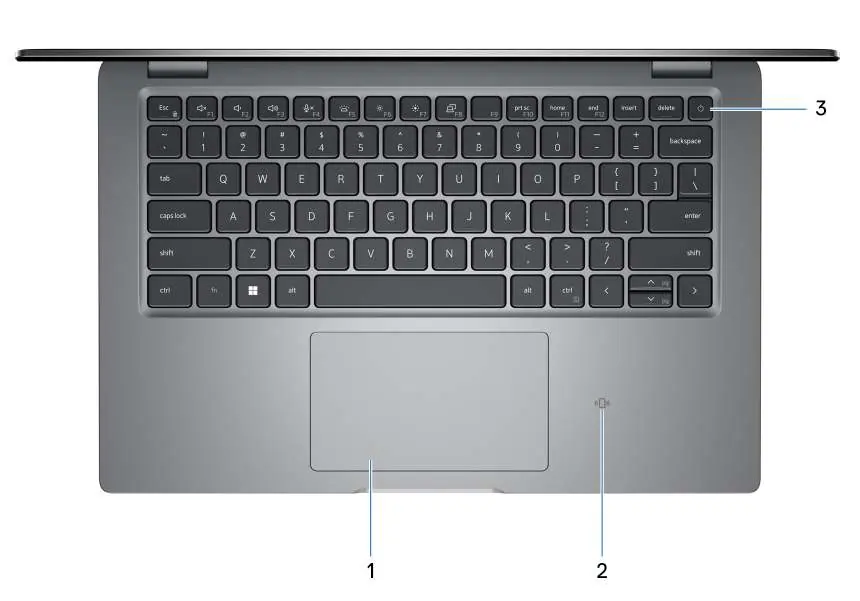
- Top: Touchpad, optional NFC/contactless smart card reader, and power button with optional fingerprint reader.
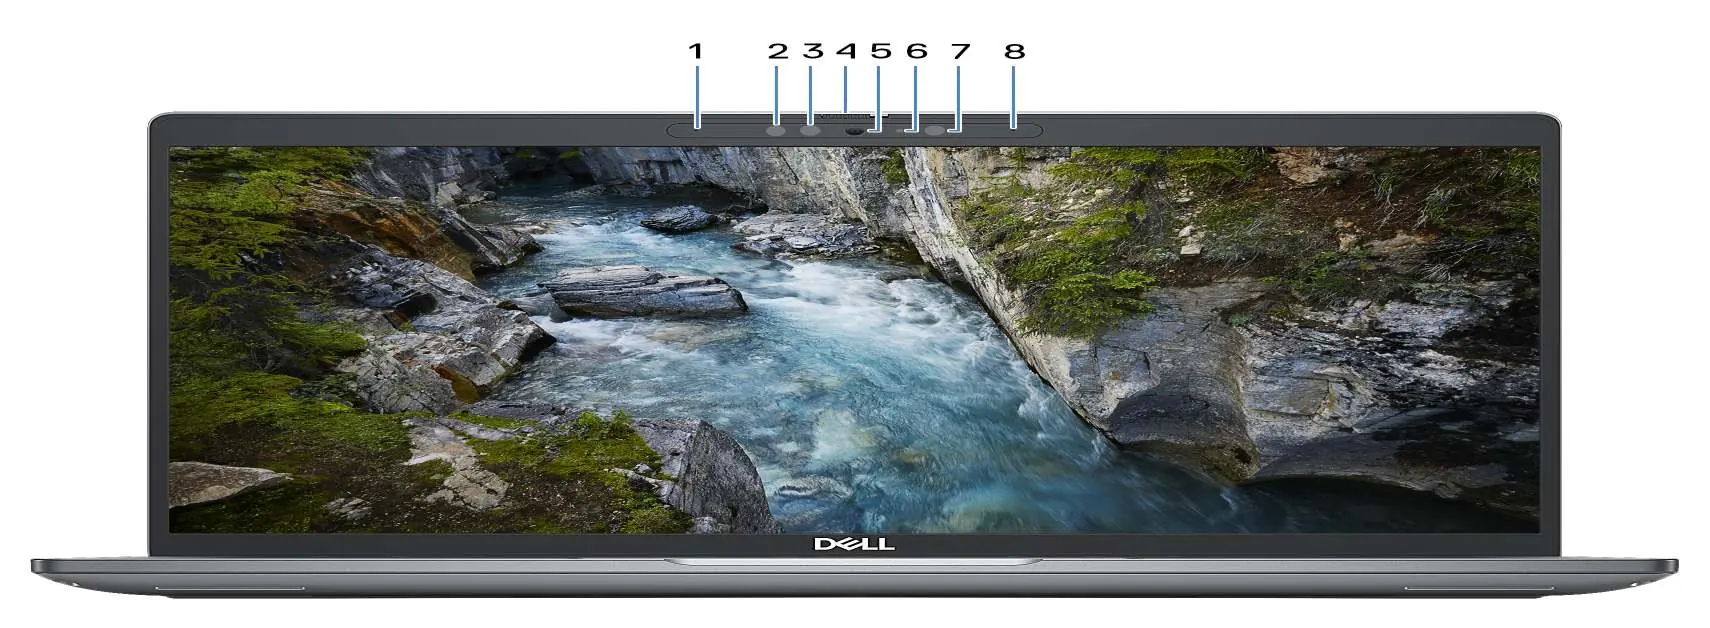
- Display: Integrated microphones, optional infrared camera with shutter, and ambient-light sensor.
Battery and status light
The power and battery-status light indicates the system state:
- Solid white: AC adapter connected, battery charging.
- Solid amber: Battery charge is low or critical.
- Off: Battery fully charged or system in shutdown.
Component replacement
The manual provides detailed steps for removing and installing Customer Replaceable Units (CRUs) and Field Replaceable Units (FRUs), including the SIM card tray, base cover, memory modules, solid-state drives, wireless cards, battery, and cooling fan. Always follow electrostatic discharge (ESD) protection guidelines when working inside the computer.
BIOS and troubleshooting
Access the BIOS setup program to configure system options, update the BIOS, or manage passwords. If you encounter issues, use the built-in diagnostics tools such as SupportAssist Pre-boot System Performance Check or the Built-in Self-Test (BIST) for the LCD and system components.
Manufacturer information
Dell Inc.
Practical help
Common problems
Battery not charging when computer is off
Ensure the power adapter is connected and the PowerShare feature is enabled in the BIOS setup program.
System not turning on
Connect the power adapter, as the battery may be in power-saving mode during shipment. Perform a hard reset by draining residual flea power.
Fingerprint reader not working
Ensure your finger is placed steadily on the power button. Note that models with integrated fingerprint readers do not have a power-status light on the button.
Before use
- Connect the power adapter to the computer.
- Press the power button to turn on the system.
- Follow on-screen instructions to complete OS setup.
- Connect to a network for initial updates.
- Register your product using Dell apps.
Specs in practice
- Thunderbolt 4
- Supports data transfer up to 40 Gbps, dual 4K displays or one 8K display, and power delivery.
- ExpressCharge
- Technology that allows for faster battery charging under specific temperature conditions.
Images and diagrams
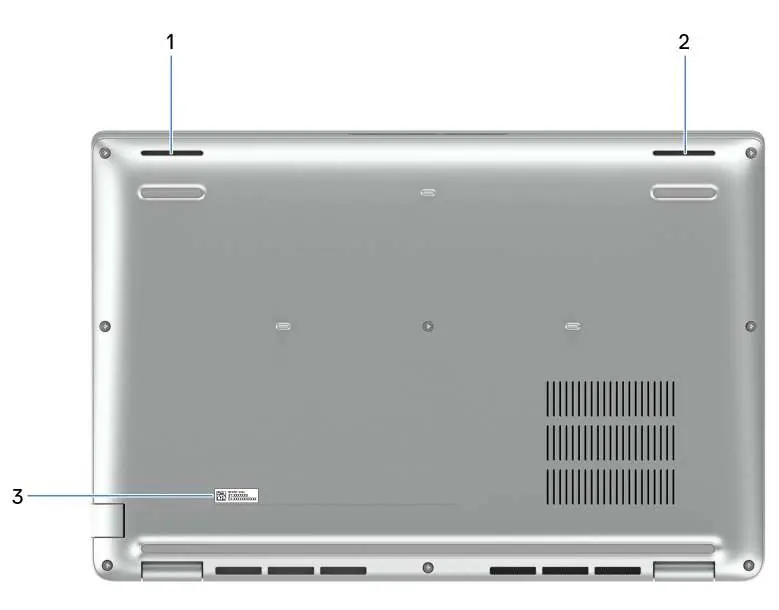
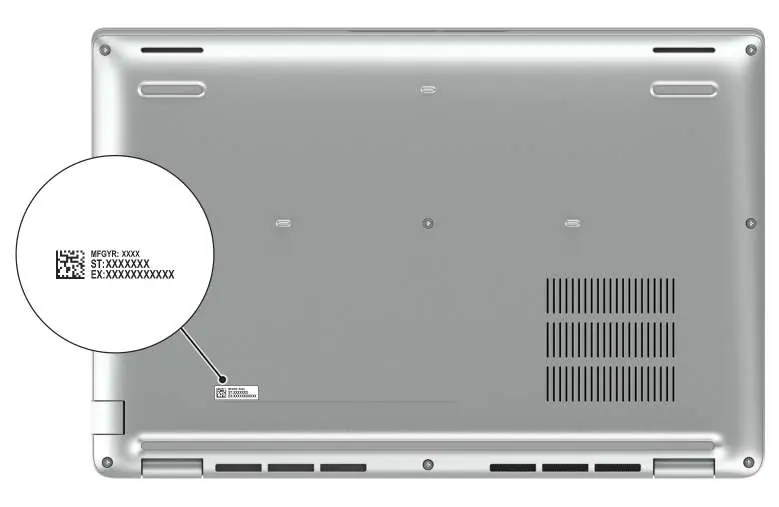
- The manual includes detailed diagrams of the right and left sides of the chassis, identifying all ports and slots.
- Top-down view diagrams illustrate the location of the touchpad, power button, and optional NFC reader.
- Display assembly diagrams show the placement of microphones, camera, and ambient light sensors.
Model compatibility
- Wi-Fi 6E is supported only in regions where it is available; otherwise, Wi-Fi 6 is used.
- The WWAN module is optional and only available on specific configurations.
- Smart-card reader and fingerprint reader are optional features.

Manual page author
Emily Carter
User documentation editor
Prepares concise manual descriptions and highlights the most useful setup, operation, and maintenance information for readers.