Computers / Laptops
User Guide for DELL Precision 5570 Laptop
Quick setup guide and technical specifications for the DELL Precision 5570 laptop, including port descriptions, battery status indicators, and keyboard shortcuts.
Table of contents
Manual images
Jump to the sectionQuick guide from the manual
This document provides essential setup instructions and technical specifications for the DELL Precision 5570. It covers initial configuration, hardware component identification, and system maintenance guidelines.
Set up your Precision 5570
To set up your computer:
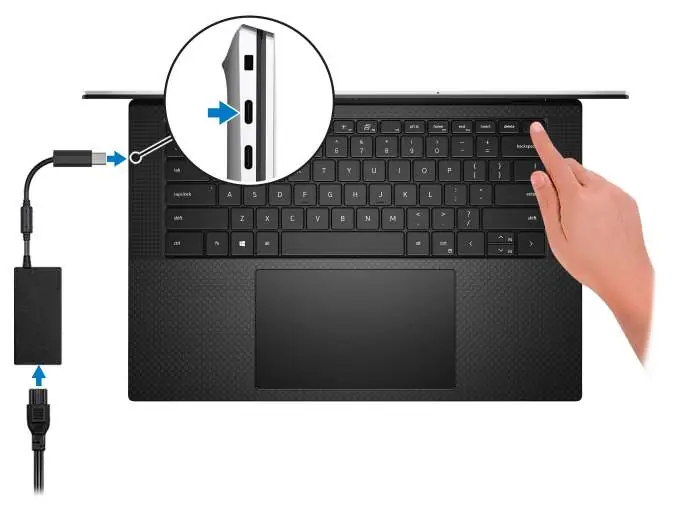
- Connect the power adapter to one of the Thunderbolt 4 (USB4) Type-C ports or the USB 3.2 Gen 2 Type-C port.
- Press the power button to turn on the computer.
- Follow the on-screen instructions to complete the operating system setup (Windows or Ubuntu).
- If the battery is in power-saving mode, ensure the power adapter is connected during the first startup.
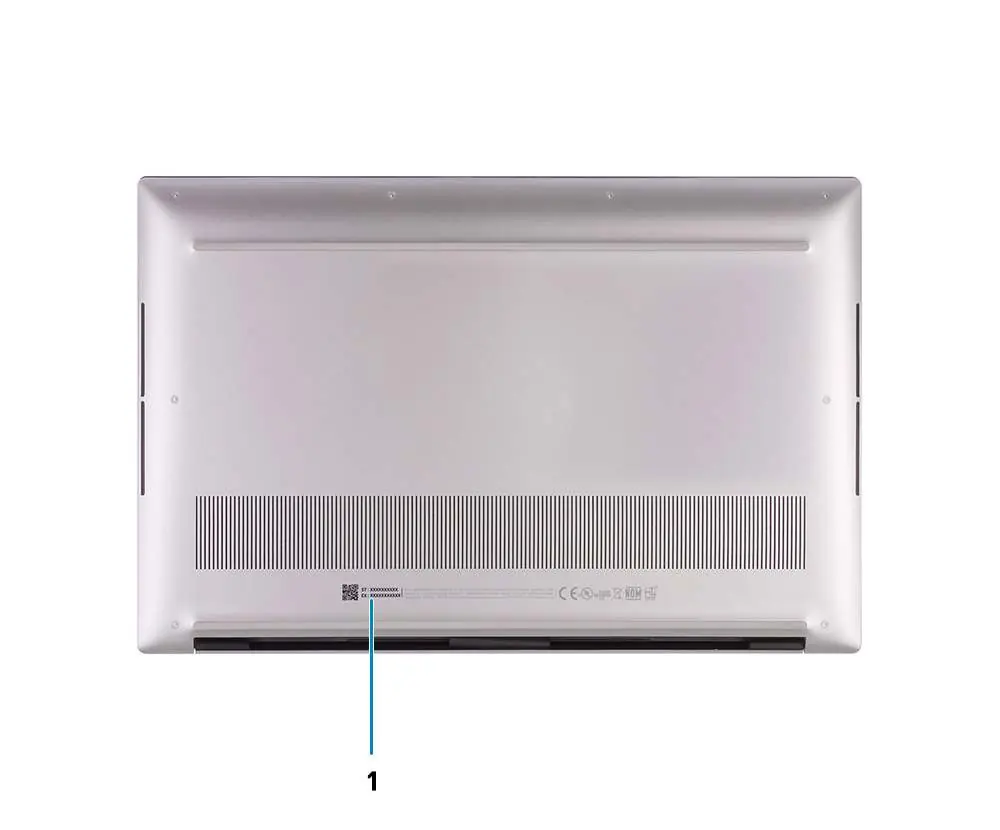
Views of Precision 5570
The laptop features various ports and indicators:
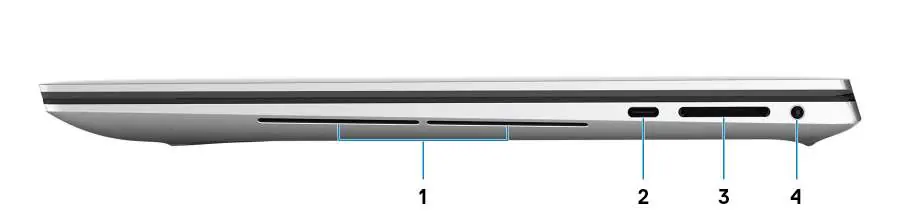

- Right side: Includes a woofer, USB 3.2 Gen 2 (Type-C) port with DisplayPort/Power Delivery, SD-card slot, and a headset port.
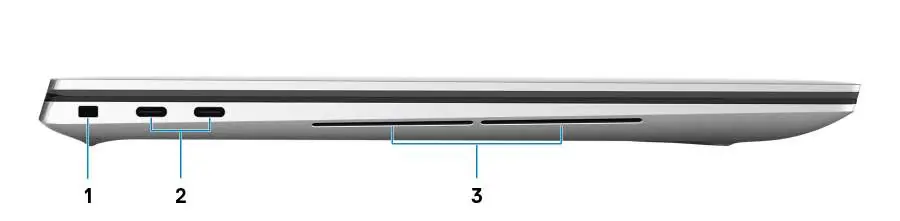
- Left side: Features a wedge-shaped security-cable slot, two Thunderbolt 4 (USB4) Type-C ports with Power Delivery, and a woofer.
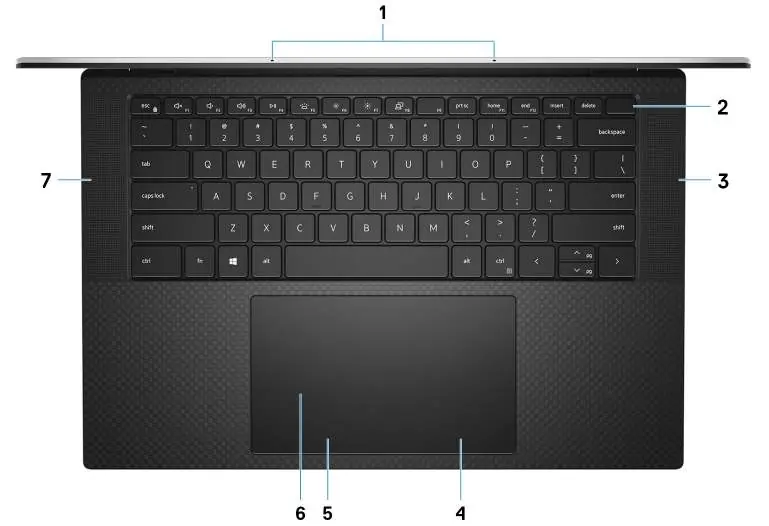
- Top: Contains microphones, a power button with an integrated fingerprint reader, speakers, and a touchpad.
- Display: Equipped with an infrared emitter, ambient-light sensor, RGB-infrared camera, and camera-status light.
Battery Charge and Status LED
The battery status light indicates the charge level:
- Solid white: Power adapter connected, battery > 5% charge.
- Amber: Running on battery, battery < 5% charge.
- Off: Power adapter disconnected or battery fully charged.
Keyboard shortcuts
The F1-F12 keys serve as multimedia controls. Use Fn + Esc to toggle between multimedia functionality and standard function key behavior. Common shortcuts include:
- Fn + F1: Mute audio
- Fn + F2/F3: Decrease/Increase volume
- Fn + F4: Play/Pause
- Fn + F5: Toggle keyboard backlight
- Fn + F6/F7: Decrease/Increase brightness
Safety and Maintenance
To reduce eye strain, use the ComfortView feature, maintain a viewing distance of 20-28 inches (50-70 cm), and take regular breaks. Always operate the device within the specified temperature ranges (0°C to 35°C for operation) to ensure optimal performance.
Manufacturer information
Dell Inc.
Practical help
Common problems
Computer does not turn on
Ensure the power adapter is connected to a USB Type-C port and the battery is charged.
Force shutdown
Press and hold the power button for 10 seconds.
Low battery indicator
If the battery light is solid amber, the battery has less than 5% charge; connect the power adapter.
Before use
- Connect the power adapter to a USB Type-C port.
- Press the power button to initiate startup.
- Follow on-screen prompts for OS configuration.
- Ensure the environment is within 0°C to 35°C for operation.
Specs in practice
- Thunderbolt 4
- Supports up to 40 Gbps data transfer, two 4K displays or one 8K display, and Power Delivery.
Images and diagrams
- The right side features a USB 3.2 Gen 2 Type-C port and an SD-card slot.
- The left side features two Thunderbolt 4 ports and a security lock slot.
- The power button doubles as a fingerprint reader.
Model compatibility
- USB Type-C to DisplayPort adapter is required for DisplayPort devices.
- 40 Gbps-certified cable is required for maximum Thunderbolt 4 performance.
- Dell docking stations are compatible via Thunderbolt 4 ports.

Manual page author
David Miller
Documentation analyst
Organizes user manual content into clear summaries, with attention to model details, product context, and everyday usability.