Electronics / Interactive Displays
49" 10pt PCAP Touch Kiosk
Quick guide for the 49" 10pt PCAP Touch Kiosk. Includes setup, Android settings, DiViEX media management, troubleshooting, and technical specifications.
Table of contents
Manual images
Click an image to enlargeQuick guide from the manual
This document provides essential instructions for setting up and operating the 49" 10pt PCAP Touch Kiosk. It covers safety precautions, hardware installation, Android system configuration, and media management using the pre-installed DiViEX app.
Safety and Warnings
To ensure safe operation and longevity of the product, please observe the following:
- Use a surge protector or power strip with an internal circuit breaker.
- Do not block ventilation openings; they are critical for cooling.
- Disconnect the power supply before connecting or disconnecting any cables.
- Do not place the unit in direct sunlight, moist environments, or areas with extreme temperatures.
- If the unit is moved from a cold to a warm environment, wait before turning it on to prevent condensation.
- If the screen ruptures, rinse skin with water for 15 minutes and consult a doctor.
Unpacking and Installation
Note: Two people are required for safe unpacking and assembly of this unit.

- Carefully remove the kiosk from the wooden box.
- Ensure the unit is placed on a stable surface.
- Connect the power cord to the unit and a wall outlet.
- Flip the power switch located on the back of the unit to the ON position.
Parts Description
The unit features an LCD screen, remote sensor, base, leveler, access door with lock, and an on/off switch. The rear interface panel includes:
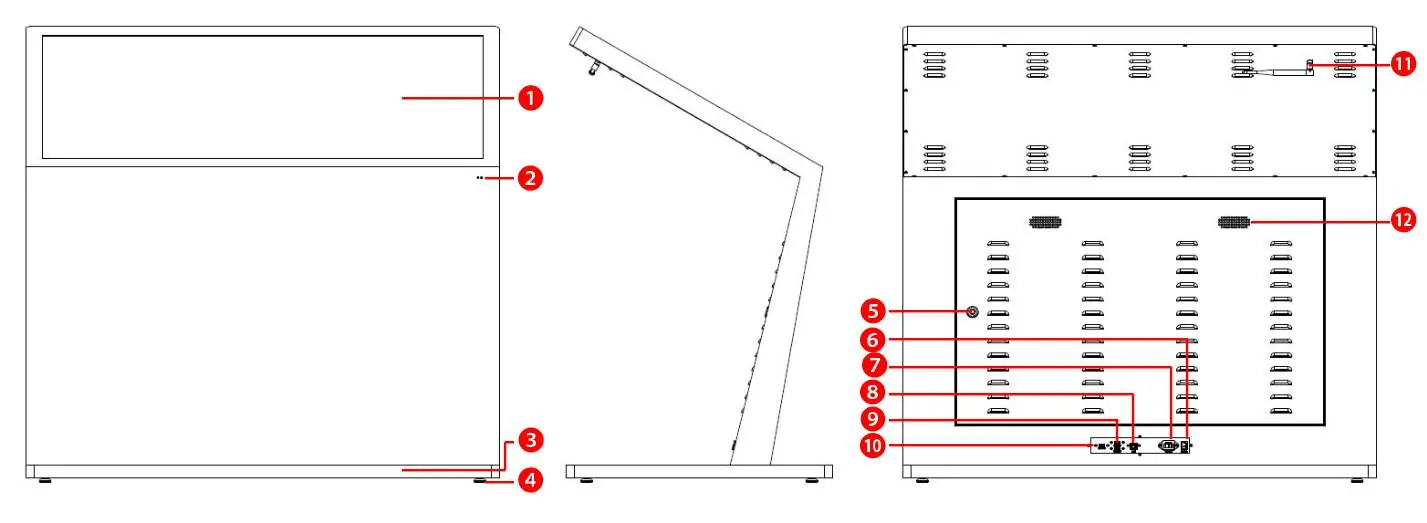
- Power Input Socket
- RJ45 (LAN) Port
- USB 2.0 Ports (x2)
- USB 3.0 Port (x1)
- Wi-Fi Antenna
- Speakers
Operation and Android Settings
Once powered on, the unit displays the home screen with a navigation bar and App Drawer. You can manage settings by launching the Settings app:
- Wi-Fi/Ethernet: Configure network settings under Network and Internet.
- Bluetooth: Pair devices via Connected Devices.
- Sound: Adjust volume for alarms, calls, and media.
- System Language: Change system language under System > Languages.
- Factory Reset: Erase all data via System > Advanced Options > Reset Options.
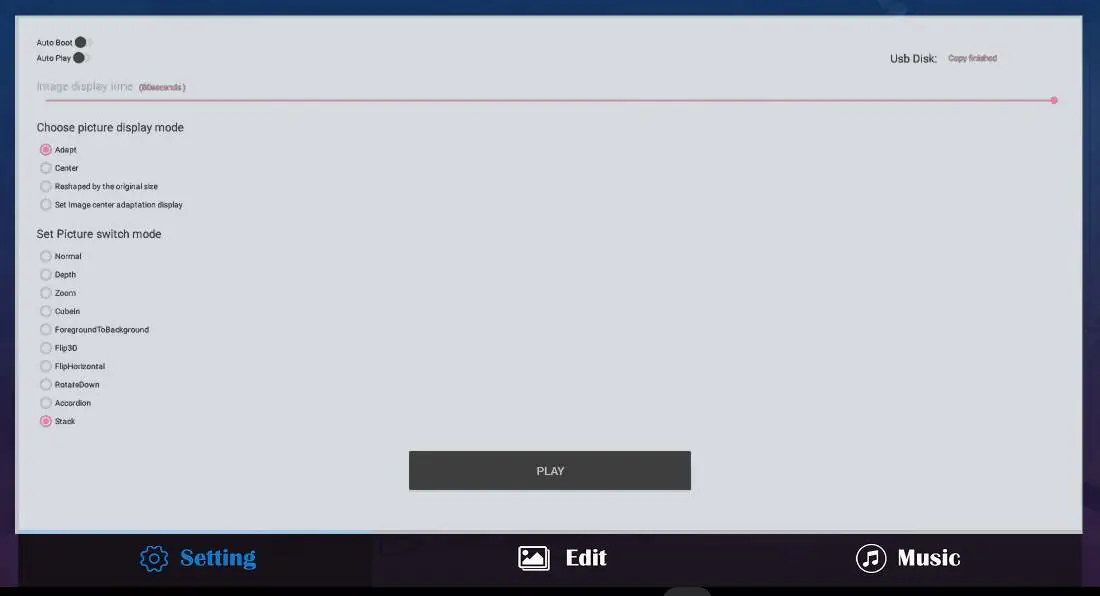
DiViEX Media Management
The DiViEX app is pre-installed for content management. You can upload media via internal storage or USB.
Option 1: Internal Storage
- Insert USB into the unit.
- Open File Explorer and navigate to your files.
- Select files, click Multi, then Editor > Copy.
- Navigate to Internal Memory > MediaFolder and paste the files into the appropriate subfolder (Images, Videos, Music).
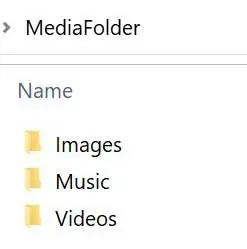
Option 2: USB Drive
- On a computer, create a folder named "MediaFolder".
- Inside, create subfolders: "Images", "Videos", "Music".
- Copy your media files to the corresponding folders.
- Insert the USB into the kiosk and open DiViEX.
Troubleshooting
If you encounter issues, try these steps:
- No Picture/Sound: Check power connection, ensure the toggle switch is ON, and verify the wall outlet.
- Remote Not Working: Check batteries, ensure you are within 1 foot of the unit, and point directly at the sensor.
- Cannot Upload Content: Verify file formats (JPG, PNG, MP4, etc.) and ensure file size is within available space.
Technical Specifications
- Display: 49" LCD, 1920x1080 resolution, 400 nits brightness.
- System: Android 11, Rockchip RK3568 Quad-core CPU.
- Memory: 4GB RAM, 64GB ROM.
- Connectivity: Wi-Fi 6, Bluetooth 5.0, Ethernet (RJ45).
- Power: 100V-240V,
Practical help
Common problems
No picture or sound
Check that the unit is plugged into a wall outlet, the power cord is connected to the terminal on the back, and the toggle switch is in the ON position.
Remote control not working
Check that batteries are inserted correctly, replace dead batteries, and ensure you are standing within 1 foot of the unit, pointing directly at the sensor.
Cannot upload content
Confirm the content file format is supported (see technical specifications) and that the file size is less than the available storage space.
No Wi-Fi signal
Ensure Wi-Fi is turned on in settings, the antenna is attached and pointed upward, and the router is functioning.
Before use
- Use a surge protector or power strip with an internal circuit breaker.
- Ensure two people are available for safe unpacking.
- Check that the unit is placed on a stable surface.
- Verify that ventilation openings are not blocked.
- Disconnect power before assembling or disassembling.
Specs in practice
- Operating System
- Android 11
Images and diagrams
- Parts diagram identifies the LCD screen, remote sensor, base, leveler, and access door.
- Interface diagram details the rear panel ports including USB 2.0/3.0, LAN, power socket, and switch.
Model compatibility
- Supports Wi-Fi 6 (compatible with Wi-Fi 5).
- Supported Image Files: JPG, JPEG, BMP, PNG, GIF.
- Supported Video Files: AVI, MPEG4, WMV, MKV, FLV, MP4, MOV.
- Supported Audio Files: MP3.

Manual page author
Michael Turner
Technical manual editor
Reviews PDF manuals for structure, safety notes, and practical product details so readers can find the right information quickly.