Electronics / Interactive Displays
User Manual for Philips 10BDL3351T Interactive Display
Comprehensive user guide for the Philips 10BDL3351T Interactive Display. Includes installation, setup wizard, admin mode, network configuration, and troubleshooting steps.
Table of contents
Manual images
Click an image to enlargeQuick guide from the manual
The Philips 10BDL3351T is an interactive display designed for professional use. Key operations include:
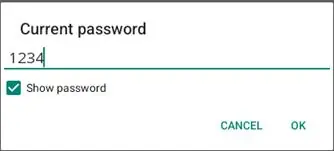
- Admin Mode: Press Menu + Volume- to enter. Default password is 1234.
- Turn on screen: Press Menu + Menu + Volume- + Volume-.
- Enable touch: Press Menu + Menu + Volume+ + Volume- + Volume- + Volume+.
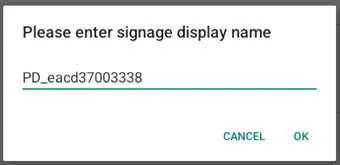
- Setup Wizard: Follow the on-screen instructions during the first boot to configure language, network, and signage settings.
Installation
The display can be mounted using the VESA standard or the provided back cover.
- VESA Mount: Supports VESA MIS-D75 (75x75mm). Use M4x9mm screws. Installation height should be less than 2 meters.
- Back Cover Mounting: Use the provided back cover and self-tapping screws to secure the unit to the wall.
Operation and Admin Mode
The display runs on an Android-based system. The Admin mode provides access to critical settings including:
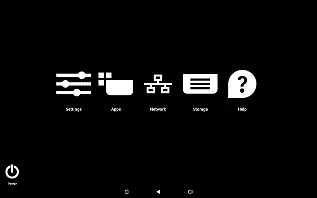
- Settings: Configure network, signage display, apps, and system tools.
- Apps: Manage installed applications.
- Network: Set up Wi-Fi or Ethernet connections.
- Storage: Manage internal and external storage.
- Power: Options for Power off, Sleep, and Reboot.
Settings and Configuration
The Signage Display menu allows for advanced configuration:
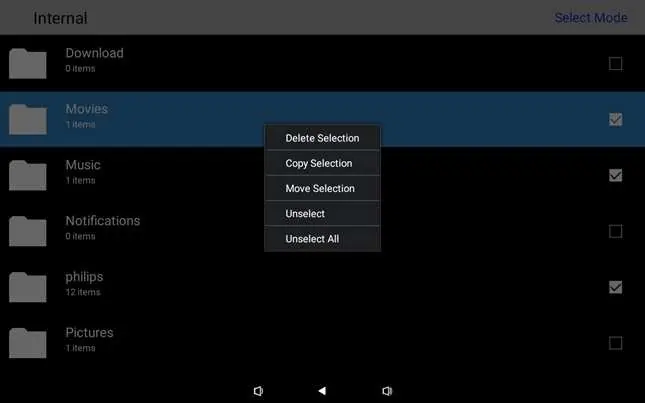
- Clone Media Files: Import/export settings and media files via USB or SD card.
- Schedule: Set up to seven different intervals for display activity.
- Screenshot: Enable auto-screenshots and set intervals.
- Email Notification: Configure SMTP settings to receive screenshot attachments.
- FTP: Enable FTP server for remote file management.
- Remote Control: Bind the device to a remote control server.
Maintenance and Troubleshooting
To ensure optimal performance, keep the display away from direct sunlight and heat sources. Always use a moving screen saver to prevent burn-in. If the display becomes dirty, wipe it with a soft, dry cloth or a cloth soaked in a mild detergent solution, ensuring no moisture enters the unit.
Troubleshooting
- No picture: Check if the adapter is connected and the power LED is green. Use the button combination to turn on the screen.
- Touch not working: Use the button combination to enable the touch function.
- Cannot detect USB/SD: Ensure the function is enabled in the settings menu.
Manufacturer information
Philips
Practical help
Common problems
No picture is displayed
Ensure the power adapter is connected and the power LED is green. Press 'Menu + Menu + Volume- + Volume-' to turn on the screen.
Touch function does not work
The touch function may be disabled. Press 'Menu + Menu + Volume+ + Volume- + Volume- + Volume+' to enable it.
Cannot detect USB device or SD card
The settings for USB/SD card may be disabled. Go to the 'Setting' menu and enable the function.
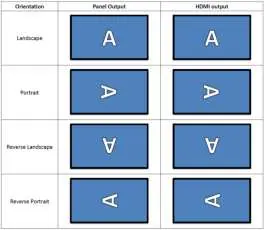
HDMI output is abnormal
Ensure the HDMI cable is connected firmly and the external device is in good condition.
Before use
- Verify package contents: Colour Display, Quick Start Guide, DC Power Adapter, Power Plug.
- Ensure proper ventilation around the display cabinet.
- Connect the power adapter to the display's power input socket.
- Connect the network cable if a wired connection is required.
- Insert a Micro SD card if external storage is needed.
- Ensure the power plug and outlet are easily accessible.
Specs in practice
- Power Requirement
- 12V 2.0A DC or 802.3at PoE+ (Power over Ethernet).
- Operating Temperature
- 0°C to 40°C.
Images and diagrams
- Left View: Shows the location of the Menu and Volume buttons.
- Input/Output Terminals: Identifies ports for Micro SD, USB, Earphone, HDMI, USB C2, DC IN, and LAN.
Model compatibility
- Supports VESA MIS-D75 (75x75mm) mounting standard.
- Requires 20MB of free space in internal storage for normal operation.
- External storage devices must be named in English or UTF-8.

Manual page author
David Miller
Documentation analyst
Organizes user manual content into clear summaries, with attention to model details, product context, and everyday usability.