Power / Energy Storage Systems
User Manual for Dyness AR2.5-12V 12.8V 200Ah LiFePO4 Battery
Quick guide for the Dyness AR2.5-12V 12.8V 200Ah LiFePO4 battery. Includes charging instructions, series/parallel connection steps, cable sizing, and troubleshooting for BMS activation.
Table of contents
Manual images
Click an image to enlargeQuick Guide and Safety
The Dyness AR2.5-12V is a 12.8V 200Ah LiFePO4 battery designed for energy storage. Important: Do not use this product as a starting battery. Always verify the product is working properly upon unpacking. If the battery is not going to be used for a long time, store it at a 50% charge level and recharge every six months.
Product Parameters
Key specifications for the AR2.5-12V include:
- Nominal Voltage: 12.8V
- Rated Capacity: 200Ah
- Energy: 2560Wh
- Charge Method: CC/CV
- Charge Voltage: 14.4V ±0.2V
- Recommended Charge Current: 40A (0.2C)
- Max. Continuous Discharge Current: 200A
- Protection Class: IP65
- Terminal Bolts: M8 x 16mm
Usage Instructions
To estimate battery capacity, disconnect the battery from chargers and loads, leave it for 3 hours, and measure the resting voltage. Refer to the SOC (State of Charge) table in the manual for approximate values (e.g., 13.3V-14.0V is 95%-100% SOC). Ensure battery terminals are tightened to 10-12 N·M to prevent heat buildup and damage.
Charging Instructions
The battery can be charged via solar panels, dedicated battery chargers, or alternators/generators.
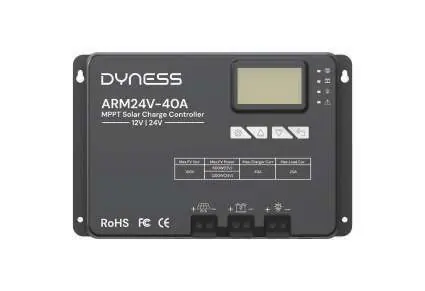
- Solar Panel: Recommended range is ≥700W. Use 12V (14.6V) LiFePO4 mode on your controller.
- Battery Charger: Use a 14.6V LiFePO4 charger. Avoid using alligator clips as the contact area is too small, which may cause terminal melting.
- Alternator/Generator: Ensure the device supports AC output and use a suitable battery charger between the generator and the battery. Recommended charging voltage is 14.2V to 14.6V.
Series and Parallel Connections
You can connect up to 16 identical batteries. Before connecting, ensure all batteries are from the same brand, purchased within six months of each other, and have the same capacity and BMS. Voltage Balancing: Fully charge batteries separately to ≥13.35V and connect them in parallel for 12-24 hours before creating series or parallel systems to reduce voltage differences.
Troubleshooting and FAQ
If the battery does not work or cannot be charged, the BMS may have shut it off. Try these activation methods:
- Disconnect all connections, leave the battery for 30 minutes, then attempt to charge.
- Use a 0V charger to charge the battery until the voltage is between 14V and 14.6V.
- Connect an 18V-36V solar panel (no controller required) for 3-10 seconds under sunny conditions.
Safety Precautions
Strictly follow these safety rules:
- Do not reverse positive and negative poles.
- Do not use unofficial parts.
- Stop using the battery if it smells, changes color, makes noise, leaks, or is deformed.
- Do not place near heat sources or fire.
- Do not immerse in water or use in the rain.
- Do not puncture or dismantle the product.
- Store out of reach of children and pets.
Practical help
Common problems
Battery won't work or charge (BMS protection)
Disconnect all cables, wait 30 minutes, or use a 0V charger to bring voltage to 14V-14.6V, or pulse with an 18V-36V solar panel for 3-10 seconds.
Voltage difference between batteries in a system
Rebalance the battery voltage every 6 months.
Loose battery terminals
Tightly screw in post bolts to 10-12 N·M to prevent heat buildup and damage.
Before use
- Verify the product is working properly upon unpacking.
- Ensure battery terminals are tightened to 10-12 N·M.
- Check that the battery is at 50% charge if storing for a long time.
- Use appropriate cable sizing based on the load (refer to NEC Table 310.15(B)16).
- Wear insulating gloves before connecting.
- Fully charge batteries separately before connecting in series/parallel.
Specs in practice
- Nominal Voltage
- 12.8V
- Rated Capacity
- 200Ah
- Recommended Charge Current
- 40A (0.2C)
- Protection Class
- IP65 (Dust tight and protected against water jets)
Images and diagrams
- Figure 3-1: Solar panel and MPPT controller connection.
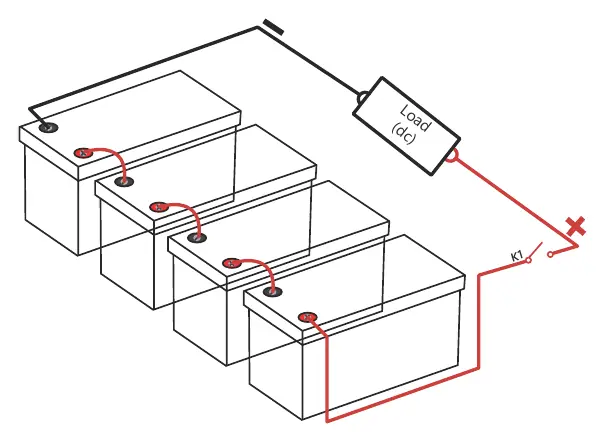
- Figure 5-1: Series connection for 51.2V 200Ah system.
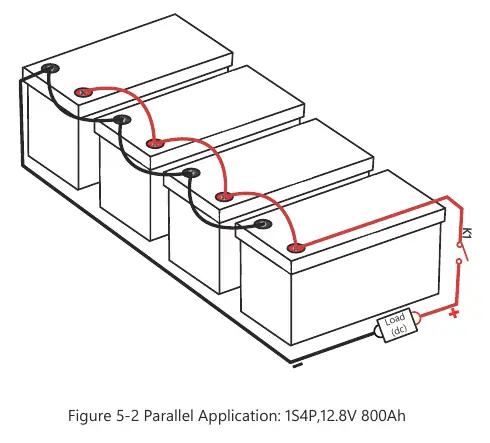
- Figure 5-2: Parallel connection for 12.8V 800Ah system.
- Figure 6-1: Activation method using a charger.
Model compatibility
- Do not use as a starting battery.
- Use 14.6V LiFePO4 charger.
- Support up to 16 identical batteries in series/parallel.
- Recommended solar panel range: ≥700W.

Manual page author
Michael Turner
Technical manual editor
Reviews PDF manuals for structure, safety notes, and practical product details so readers can find the right information quickly.