Automotive / Electric Bikes
User Manual for Engwe N1 Air Electric Bike
Comprehensive user manual for the Engwe N1 Air electric bike. Includes detailed assembly instructions, safety guidelines, battery charging procedures, display settings, maintenance tips, and troubleshooting steps.
Table of contents
Manual images
Click an image to enlargeQuick Start Guide
Before your first ride, ensure the bike is fully assembled according to the installation guide. Check that all fasteners are tight, the battery is fully charged, and you are wearing a helmet. Adjust the handlebars and saddle to your height, ensuring the safety marks are not exceeded. Power on the bike by pressing the power button for 1 second.
Safety Notes
- This product is not designed for off-road biking.
- Users under the age of 16 are strictly prohibited from using this product.
- Always abide by national and local traffic laws.
- Do not charge the battery if the charger or power supply is wet.
- Do not modify the bike without authorization.
- Always wear a helmet and secure the chin strap.
Assembly Instructions
The bike requires assembly of several components. Follow these steps carefully:
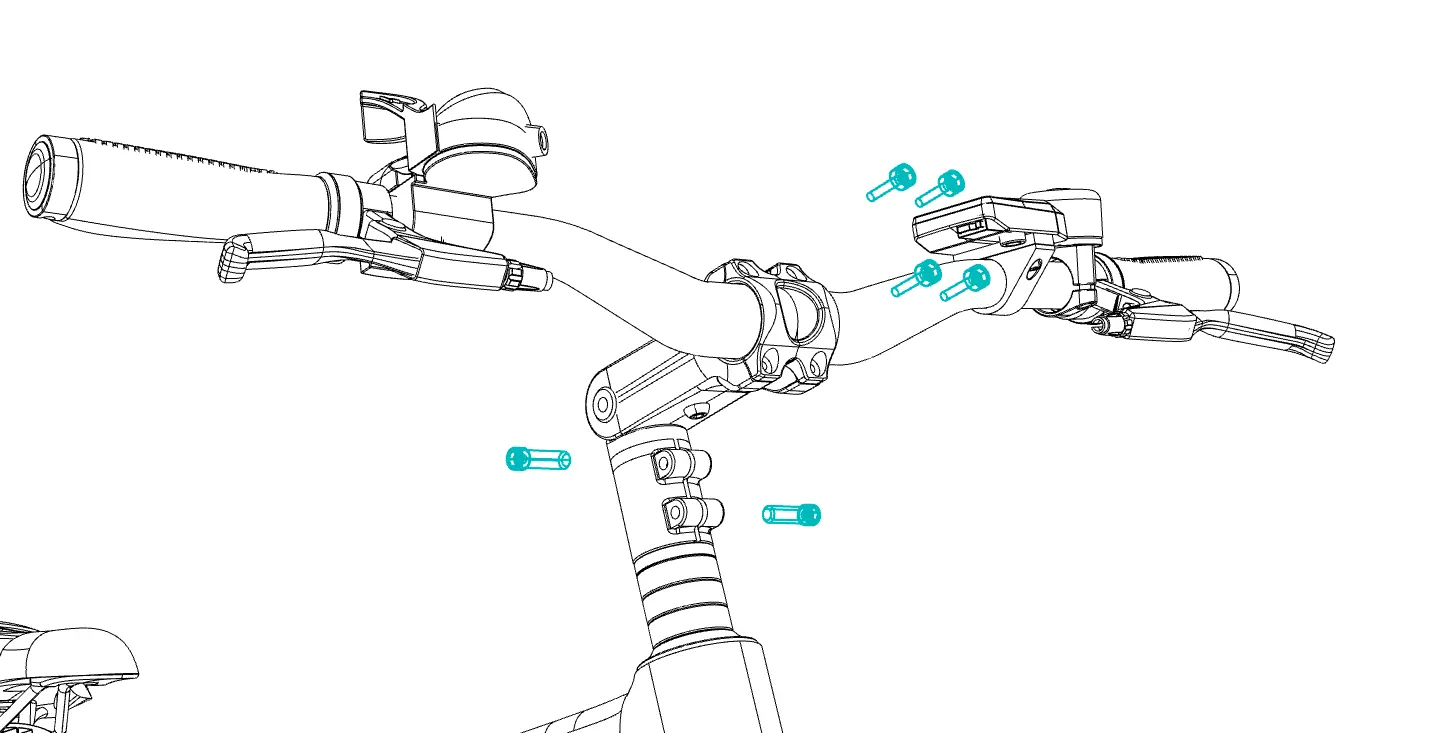
- Handlebars: Loosen the screws, adjust to a comfortable height, and ensure the handlebar is centered and perpendicular to the frame.
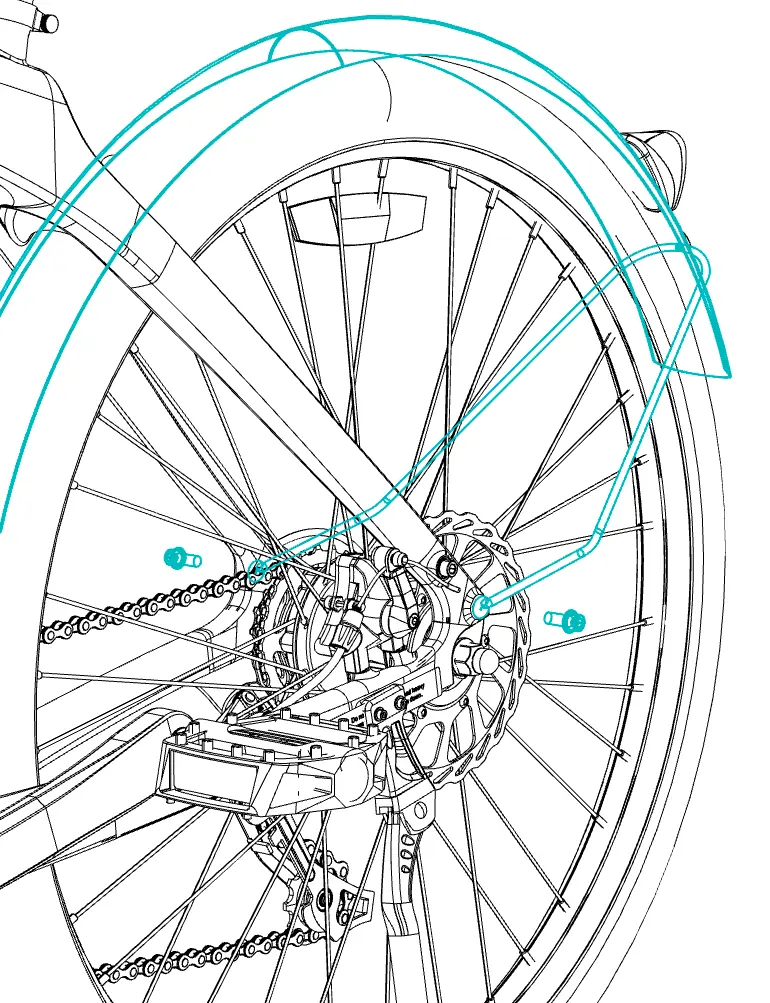
- Mudguard and Headlight: Attach the mudguard and headlight to the front fork using the provided screws and tools.
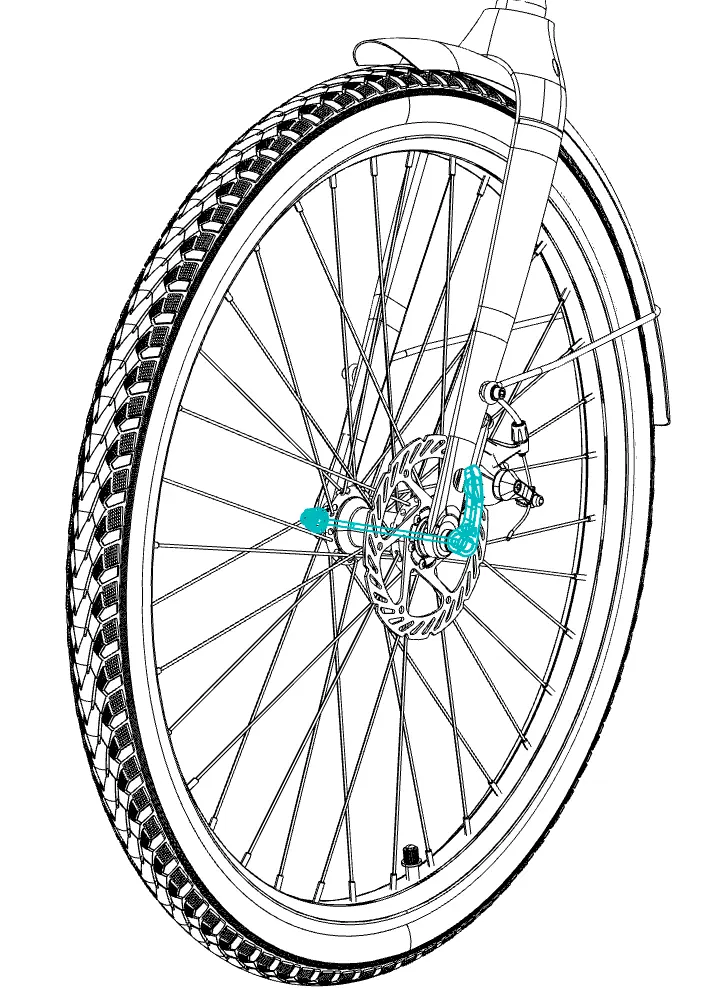
- Wheel: Remove the axle, insert the front wheel, and secure it using the quick-release mechanism.
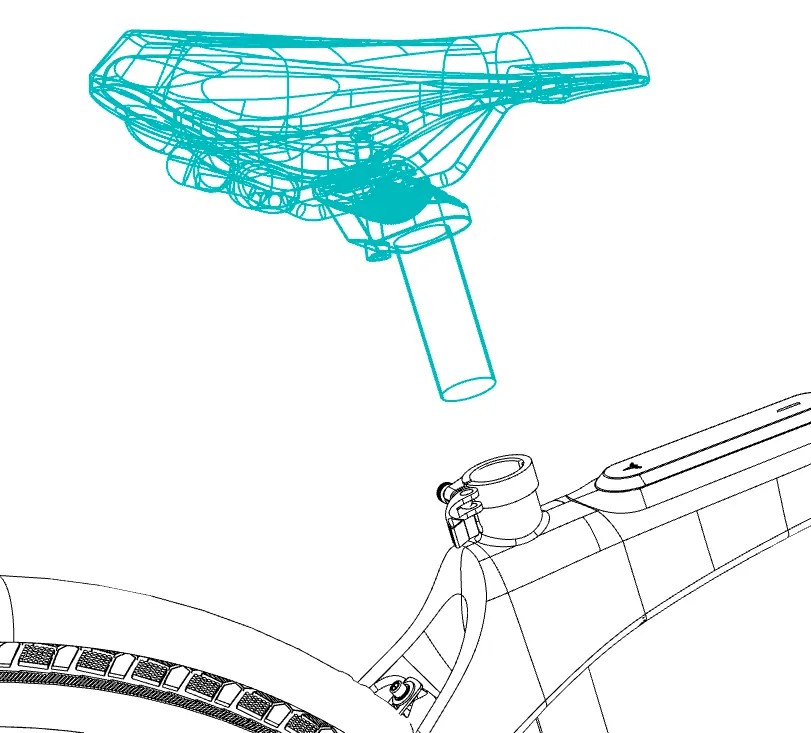
- Saddle: Adjust the height and angle. Ensure the white safety line on the seat post remains covered.
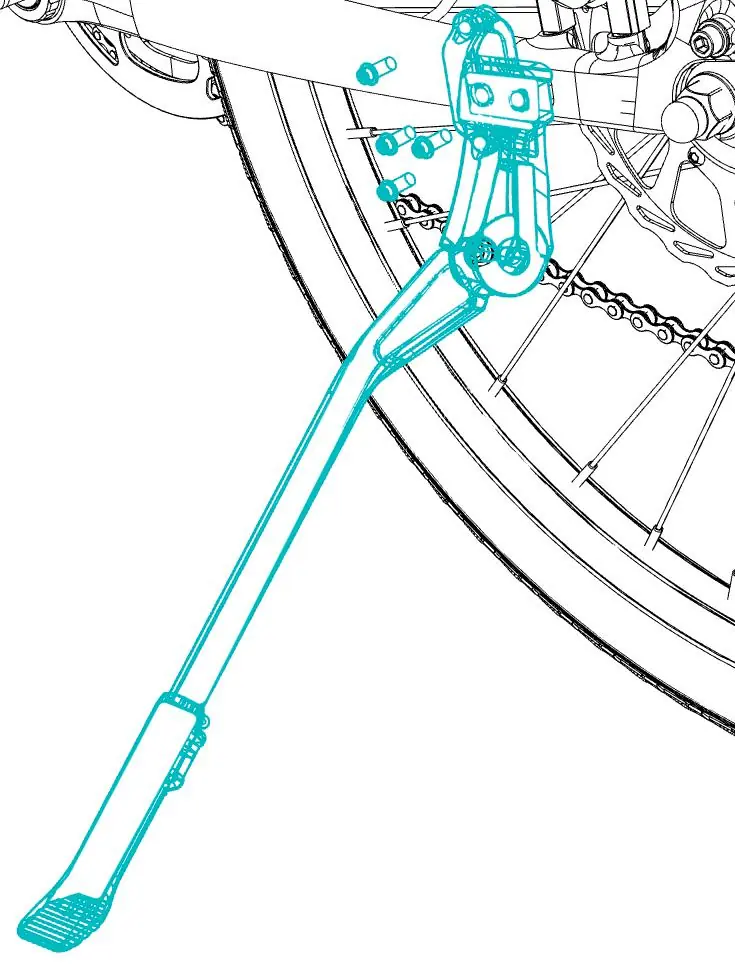
- Kickstand: Install the kickstand on the frame. Do not sit on the bike while the kickstand is down.
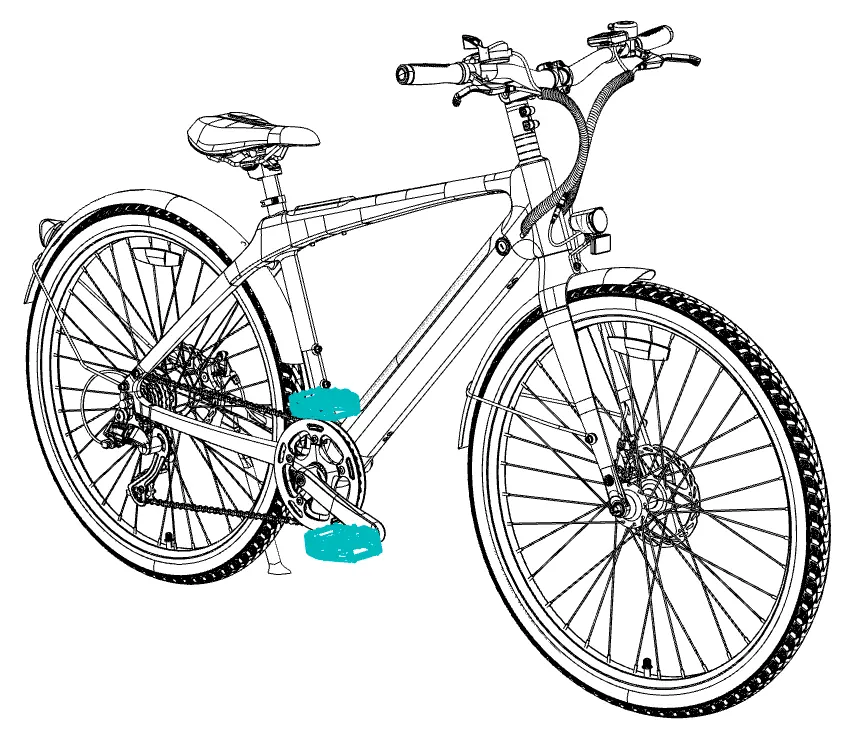
- Pedals: Distinguish between left and right pedals and screw them into the crank arms.
Operation
The bike features a display for monitoring speed, battery level, and assist gear. Use the + and - buttons to adjust power assist levels. Long press the - button to enter walking assist mode (6 km/h). The headlight can be controlled manually or automatically via the light-sensing function.
Battery and Charging
The battery can be charged while installed on the frame or removed. Charging takes approximately 5-8 hours. Use only the manufacturer's original charger. When the indicator lamp on the charger is red, charging is in progress; green indicates a full charge.
Settings
To access detailed settings, power on the bike and hold the + and - buttons simultaneously for more than 2 seconds. You can adjust ODO reset, toggle units, screen brightness, startup password, and light sensitivity.
Maintenance
Regular maintenance is essential for safety and longevity. Check tire pressure, lubricate bearings every six months, and add oil to the chain and derailleur cable every two months. Keep the motor clean and avoid submerging it in water (IPX5 rating).
Troubleshooting
If you encounter issues, refer to the error codes on the display. Common solutions include checking battery connections, ensuring correct starting sequence, and verifying tire pressure. For persistent issues, contact the Engwe after-sales team.
Product Parameters
- Maximum load: 120kg
- Maximum speed: 25km/h
- Battery capacity: 360Wh Li-ion
- Maximum range: 100km
- Tire size: 700 x 38C
- Charging time: 5-8 hours
Practical help
Common problems
Vehicle does not work
Check battery level, clean and retighten electrical connectors, and ensure the correct starting sequence.
Not enough mileage
Check tire pressure and inflate if low. Ride with pedal assist to conserve energy.
Battery not charging
Reconnect the charger, check for damage, or contact the after-sales team.
Motor does not work after power up
Check for loose or damaged motor cables, tighten the throttle, or contact the after-sales team.
Before use
- Check for loose fasteners or damaged parts.
- Ensure the battery is sufficiently charged.
- Wear a helmet.
- Check tire pressure (max 350kPa).
- Verify brake lever function.
- Ensure the handlebar is centered and secure.
Specs in practice
- Maximum load
- 120kg total weight including rider and cargo.
- Maximum speed
- 25km/h.
- Charging time
- 5-8 hours for a full charge.
- Waterproof rating
- IPX5; do not submerge or use high-pressure water.
Images and diagrams
- Handlebar installation: Loosen screws, adjust height, ensure centered and perpendicular to frame.
- Mudguard/Headlight: Follow numbered steps for mounting to fork.
- Wheel installation: Remove axle, insert wheel, secure quick-release.
- Saddle adjustment: Ensure white safety line is covered.
- Pedal installation: Distinguish between left and right pedals.
Model compatibility
- Not designed for off-road biking.
- Users under 16 are prohibited.
- Use only the original charger provided.

Manual page author
Emily Carter
User documentation editor
Prepares concise manual descriptions and highlights the most useful setup, operation, and maintenance information for readers.