Automotive / Electric Bikes
User Manual for Heybike EC 1-ST Electric Bike
Quick guide for the Heybike EC 1-ST electric bike. Includes assembly instructions, charging procedures, display settings, maintenance tips, and troubleshooting.
Table of contents
Manual images
Click an image to enlargeQuick guide from the manual
This manual provides essential instructions for assembling, operating, and maintaining your Heybike EC 1-ST electric bike. Before your first ride, ensure the bike is fully assembled, all bolts are tightened, and the battery is fully charged. Always wear a helmet and comply with local traffic regulations.
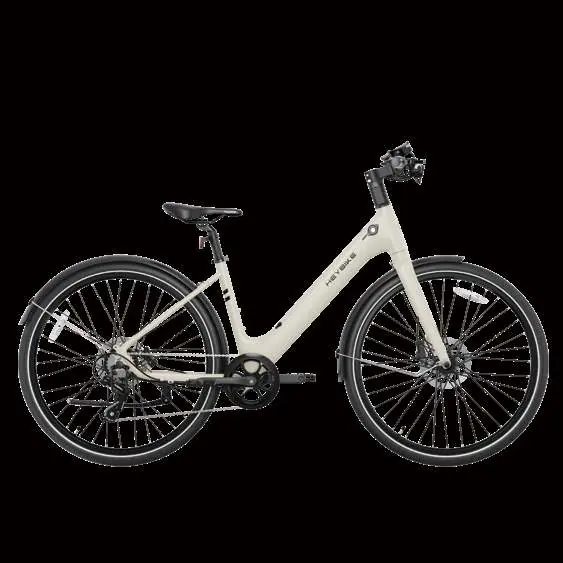
Product Overview
The Heybike EC 1-ST features a frame with an integrated battery, LCD display, and disc brakes. Key components include the handlebar with display controls, front and rear wheels, saddle, and pedal assembly.
Assembly Instructions
Follow these steps to assemble your bike:
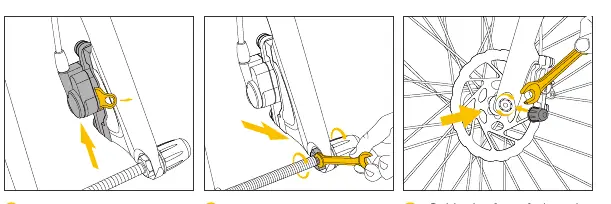
- Front Wheel: Remove brake protection clip and fork protection shaft. Install the wheel and lock the shaft cap.
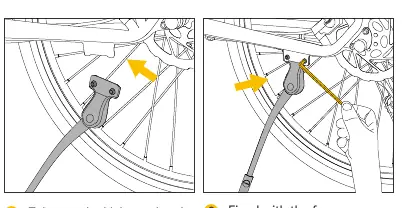
- Kickstand: Attach the kickstand to the frame using the provided screws.
- Mudguards: Install front and rear mudguards using the provided screws and brackets.
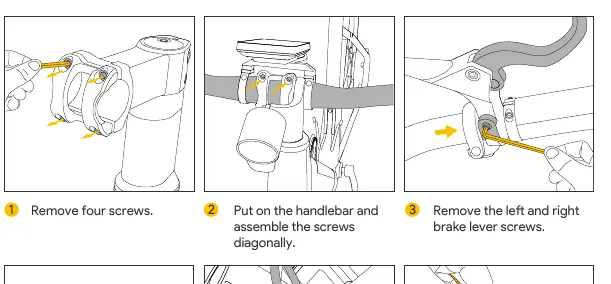
- Handlebar: Remove screws, position the handlebar, and tighten screws diagonally. Connect gauge and headlight plugs, then secure wires with cable ties.
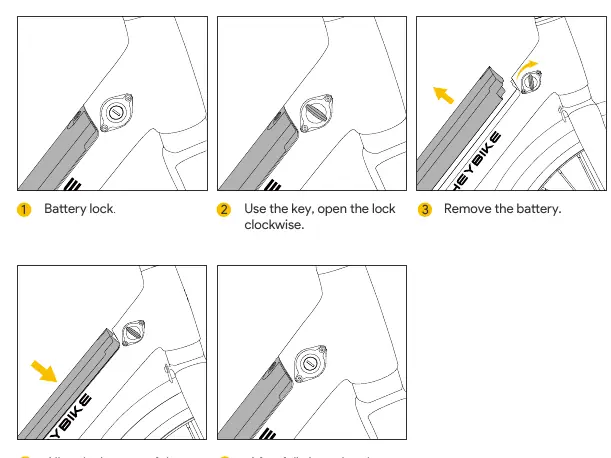
- Battery: Align the battery with the metal interface, insert it, and lock it with the key.
- Saddle: Open the seat post clamp, position the saddle, and lock the clamp.
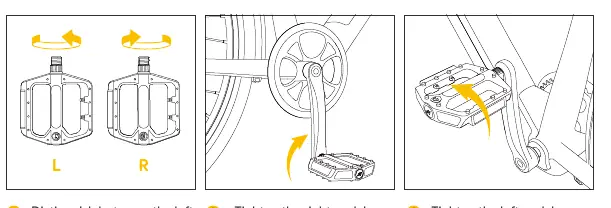
- Pedals: Distinguish between left and right pedals. Tighten the right pedal clockwise and the left pedal counterclockwise. Check chain alignment.
Charging
Place the charger in a flat, dry, and secure location. Uncover the charging port on the battery, connect the charger, and plug it into a power outlet. The light turns green when fully charged. You may also remove the battery to charge it indoors.
Display and Settings
The LCD display shows riding duration, battery life, speed (current, average, max), gear, and mileage. Use the control buttons to turn the display on/off, adjust gear levels, activate the backlight, or enter parameter settings. Error codes (E-06 to E-11) help identify issues like motor faults or low battery.
Daily Care and Maintenance
Keep the bike clean by wiping it with a damp cloth. Do not use high-pressure water sprays or corrosive solvents. Store the bike in a cool, dry place. Regularly check tire pressure (40-60 PSI) and inspect the braking system. Charge and discharge the battery every other month if not in use.
Troubleshooting
If the bike does not work, check the battery level, connections, and fuse. If the motor does not respond, check wiring and throttle connections. For reduced range, check tire pressure and battery health.
Practical help
Common problems
Bike does not work
Check battery level, ensure connections are secure, verify battery is seated, and check the discharge fuse.
Reduced range
Check tire pressure, ensure battery is fully charged, avoid excessive loads or steep hills, and check for rubbing brakes.
Battery cannot be charged
Check charger connections, inspect for damage, and check the charging fuse.
Strange noises from wheels or motor
Tighten or repair spokes/rims and check motor wiring connections.
Before use
- Check tire pressure (40-60 PSI).
- Ensure battery is fully charged.
- Verify brakes are functioning correctly.
- Ensure all bolts and quick releases are securely fastened.
- Check that safety labels are in place.
- Ensure the bike is turned on and the battery is not showing errors.
Specs in practice
- Charger Time
- 4-5 hours for a full charge.
- Battery Capacity
- 360Wh 10Ah 36V.
Images and diagrams
- Assembly steps cover front wheel, kickstand, mudguards, handlebar, battery, saddle, and pedals.
- Display shows speed, battery life, gear, and error codes.
Model compatibility
- Use only original battery packs.
- Use only the original power adapter.
- Tires: 700C x 40C.

Manual page author
Emily Carter
User documentation editor
Prepares concise manual descriptions and highlights the most useful setup, operation, and maintenance information for readers.