Electronics / Speakers & Soundbars
Genelec 1238AC Smart Active Monitor
Quick guide for the Genelec 1238AC Smart Active Monitor. Learn about setup, GLM calibration, flush mounting, connection diagrams, and technical specifications.
Table of contents
Manual images
Click an image to enlargeQuick Guide from the Manual
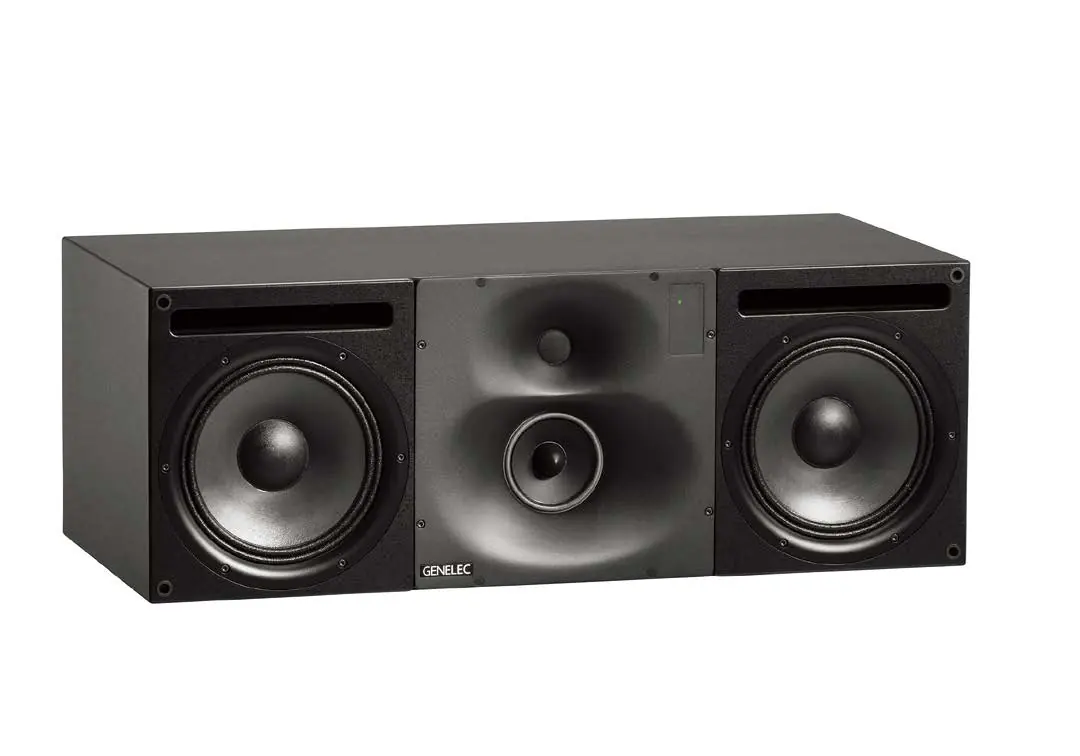
The Genelec 1238AC is a three-way smart active monitoring system designed for medium-sized control rooms. It is compatible with Genelec Loudspeaker Manager (GLM) software for calibration and network control. The system includes the RAM-L amplifier unit, which must be mounted in a 19-inch rack or on a solid surface with adequate ventilation. Proper setup requires GLM software, a measurement microphone, and network cabling.
System Description
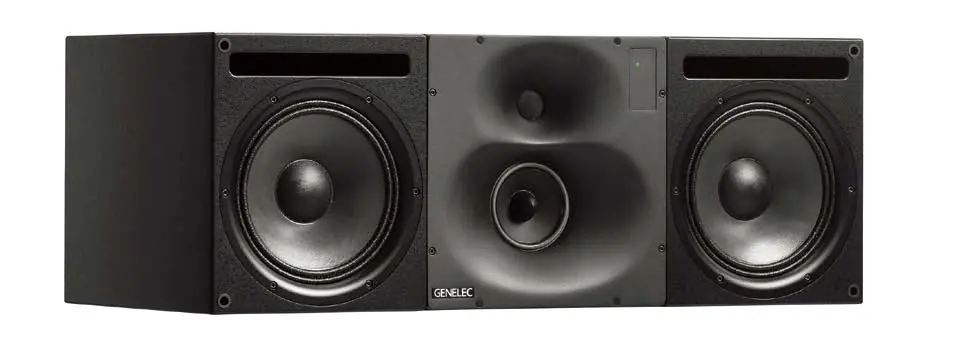
The 1238AC features dual 250 mm (10 in) woofers, a 130 mm (5 in) midrange driver, and a 25 mm (1 in) metal dome tweeter. It utilizes Directivity Control Waveguide (DCW) technology for precise stereo imaging. The RAM-L amplifier provides digital signal processing, including driver and amplifier overload protection, and room response compensation.
Setup and Calibration
The 1238AC is configured using the GLM software. Follow these steps for setup:

- Connect monitors to the GLM network using CAT5 (RJ45) cables.
- Connect the final cable to the GLM Adapter device.
- Connect the GLM Adapter to your computer via USB.
- Place the Genelec measurement microphone at the listening position, pointing upwards at ear height.
- Connect the microphone to the GLM Adapter.
- Download and install the latest GLM software from the Genelec website.
- Follow the software instructions to measure and calibrate the monitors.
- Store settings into the monitors if you do not intend to keep the computer connected.
Connections
The RAM-L amplifier rear panel includes:
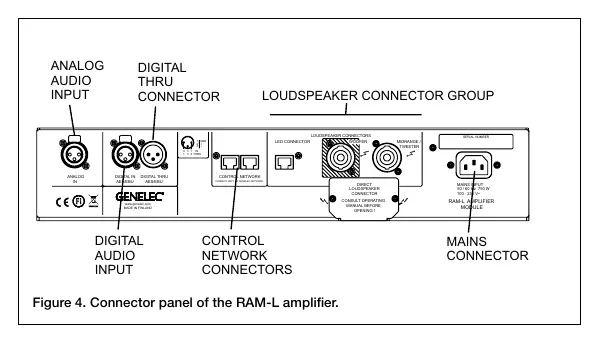
- Analog Input: Balanced XLR female connector.
- Digital Input (AES/EBU): XLR female connector.
- Digital Thru (AES/EBU): XLR male connector for daisy-chaining.
- Control Network: RJ45 sockets for GLM network (do not connect to Ethernet LAN).
- Loudspeaker Connectors: Speakon connectors for Woofer and Midrange/Tweeter.
Note: Each RAM-L amplifier is calibrated for the specific monitor enclosure it is delivered with. Do not mix amplifier/monitor pairs.
Flush Mounting
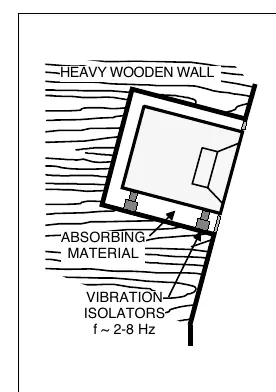
Flush mounting provides acoustical benefits by reducing edge diffraction and low-frequency reflections. Ensure the wall is stiff and heavy. The monitor should be mounted on vibration isolators with a resonant frequency between 2 to 8 Hz. Fill any empty wall cavities with absorbent mineral wool or foam plastic. Ensure the cabinet is flush with the wall surface and use a soft rubber gasket to fill the 5-10 mm gap between the monitor and the wall panel.
Troubleshooting
The front panel light indicates system status:
- Green: Normal operation.
- Yellow: Activity during GLM control.
- Red: Overload condition. Reduce source level or check AES/EBU data transmission.
Safety and Maintenance
- Servicing must be performed by qualified personnel only.
- Do not open the monitor or amplifier enclosure.
- Ensure the mains cable has a protective earth conductor.
- Maintain free airflow around the amplifier to prevent overheating.
- The monitor is capable of producing sound pressure levels exceeding 85 dB, which may cause permanent hearing damage.
Technical Specifications
- Frequency Response: 35 Hz – 20 kHz (± 2.0 dB).
- Max SPL: > 124 dB (peak per pair).
- Amplifier Power: 500 W (Bass), 250 W (Mid), 200 W (Treble).
- Dimensions (Monitor): 350 x 950 x 453 mm.
- Weight (Monitor): 60 kg.
Manufacturer information
Genelec Oy
Practical help
Common problems
Red warning light on front panel
Reduce source level or check for bit errors in AES/EBU digital audio transmission.
Distortion
Analog input is overloaded. Ensure input level does not exceed +25.0 dBu.
No sound
Check all cable connections, verify GLM network status, and ensure the amplifier is powered on.
Before use
- Verify ambient temperature is between 15-35°C.
- Ensure RAM-L amplifier has adequate ventilation (1/2 U space above/below in rack).
- Download and install the latest GLM software.
- Connect monitors using CAT5/RJ45 cables for the GLM network.
- Place measurement microphone at the listening position.
Specs in practice
- Frequency Response
- 35 Hz – 20 kHz (± 2.0 dB) for accurate sound reproduction.
- Amplifier Power
- 500W Bass, 250W Mid, 200W Treble for high-performance output.
Images and diagrams
- Figure 1 & 2: Shows acoustic axis alignment and recommended 5-channel system placement.
- Figure 3: Illustrates GLM network cabling setup with computer and microphone.
- Figure 4: Details the RAM-L amplifier connector panel layout.
- Figure 6-8: Demonstrates flush mounting techniques for different wall types.
Model compatibility
- Compatible with 8200-series SAM monitors and 7200-series SAM subwoofers.
- RAM-L amplifier is calibrated for the specific monitor enclosure it is delivered with; do not mix pairs.

Manual page author
Emily Carter
User documentation editor
Prepares concise manual descriptions and highlights the most useful setup, operation, and maintenance information for readers.