Electronics / Televisions
Hisense 120L5H 120 Short Throw 4K Laser TV User Guide
Quick setup guide for the Hisense 120L5H Laser TV, covering installation, geometric correction, remote control pairing, and troubleshooting.
Table of contents
Manual images
Jump to the sectionQuick guide from the manual
This document provides essential steps for setting up and operating your Hisense 120L5H Laser TV. It covers physical installation, image alignment, remote control pairing, and basic troubleshooting. Always ensure the device is placed on a stable surface with adequate ventilation.
Device description and setup
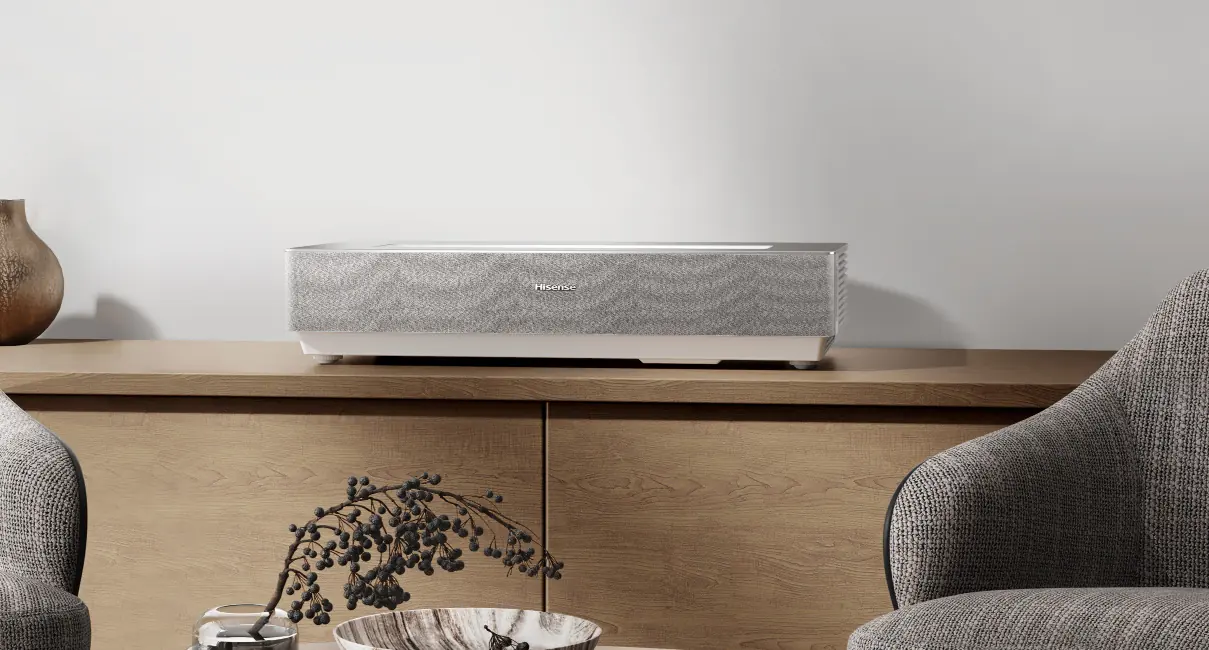
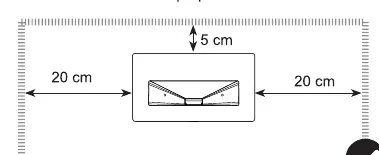
The Laser TV console features a lens with a laser, eye protection sensor, power button, and air vents. Before powering on, ensure all necessary cables (HDMI, Ethernet, audio) are connected to the rear ports. The device requires at least 20 cm of free space on the sides and 5 cm at the back for proper airflow.
Installation and connection
For optimal performance, follow these steps:
- Place the console on a stable, flat surface.
- Connect the power cord and necessary external devices (e.g., set-top box, game console) to the HDMI ports.
- Connect to the internet via Ethernet cable or built-in Wi-Fi.
- Plug the power cord into a wall outlet and press the power button.
Image adjustment
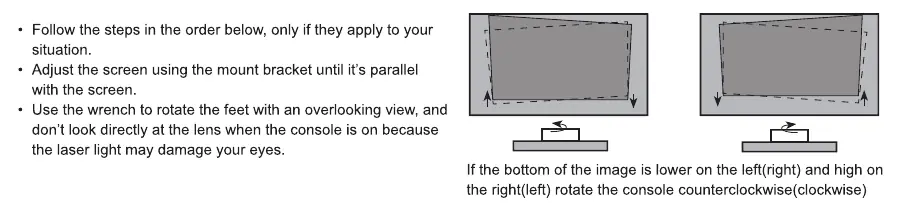
Use the geometric correction features to align the projected image with your screen:
- Auto Geometric Correction: Use the mobile app to scan the QR code and follow on-screen instructions to align the grid.
- Manual Geometric Correction: Use the remote control navigation buttons to adjust individual points to fit the screen perfectly.
Remote control
To pair the remote, keep it within 3 meters of the console and press any button (except power or mic). If pairing fails, hold the menu button to initiate the process. Ensure batteries are inserted correctly and not mixed with old ones.
Maintenance and safety
- Do not look directly into the lens while the device is on.
- Clean the lens only with professional optical cleaning tools.
- If the device is moved from a cold to a warm environment, wait at least one hour before turning it on to avoid condensation.
- Keep the device away from moisture, dust, and heat sources.
Manufacturer information
Hisense
Practical help
Common problems
No sound or picture
Check if the power cord is plugged in, the unit is not in standby mode, and the correct input source is selected.
Remote control not working
Verify the remote has power, check battery installation, and ensure it is paired correctly with the console.
Distorted or wavy picture
Move nearby electrical appliances away from the Laser TV and check the power outlet.
Clicking sound from the cabinet
This is normal; it is caused by the plastic cabinet expanding or contracting due to temperature changes.
Before use
- Ensure two people are available to move the device.
- Verify the surface is stable and can support the weight.
- Check that all cables are securely connected before positioning.
- Ensure at least 20cm of side clearance and 5cm of rear clearance for ventilation.
- Install fresh AA or AAA batteries in the remote control.
Specs in practice
- Power consumption
- 350W during operation; ensure the circuit can handle this load.
- Environmental conditions
- Operate between 5°C - 40°C (41°F - 104°F) and 20% - 80% humidity.
Images and diagrams
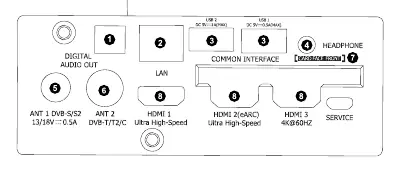
- The rear panel contains ports for Digital Audio Out, LAN, HDMI 1-3, and USB.
- The front of the console houses the lens, eye protection sensor, and power indicator.
- The remote control includes dedicated buttons for input, menu, volume, and channel navigation.
Model compatibility
- Built-in Wi-Fi supports WPA, WEP, and WPA2 security systems.
- External USB devices must not exceed 1A current consumption.
- The device is not compatible with external USB network adapters.

Manual page author
David Miller
Documentation analyst
Organizes user manual content into clear summaries, with attention to model details, product context, and everyday usability.