Furniture / Storage Cabinets
Assembly Instructions for IKEA HAUGA 2-Door Cabinet
A comprehensive assembly and installation guide for the IKEA HAUGA 2-Door Cabinet. This manual includes critical safety warnings regarding furniture tipover, step-by-step assembly instructions, wall mounting procedures, and care...
Quick answers from the manual
Quick answer
- This manual provides step-by-step assembly instructions for the IKEA HAUGA 2-Door Cabinet, including critical safety warnings regarding furniture tipover and wall mounting. p. 1, 2, 22
Key actions
- Install tipover restraint p. 2
- Mount to wall p. 22
Problems and fixes
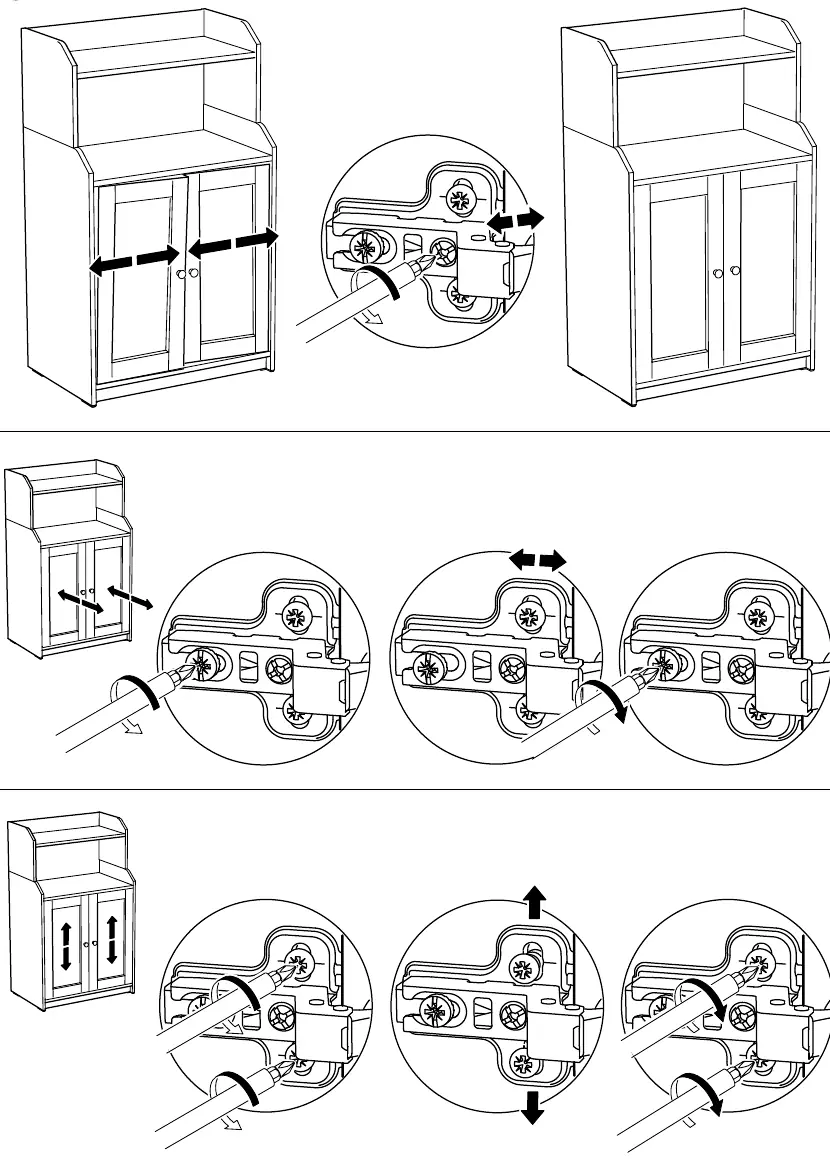
Doors not aligned
Use the adjustment screws on the hinges to align the doors.
p. 29Maintenance and reset
- Care and cleaning p. 30
Where to find it in the PDF
- Safety Warnings p. 2
- Assembly Steps p. 3, 28
- Wall Mounting p. 22
- Care and Cleaning p. 30
Table of contents
Manual images
Click an image to enlargeImportant Safety Information
WARNING: Children have died from furniture tipover. To reduce the risk of furniture tipover:
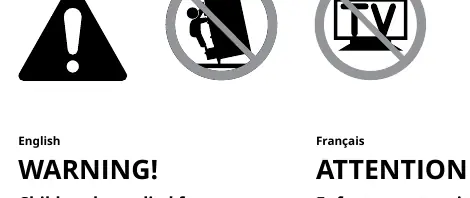
- ALWAYS install the provided tipover restraint.
- NEVER put a TV on this product.
- NEVER allow children to stand, climb, or hang on drawers, doors, or shelves.
- NEVER open more than one drawer at a time.
- Place heaviest items in the lowest drawers.
Tools Required
To assemble this cabinet, you will need the following tools:
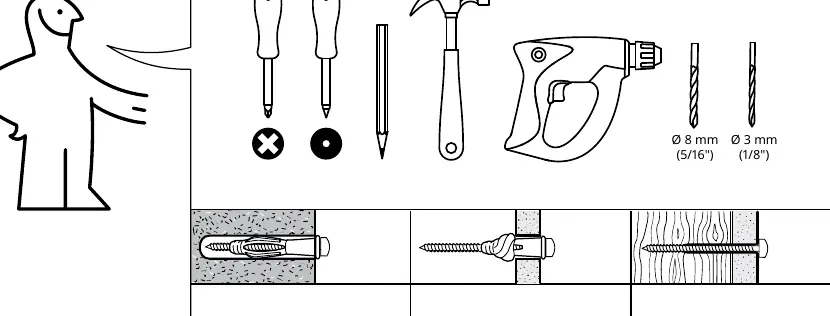
- Screwdriver (Phillips and flathead)
- Hammer
- Pencil
- Power drill
- Drill bits (8 mm for solid/hollow walls, 3 mm for solid wood)
Assembly Instructions
The assembly process involves 34 steps. Follow the diagrams carefully to ensure correct placement of panels, screws, and dowels. Key assembly notes:
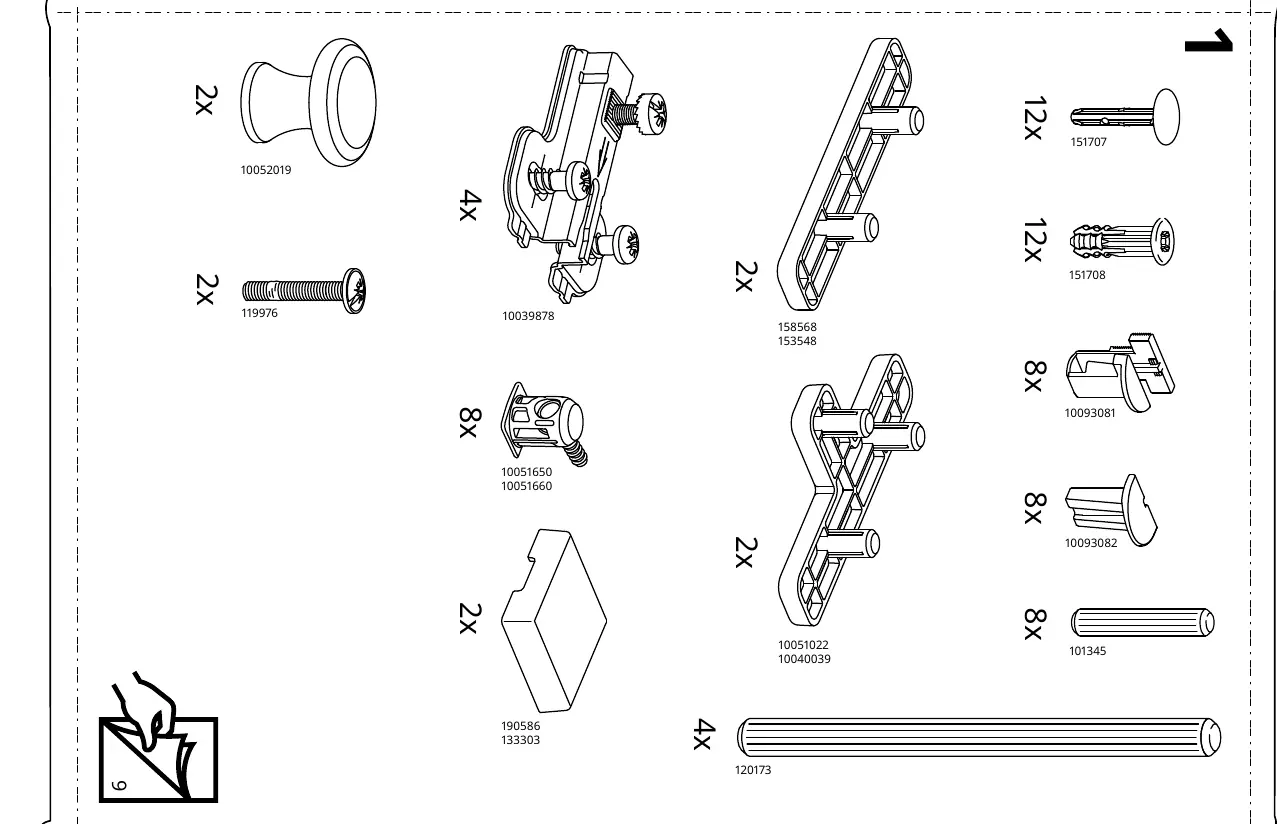
- Assemble on a soft surface to prevent scratching the furniture.
- Use the provided hardware (screws, dowels, hinges) as indicated in each step.
- Some steps require two people.
- Ensure all "Click!" connections are fully engaged.
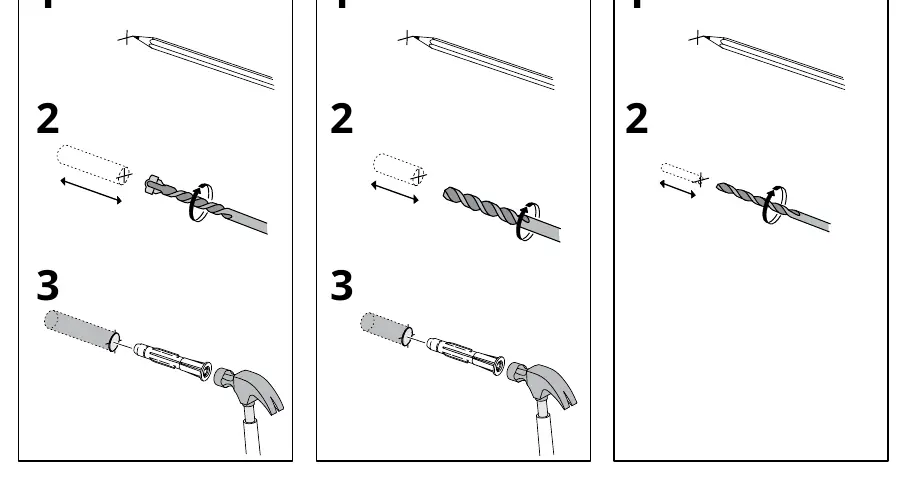
Wall Mounting
For safety, the cabinet must be secured to the wall. The supplied screws and plugs are suitable for most solid (A) and hollow (B) walls. For solid wood (C), use the screws without plugs. If you are uncertain about your wall type, seek professional advice.
Hinge Adjustment
If the doors are not aligned, use the adjustment screws on the hinges to align them horizontally and vertically. Refer to the diagrams on page 29 for the specific adjustment points.
Care and Cleaning
To maintain the cabinet:
- Wipe clean with a cloth dampened in a mild cleaner.
- Wipe dry with a clean cloth.
Manufacturer information
IKEA
Practical help
Common problems
Cabinet tipping over
Always install the provided tipover restraint to secure the unit to the wall.
Doors are misaligned
Use the adjustment screws on the hinges to align the doors horizontally and vertically.
Before use
- Ensure you have all parts listed in the manual.
- Have a hammer, screwdriver, and drill ready.
- Identify your wall type (solid, hollow, or wood) for proper mounting.
- Assemble on a soft surface to prevent damage.
- Verify that the tipover restraint is installed.
Images and diagrams
- The manual uses numbered steps to guide assembly.
- Icons indicate when to use specific tools or when two people are required.
- The 'Click!' icon indicates a snap-fit connection.
Model compatibility
- Supplied screws and plugs are suitable for most solid and hollow walls.
- For solid wood walls, use screws without plugs.

Manual page author
Emily Carter
User documentation editor
Prepares concise manual descriptions and highlights the most useful setup, operation, and maintenance information for readers.