Furniture / Storage Cabinets
Assembly Instructions for IKEA TONSTAD Sideboard
A comprehensive assembly guide for the IKEA TONSTAD Sideboard. This manual includes essential safety warnings, a list of required tools, step-by-step assembly procedures, wall-mounting instructions, and hinge adjustment tips.
Table of contents
Manual images
Click an image to enlargeImportant Safety Information
Warning: Serious or fatal crushing injuries can occur from furniture tip-over. To prevent this, you must always secure this furniture to the wall using the included tip-over restraints.
- Place heaviest items in the lower drawer.
- Do not set TVs or other heavy objects on top of this product.
- Never let children climb or hang on drawers, doors, or shelves.
Tools Required
To assemble this sideboard, you will need the following tools (not included):
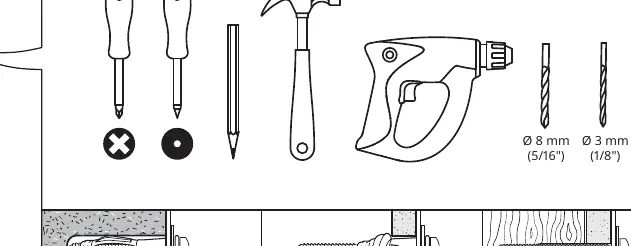
- Screwdriver (Phillips and flathead)
- Pencil
- Hammer
- Power drill
- Drill bits (8 mm for wall plugs, 3 mm for wood)
Assembly Instructions
The assembly process involves 43 steps. Ensure you have enough floor space and assemble the unit on a soft surface to prevent scratching. Follow the steps in order, paying close attention to the hardware identification on pages 8 and 9.
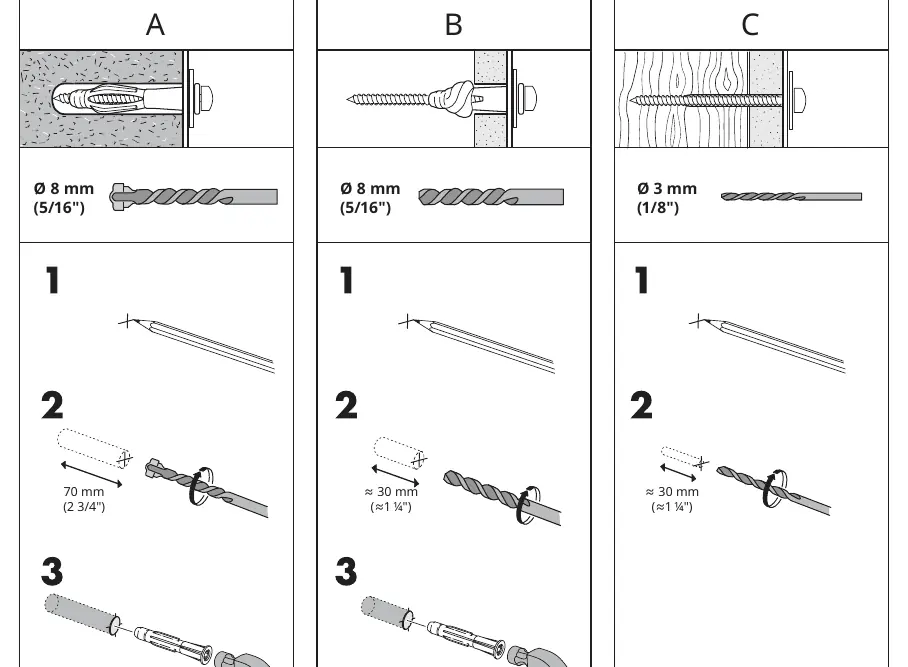
Wall Mounting
The sideboard must be anchored to the wall. The provided screws and plugs are suitable for most solid and hollow walls. For solid wood surfaces, use the screws without plugs. If you are uncertain about your wall type, seek professional advice.
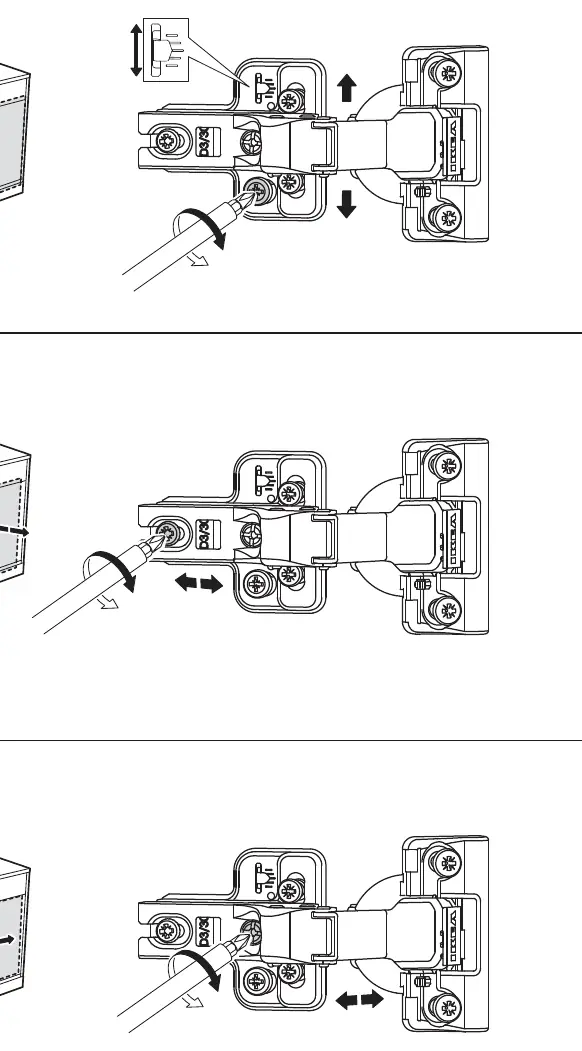
Hinge Adjustment
If the doors are not aligned correctly, you can adjust them using the hinge adjustment screws. Refer to page 38 for the specific adjustment points to align the doors vertically, horizontally, and in depth.
Manufacturer information
IKEA
Practical help
Common problems
Furniture instability
Always secure the sideboard to the wall using the included tip-over restraints to prevent tipping.
Door misalignment
Use the hinge adjustment screws located on the door hinges to align the doors properly (see page 38).
Before use
- Check all parts against the parts list on pages 8 and 9.
- Ensure you have the required tools: screwdriver, hammer, and drill.
- Identify a suitable wall type for mounting.
- Clear enough floor space for assembly.
- Assemble on a soft surface to protect the finish.
Specs in practice
- Wall Mounting
- Required for safety. Use the provided hardware for solid or hollow walls; use screws only for solid wood.
Images and diagrams
- Page 6: Tools required and wall drilling guide.
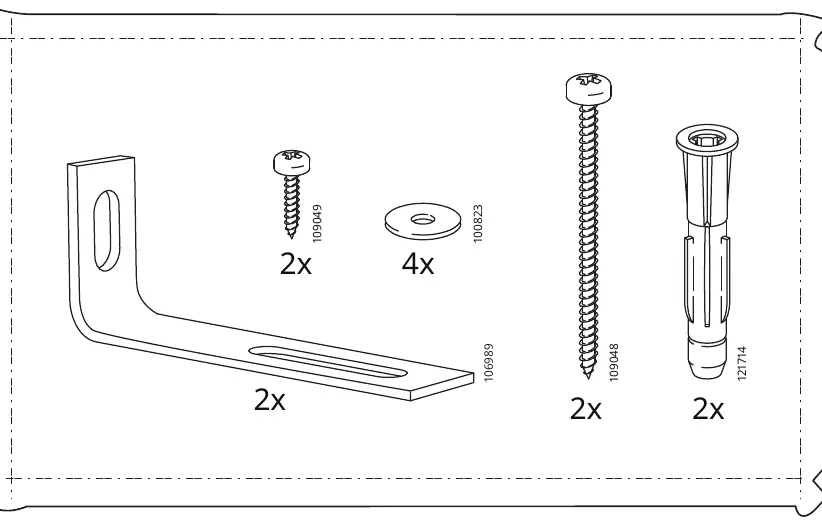
- Page 7: Hardware list for wall mounting.
- Page 28: Wall type guide (A: Solid, B: Hollow, C: Solid Wood).
- Page 38: Hinge adjustment guide.
Model compatibility
- Wall mounting hardware is suitable for most solid and hollow walls.
- For solid wood walls, use screws without the provided plugs.

Manual page author
Emily Carter
User documentation editor
Prepares concise manual descriptions and highlights the most useful setup, operation, and maintenance information for readers.