Furniture / Storage Cabinets
Installation Guide for IKEA HAUGA 2-Drawer Chest
A comprehensive installation guide for the IKEA HAUGA 2-Drawer Chest. This manual includes essential safety warnings, a list of required tools, hardware identification, and step-by-step assembly instructions, including critical...
Quick answers from the manual
Quick answer
- This document is the installation guide for the IKEA HAUGA 2-Drawer Chest. It provides step-by-step assembly instructions and critical safety warnings regarding wall anchoring to prevent furniture tip-over. p. 1, 2, 22
Key actions
- Install the anti-tip device p. 2, 22
- Assemble the frame p. 7, 17
- Assemble and insert drawers p. 25, 30
First start
- Prepare tools and workspace, then begin assembly with Step 1. p. 3, 7
Where to find it in the PDF
- Safety Warnings p. 2
- Tools and Hardware p. 3, 4, 5
- Assembly Steps p. 7, 30
- Wall Anchoring p. 22
Table of contents
Manual images
Click an image to enlargeImportant Safety Information
WARNING: Children have died from furniture tip-over. To reduce the risk of furniture tip-over:
- ALWAYS install the provided anti-tip device.
- NEVER put a TV on this product.
- NEVER allow children to stand, climb, or hang on any drawers, doors, or shelves.
- NEVER open more than one drawer at a time.
- Place heaviest items in the lowest drawers.
Tools Required
To assemble this product, you will need the following tools:
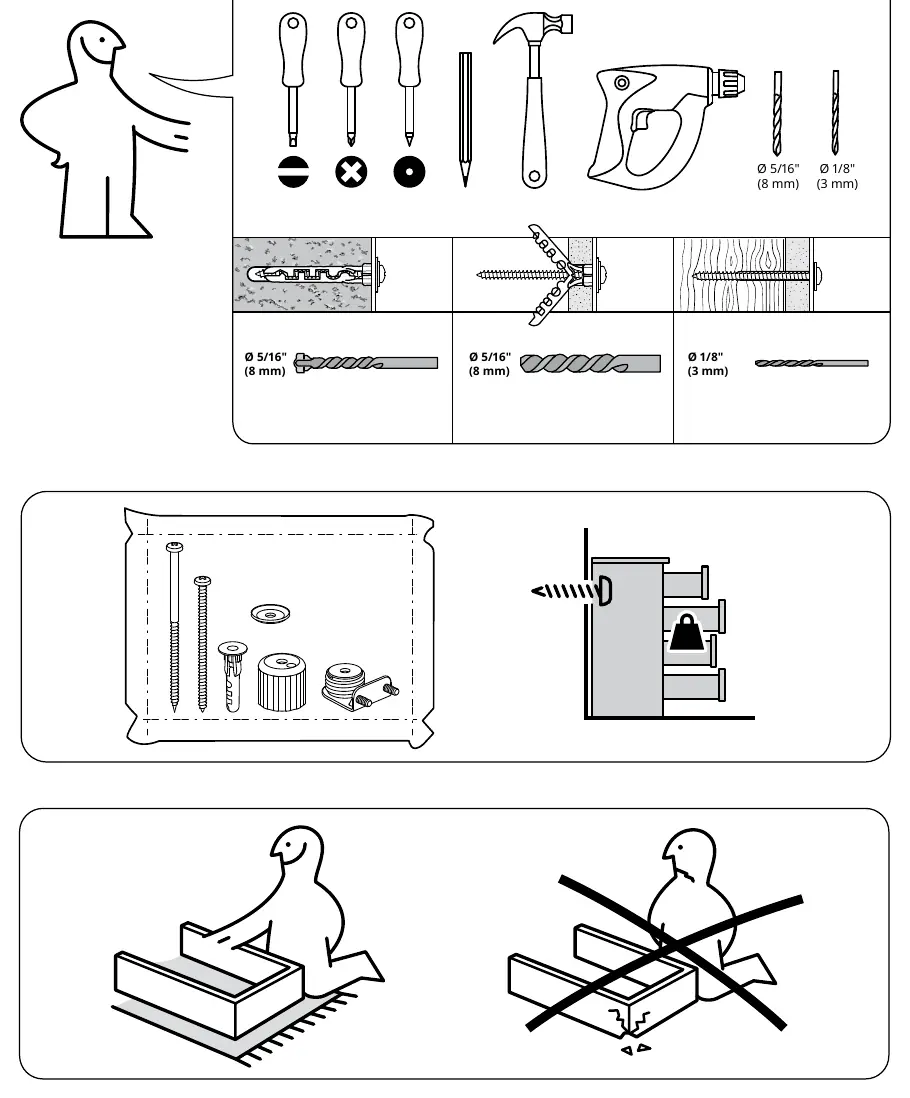
- Screwdriver (Phillips and flathead)
- Hammer
- Drill
- Pencil
Assembly Instructions
The assembly process involves building the main frame, installing drawer runners, and assembling the drawers. Follow the steps in numerical order:
- Frame Assembly: Start by attaching the drawer runners to the side panels (Step 1). Assemble the side panels and structural supports (Steps 2-17).
- Drawer Assembly: Assemble the drawer components, including the front, sides, and bottom (Steps 24-33).
- Final Setup: Insert the drawers into the frame (Steps 34-35).
Wall Anchoring
Crucial Step: The furniture must be permanently fixed to the wall to prevent tipping. The supplied screws and plugs are suitable for most solid (A) and hollow (B) walls. For solid wood (C), use the screws without plugs. If you are uncertain about your wall type, seek professional advice.
Manufacturer information
IKEA
Practical help
Common problems
Furniture instability or risk of tipping
Always install the provided anti-tip device and anchor the unit to the wall as instructed.
Difficulty inserting drawers
Ensure the drawer runners are installed correctly and that the frame is square and level.
Before use
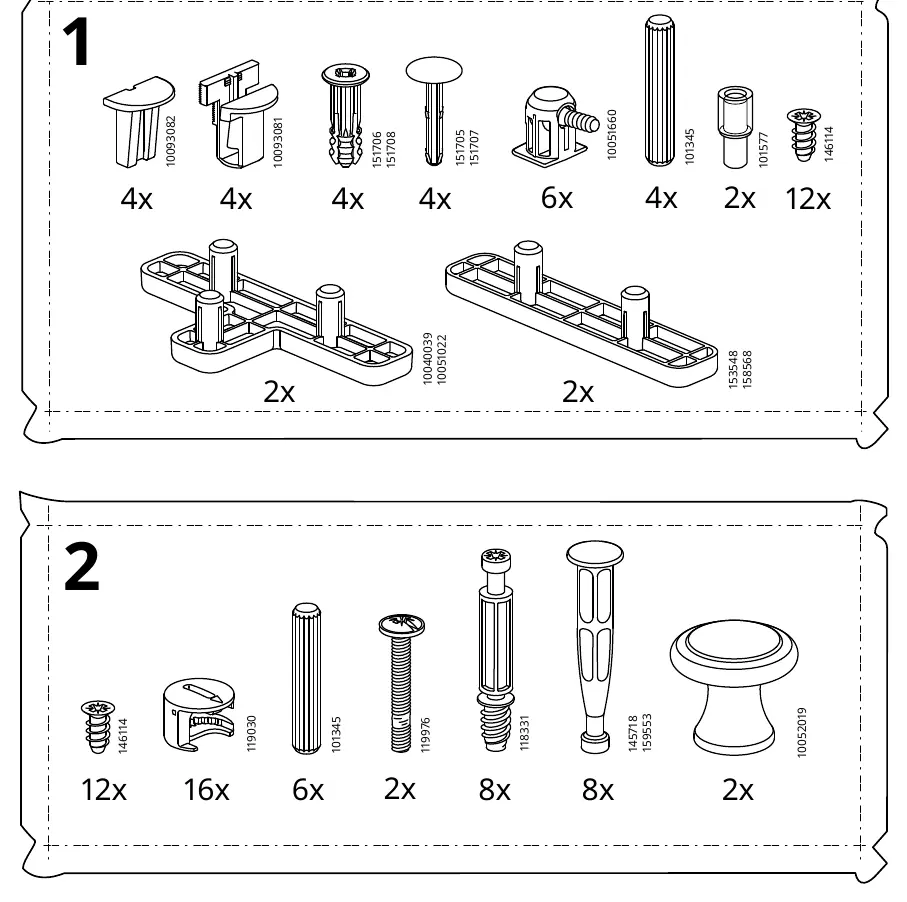
- Verify all parts and hardware are present according to the manual.
- Ensure you have the necessary tools: screwdriver, hammer, and drill.
- Identify the wall type (solid or hollow) to select the correct anchoring method.
- Clear a sufficient workspace for assembly.
Images and diagrams
- The manual uses pictograms to indicate tool usage and assembly steps.
- Warning icons indicate the risk of furniture tip-over.
- The 'X' symbol indicates incorrect assembly or prohibited actions.
Model compatibility
- Supplied screws and plugs are suitable for most solid and hollow walls.
- For solid wood walls, use screws without plugs.

Manual page author
Emily Carter
User documentation editor
Prepares concise manual descriptions and highlights the most useful setup, operation, and maintenance information for readers.