Home Appliances / Sewing Machines
User Manual for Janome 1600P Series Sewing Machine
Quick guide for the Janome 1600P Series sewing machine. Learn how to set up, thread, wind bobbins, maintain, and troubleshoot your machine effectively.
Table of contents
Manual images
Click an image to enlargeQuick guide from the manual
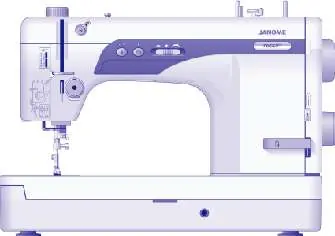
This manual provides instructions for the Janome 1600P Series sewing machine, including the 1600P, 1600P-DB, and 1600P-DBX models. It covers setup, operation, and maintenance to ensure optimal performance.
Getting Started
Before using the machine, ensure it is placed on a stable surface. Connect the power supply by inserting the foot control plug into the machine socket and the power plug into the wall outlet. Use the power switch to turn the machine on or off. The knee lifter can be attached to raise and lower the presser foot hands-free.
Threading and Bobbin
- Winding a Bobbin: Pass the thread through the guide, under the tension disk, and through the bobbin hole. Push the bobbin winder stopper to the left and press the bobbin winding button.
- Inserting the Bobbin: Place the bobbin in the case, draw the thread through the slit and under the tension spring. Insert the bobbin case into the hook, ensuring it locks into place.
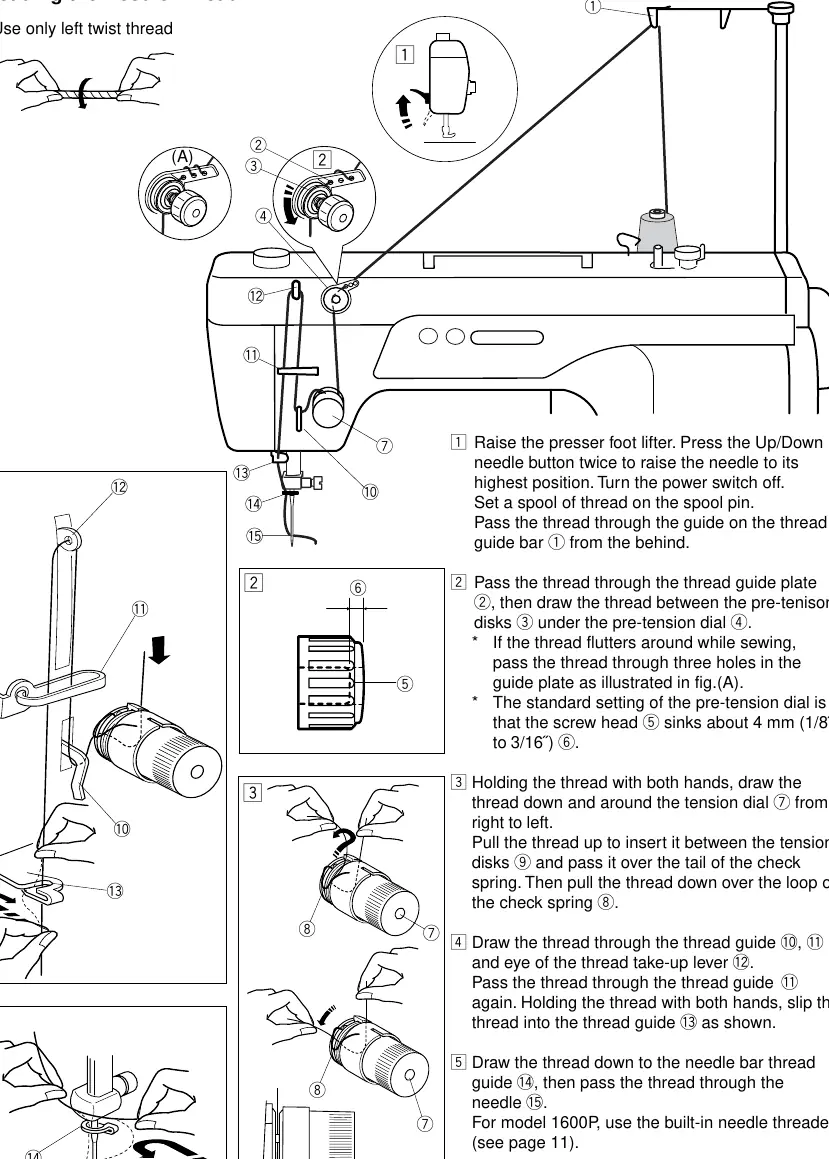
- Threading the Needle: Follow the numbered path on the machine. Pass the thread through the tension disks, around the check spring, through the take-up lever, and finally through the needle eye.
Sewing Operations
- Stitch Length: Adjust the stitch length from 0 to 6 mm using the adjustment dial.
- Speed Control: Use the speed control slider to set the maximum sewing speed. The foot control varies speed up to the set limit.
- Reverse Stitching: Press the reverse stitch lever to sew in reverse for locking seams.
- Needle Position: Use the Up/Down needle position button to control whether the needle stops in the up or down position.
Care and Maintenance
- Cleaning: Regularly clean the hook and feed dog using the provided lint brush. Remove the needle plate to access these areas.
- Oiling: Oil the machine points (marked in the manual) with sewing machine oil MO-70. Oil once a day if the machine is used frequently.
- Replacing the Light Bulb: Turn off the power and let the bulb cool. Remove the face cover or lamp window to access the bulb. Replace with a 12V, 5W bulb.
Troubleshooting
If you encounter issues, check the following:
- Needle thread breaks: Check threading, tension, needle condition, and ensure thread is not too heavy.
- Bobbin thread breaks: Check bobbin holder threading and remove lint from the hook race.
- Skipped stitches: Ensure the needle is inserted correctly and is not bent or blunt.
- Machine noisy: The machine likely needs oiling or has thread caught in the hook race.
Practical help
Common problems
Needle thread breaks
Check if threaded properly, reduce tension, replace bent/blunt needle, or ensure thread is suitable for the needle size.
Bobbin thread breaks
Re-thread the bobbin holder and clean lint from the hook race.
Skipped stitches
Ensure the needle is inserted correctly, is not bent, and is the correct type for the fabric.
Machine noisy or not running smoothly
Oil the machine points and check for thread caught in the hook race.
Before use
- Ensure the machine is plugged into a power outlet.
- Check that the needle is not bent or blunt.
- Verify the machine is threaded correctly according to the diagram.
- Ensure the presser foot is down when sewing.
- Check that the bobbin is wound and inserted correctly.
Specs in practice
- Stitch Length
- Adjustable from 0 to 6 mm.
- Needle (1600P)
- Uses HL x 5 needles.
- Needle (1600P-DB/DBX)
- Uses DB x 1 needles.
Images and diagrams
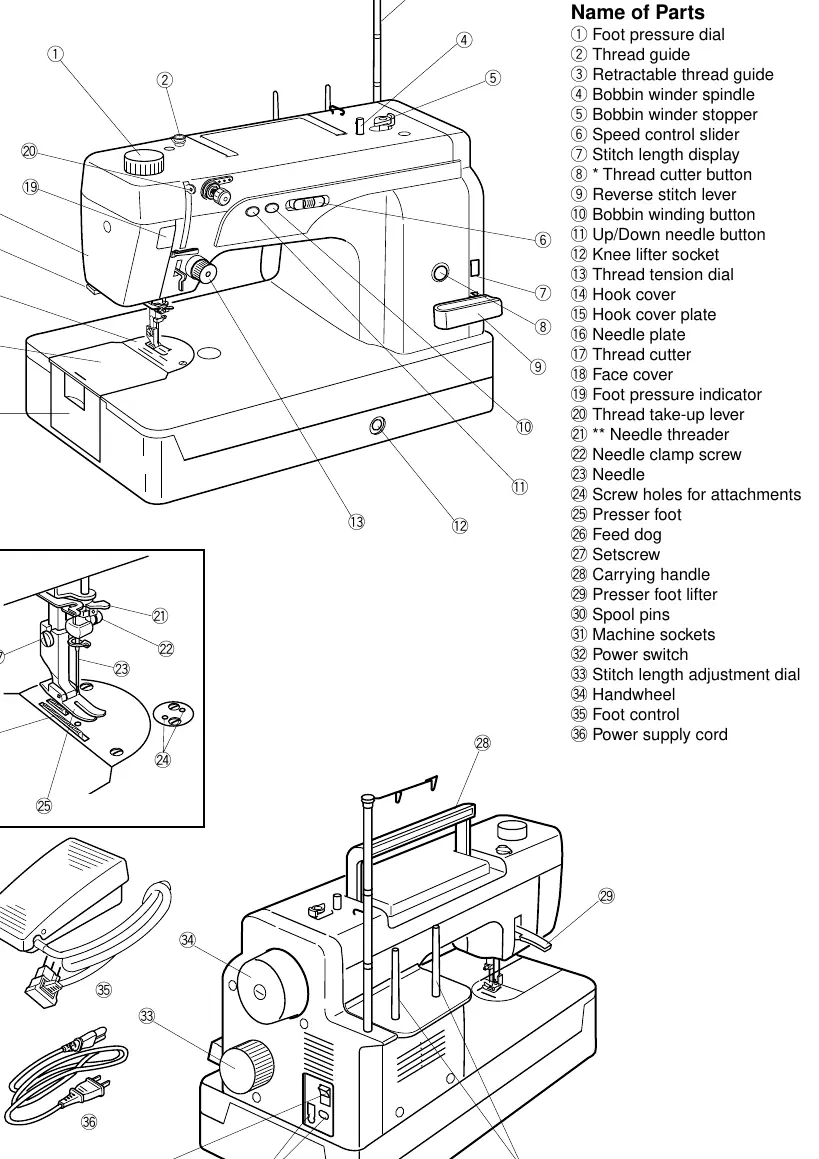
- The 'Name of Parts' diagram on page 4 identifies all controls, including the foot pressure dial, thread cutter, and speed control slider.
- The threading diagram on page 12 shows the precise path for the needle thread.
- The bobbin winding diagram on page 10 illustrates the path from the spool to the bobbin.
Model compatibility
- Model 1600P uses HL x 5 needles.
- Models 1600P-DB and 1600P-DBX use DB x 1 needles.
- Foot control model TJC-005 is used with model 1600P.

Manual page author
Michael Turner
Technical manual editor
Reviews PDF manuals for structure, safety notes, and practical product details so readers can find the right information quickly.