Garden / Outdoor Furniture
Assembly Instructions for Patiojoy 11-Piece Patio Furniture Set HW71702
Complete assembly guide for the Patiojoy 11-Piece Patio Furniture Set (HW71702). Includes a detailed parts list, step-by-step installation instructions for chairs, table, and ottomans, and procedures for handling return or damage claims.
Table of contents
Manual images
Click an image to enlargeQuick guide from the manual
This manual provides assembly instructions for the Patiojoy 11-Piece Patio Furniture Set (HW71702). The set consists of chairs, a table, and ottomans. Important: Do not fully tighten screws (100%) until all parts are aligned and connected. Use the included Allen Key for assembly. Keep the original packaging until assembly is complete in case of returns.
Before you start
- Read all instructions carefully before beginning.
- Separate and count all parts and hardware to ensure nothing is missing.
- Assemble the product on a flat, steady, and stable surface.
- Keep small parts and packaging materials away from babies and children to avoid choking hazards.
- Assemble the product near the area where it will be placed to avoid unnecessary moving.
Parts list
The set includes various frames (A-L), panels (M-Q), and hardware (screws 1-8, Allen Key 9). Ensure all items listed on page 3 are present before starting assembly.
Assembly instructions
The assembly is divided into three main sections:
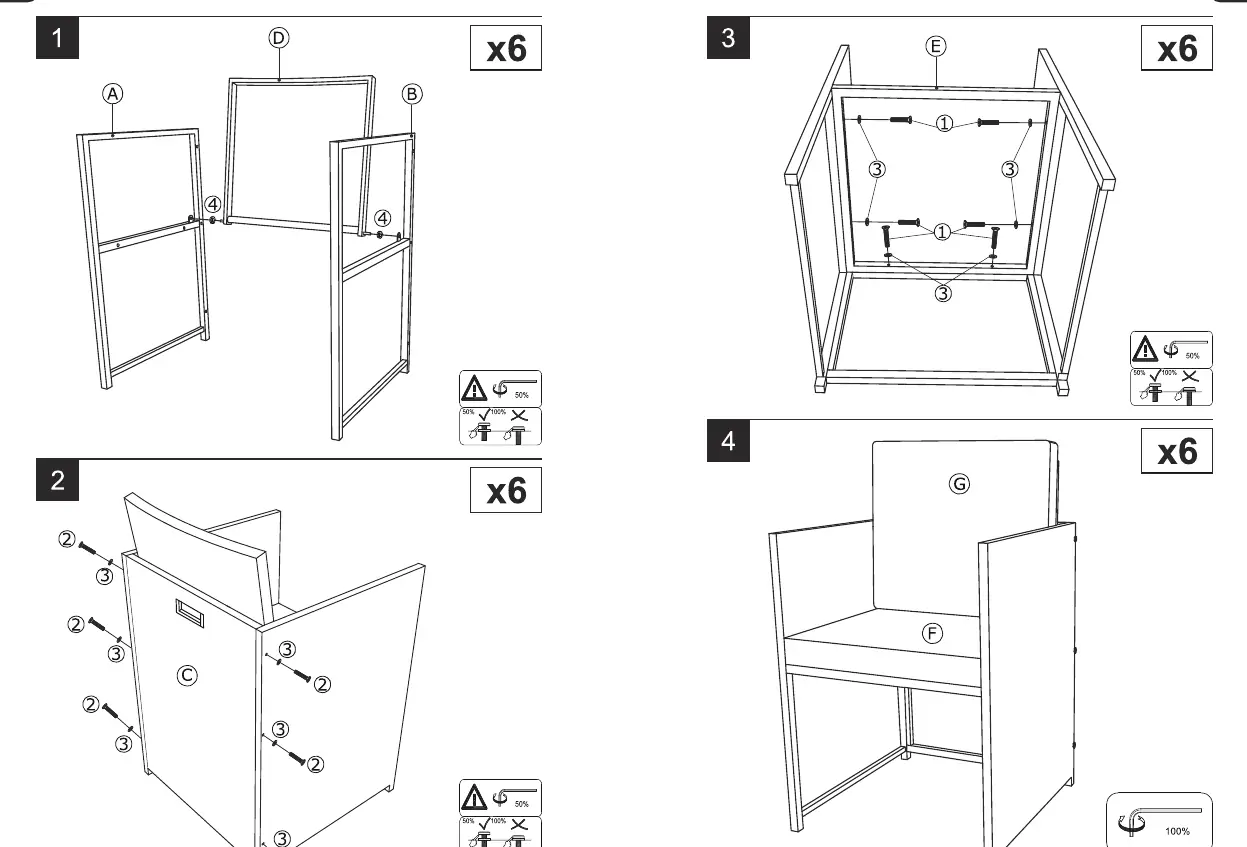
Chair assembly (Steps 1-4)
- Connect side frames (A, B) to the back frame (D) using screws (4).
- Attach the seat frame (C) to the side frames using screws (2) and washers (3).
- Attach the bottom frame (E) to the structure using screws (1) and washers (3).
- Place the seat cushion (F) and back cushion (G) to finish the chair. Repeat for all chairs.
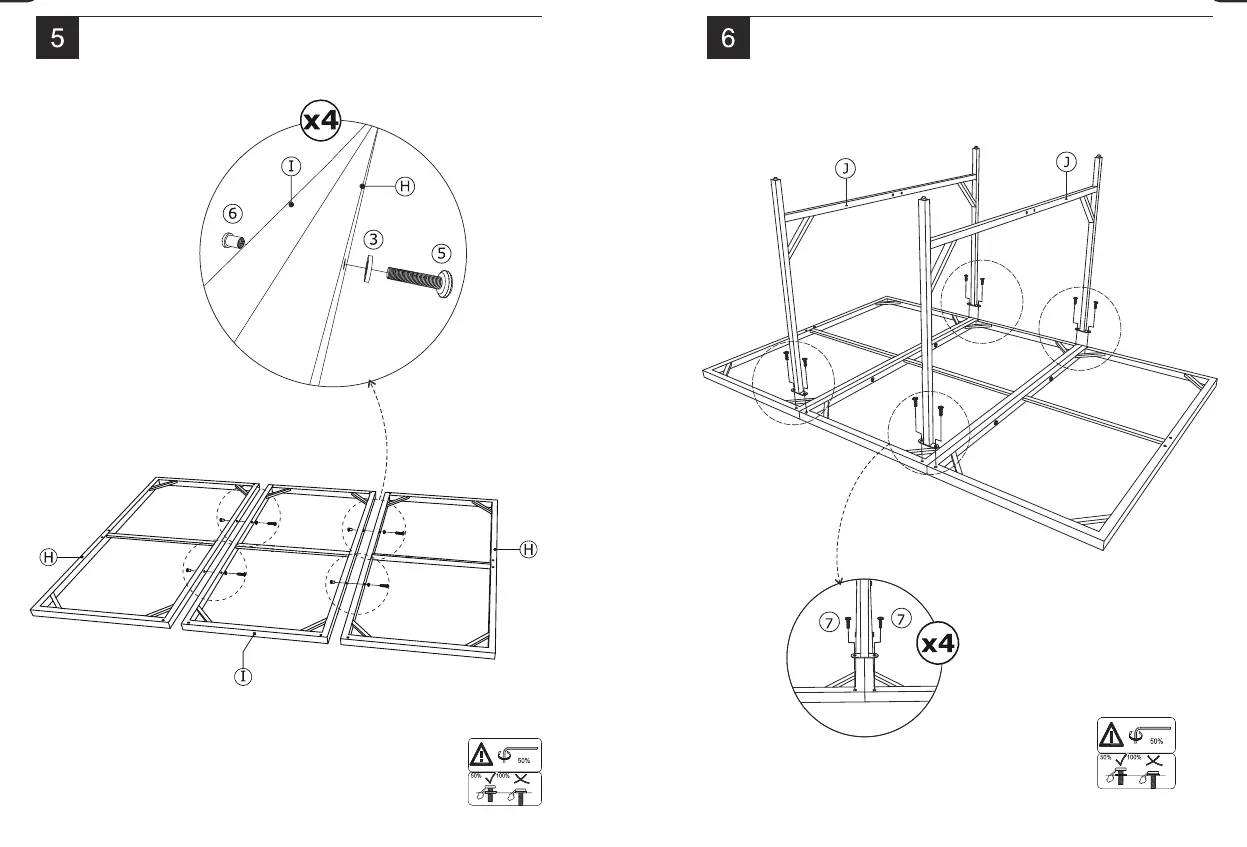
Table assembly (Steps 5-11)
- Connect table frames (H, I) using screws (5) and washers (3, 6).
- Attach legs (J, K) and support bars (L) to the table frame using screws (7, 8).
- Place the glass table tops (M) onto the assembled frames.
- Ensure all screws are tightened to 100% once the table is level.
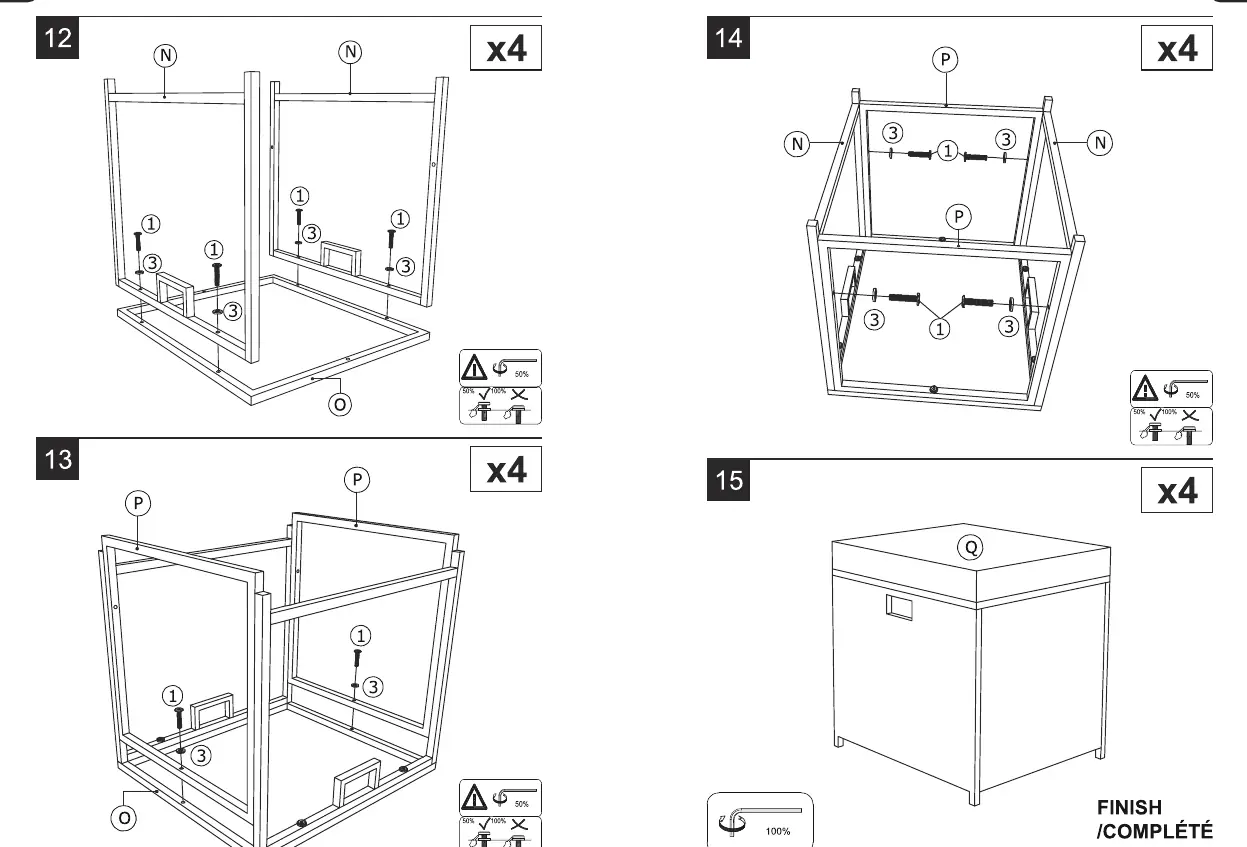
Ottoman assembly (Steps 12-15)
- Assemble the ottoman frame using side panels (N), base (O), and top frame (P) with screws (1) and washers (3).
- Place the cushion (Q) on top. Repeat for all ottomans.
Return and damage claims
If you encounter issues or damage:
- Do not discard the box or original packaging. Returns must be in the original box.
- Take a photo of the box markings (on the side of the box) to identify the product number.
- Take a photo of the damaged part.
- Send an email to the customer service team with the images and a description of the claim.
Practical help
Common problems
Difficulty aligning screws during assembly
Do not tighten screws 100% until all parts are connected. Tighten them only to 50% initially to allow for adjustments.
Missing parts or hardware
Check all packaging materials thoroughly. If parts are missing, contact customer support with photos of the box markings.
Before use
- Count all parts and hardware against the list on page 3.
- Ensure you have a flat, steady, and stable surface for assembly.
- Keep small parts and packaging away from children.
- Do not discard the original box until assembly is complete.
- Verify you have the Allen Key (9) included in the hardware pack.
Specs in practice
- M6 x 35mm/45mm/40mm/15mm/10mm
- Various screw lengths used for different assembly steps. Ensure you use the correct length as specified in each step.
Images and diagrams
- The manual uses a 50% vs 100% tightening icon. This indicates that you should only partially tighten screws until the final assembly step to ensure proper alignment.

Manual page author
Emily Carter
User documentation editor
Prepares concise manual descriptions and highlights the most useful setup, operation, and maintenance information for readers.