Lighting / Fixtures
Philips Ultinon LED Car Headlight Bulb Installation Guide
Installation and setup guide for Philips Ultinon LED headlight bulbs, covering various socket types and CANbus compatibility testing.
Table of contents
Product Overview
The Philips Ultinon LED headlight bulb is designed to provide high-performance lighting for vehicles. This guide covers the installation process for various bulb types, including H4, H7, H1, H3, and HB4 sockets. Proper installation is critical to ensure optimal beam pattern and vehicle safety.
Safety and Preparation
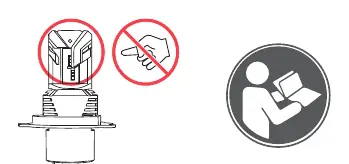
Before beginning the installation, ensure the vehicle's ignition is turned off and the headlight switch is in the OFF position. Allow the existing bulbs to cool down if they have been recently used, as they can become extremely hot. Do not touch the LED chip surface with your fingers, as oils and debris can damage the bulb.
Installation Procedures
The installation process varies depending on the specific bulb socket type:
- H4/H7 Sockets: Remove the original bulb, unlock the retaining clip, insert the LED bulb until it clicks into place, and reconnect the power connector. Ensure the bulb is seated correctly in the housing.
- H1/H3 Sockets: Insert the bulb into the housing and secure it with the retaining wire until a click is heard. Connect the electrical harness.
- Other Bulbs (e.g., HB4): Follow the specific locking mechanism for your vehicle's housing, ensuring the bulb is rotated and locked securely. Some models may require the use of included O-rings for a proper seal.
Testing and Compatibility
After installation, perform a functional test by turning on the vehicle's headlights. If your vehicle is equipped with a CANbus system, monitor the dashboard for any bulb-out warning indicators. If an error occurs, an additional CANbus adapter may be required to resolve the compatibility issue.
Manufacturer information
Philips
Practical help
Common problems
Dashboard bulb-out warning light
The vehicle's CANbus system may detect the lower power consumption of the LED. Install a compatible CANbus adapter to eliminate the warning.
Bulb does not fit or seal properly
Ensure the correct bulb type is used for your vehicle. For some models like HB4, ensure the provided O-rings are installed correctly to create a secure seal.
Before use
- Ensure the vehicle ignition and headlight switch are in the OFF position.
- Allow existing bulbs to cool down completely before removal.
- Verify the bulb socket type matches your vehicle's requirements.
- Do not touch the LED chip surface.
- Ensure you have the necessary space to access the headlight housing.
Images and diagrams
- The manual provides specific visual sequences for H4/H7 (A1, A2, A3), H1/H3, and other bulb types.
- Look for the 'Clicked' indicator in diagrams to confirm the bulb is locked into the socket.
- The final section illustrates the CANbus testing procedure using the vehicle's dashboard indicators.
Model compatibility
- Compatible with various headlight housing types including H4, H7, H1, H3, and HB4.
- Vehicles with CANbus systems may require an additional adapter to prevent dashboard error messages.

Manual page author
Emily Carter
User documentation editor
Prepares concise manual descriptions and highlights the most useful setup, operation, and maintenance information for readers.