Health / Medical Devices
Installation and Operation Guide for Philips DreamStation Wi-Fi Accessory
Quick guide for the Philips DreamStation Wi-Fi Accessory. Learn how to install, connect to Wi-Fi, troubleshoot connection errors, and maintain your device.
Table of contents
Manual images
Click an image to enlargeQuick Guide
The DreamStation Wi-Fi Accessory allows your Philips Respironics therapy device to transfer data to compliance software via a local Wi-Fi network. Installation involves inserting the accessory into the therapy device, connecting to your network via the device menu, and ensuring proper placement away from other electronic devices to avoid interference.
Installation
- Ensure the therapy device is turned off.
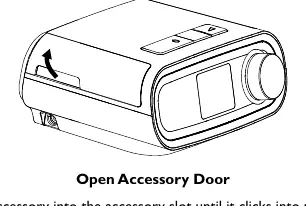
- Open the accessory door on the therapy device.
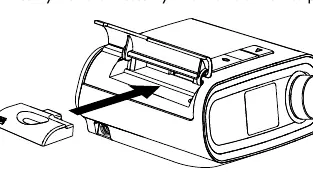
- Slide the Wi-Fi Accessory into the accessory slot until it clicks into place.
- Close the accessory door.
- Wait up to 30 seconds after powering on for the accessory to be ready.
Connecting to Your Network
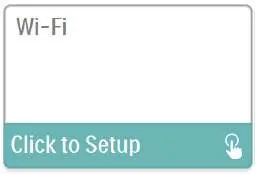
- Navigate to the My Setup menu on your therapy device and select Wi-Fi.
- The device will search for available networks. Select your network from the list.
- If your network is secure, enter the password using the on-screen keyboard.
- Once connected, the network name and signal strength will appear in the My Setup menu.
Connecting to Compliance Software
The accessory typically uploads data automatically at predetermined times. If your provider instructs you to perform a manual upload:
- Navigate to the My Provider menu on the therapy device.
- Select Upload.
- The device will display an animated sending screen, followed by a completion message.
Troubleshooting and Error Messages
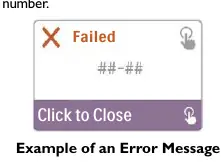
If a connection or upload fails, an error message with a number will appear. Common actions include:
- 1-x (Connection Error): Unplug the power supply from the therapy device, wait 10 seconds, plug it back in, and retry the manual upload.
- 5-x (Network Configuration Error): Verify your password and ensure the device is within range of your wireless network.
- Buzzing Noise: If you hear buzzing, relocate the therapy device away from other electronic devices like speakers or radios.
Removing the Accessory
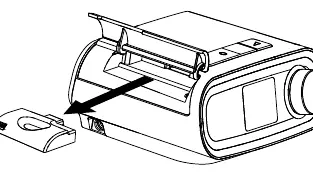
- Ensure the therapy device is turned off.
- Open the accessory door.
- Gently pull the accessory out of the therapy device.
- Close the accessory door.
Cleaning and Maintenance
Remove the accessory from the therapy device before cleaning. Wipe the outside with a cloth slightly dampened with water and a mild detergent. Ensure no liquid enters the connectors and let the accessory dry completely before reinstallation.
Manufacturer information
Philips
Practical help
Common problems
Red X over signal icon
The device detects a wireless router but cannot connect. Repeat the network setup steps, ensuring you select the correct network and enter the correct password.
Buzzing noise heard
Relocate the therapy device and accessory away from other electronic devices like clock radios or speakers.
Connection Error (1-x)
Unplug the power supply cord from the therapy device, wait 10 seconds, plug it back in, and initiate a manual upload via the My Provider menu.
Before use
- Ensure the therapy device is turned off before installation.
- Allow the device to reach room temperature if it has been exposed to extreme heat or cold.
- Use ESD (electrostatic discharge) precautionary procedures when handling connectors.
- Verify the device is within range of your wireless network.
Specs in practice
- WLAN Standard
- 802.11 b/g/n
- Operating Frequency
- 2402-2480 MHz
- Expected Service Life
- 5 years
Images and diagrams
- Installation: Open the accessory door, slide the unit into the slot until it clicks, and close the door.
Model compatibility
- Designed for use with select Philips Respironics therapy devices only.
- Not suitable for use on airlines.

Manual page author
Michael Turner
Technical manual editor
Reviews PDF manuals for structure, safety notes, and practical product details so readers can find the right information quickly.