Power / Power Distribution Units
StarTech.com 14-Outlet 1U Rackmount PDU with Surge Protection 1415B8H-RACK-PDU-SP
Quick start guide for the StarTech.com 14-Outlet 1U Rackmount PDU (1415B8H-RACK-PDU-SP). Includes installation instructions for 19-inch rack and 0U vertical mounting, safety warnings, and feature overview.
Table of contents
Manual images
Click an image to enlargeImportant Information
This document provides installation and usage instructions for the StarTech.com 14-Outlet 1U Rackmount PDU (1415B8H-RACK-PDU-SP). This unit is designed exclusively for use within racks in computer rooms, telecommunications, and cloud data centers. Ensure you have the necessary tools, including a Phillips screwdriver (PH1 for M3 screws, PH2 for M5 screws) and an optional cage nut tool, before beginning installation.
Product Overview
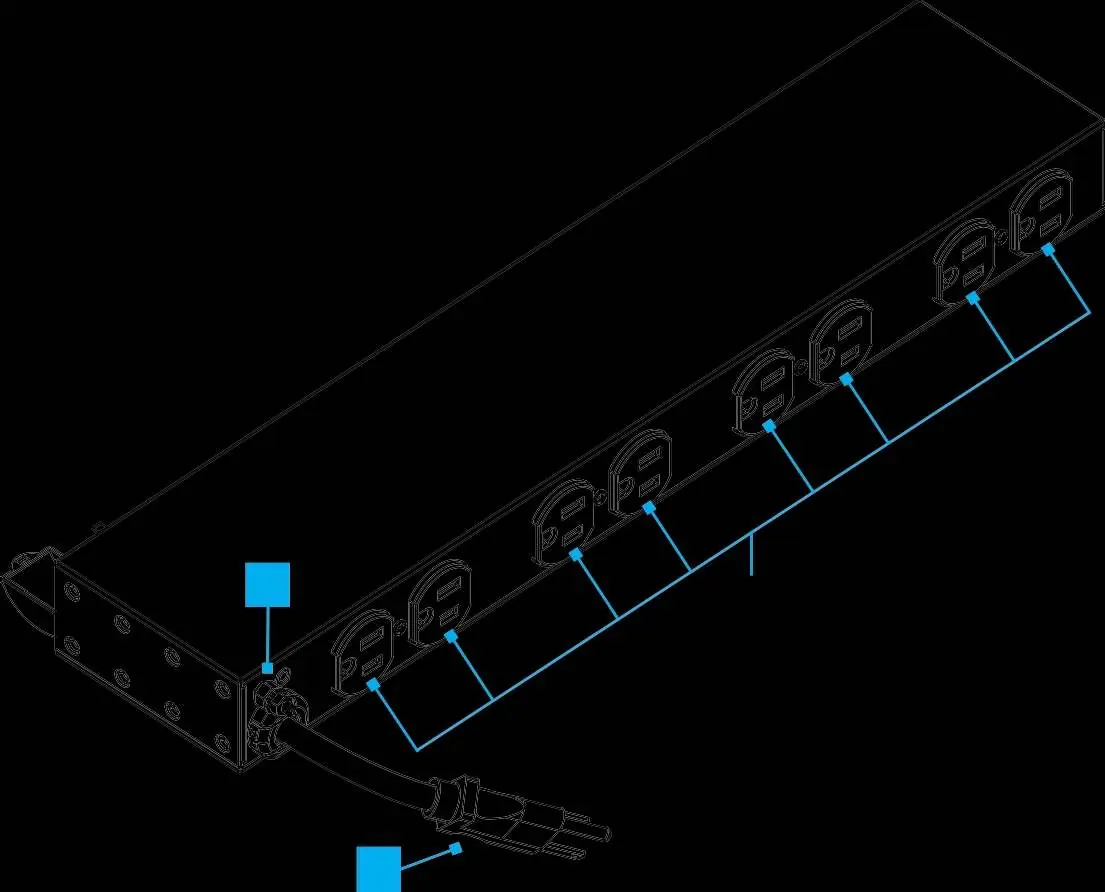
The PDU features 14 NEMA 5-15R outlets (6 on the front, 8 on the rear) rated for 125V AC, 15A. It includes a surge protection LED indicator, a manual circuit breaker reset button, and a power switch. The unit provides up to 3000 Joules of AC surge protection.
Package Contents
- 1 x PDU Unit
- 2 x 4-Way Mounting Brackets (Pre-installed)
- 4 x M5x12 mm Rack Screws
- 4 x M5 Cage Nuts
- 1 x Quick Start Guide
Installation
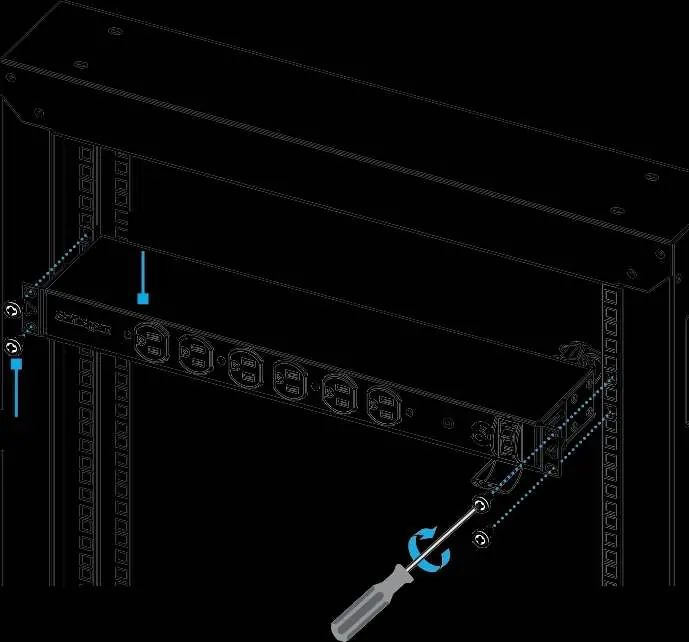

19-Inch Rack Mount
- Insert the cage nuts (D) into the desired rack mounting holes.
- Align the PDU (A) with the rack posts.
- Secure the PDU to the rack using the M5x12 mm screws (C) and a Phillips screwdriver.
Vertical 0U Mount
- Position the PDU vertically within the rack.
- Align the mounting brackets with the rack mounting holes.
- Secure the unit to the rack using the appropriate screws.
Bracket Adjustment
The 4-way mounting brackets can be removed or reinstalled to change the orientation or depth of the PDU.
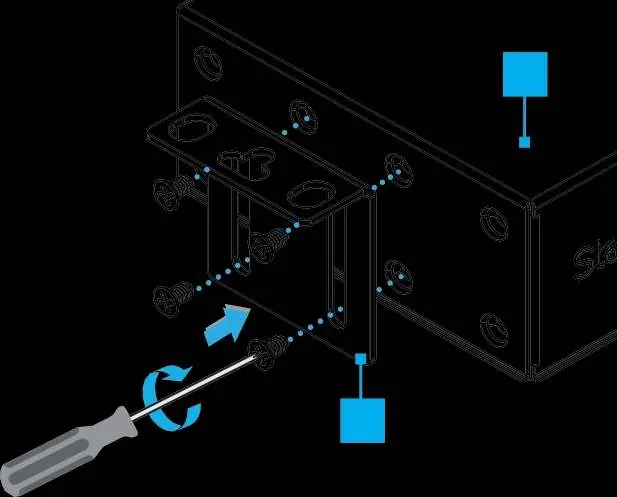
- Use a Phillips screwdriver to remove the screws holding the bracket (B) to the PDU (A).
- Reposition the bracket as needed.
- Reinstall the screws to secure the bracket to the PDU.
Safety Warnings
- StarTech.com is not responsible for material damage or personal injury resulting from improper installation.
- Do not touch the product while connected to power if the circuit board or electrical cable is exposed.
- If the connected equipment draws excessive current, the circuit breaker will trip. Disconnect non-essential devices, let the unit cool for at least 60 seconds, and press the manual reset button.
- Never insert foreign objects into the power outlets.
- Ensure the grounding point (9) is connected to a proper earth ground using a minimum 18 AWG wire (green or green/yellow).
Official resources from the manual
Practical help
Common problems
Circuit breaker trips
Inspect the connected load and disconnect non-essential or malfunctioning devices. Allow the unit to cool for at least 60 seconds before pressing the manual reset button.
Surge protection LED is off
The LED turns off when a surge protection event occurs. Check the unit status and connected equipment.
Before use
- Verify the rack mounting hole type (threaded vs. cage nut).
- Ensure you have a Phillips screwdriver (PH1 for M3, PH2 for M5).
- Check that all package contents (PDU, brackets, screws, cage nuts) are present.
- Ensure the power source is 125V AC.
- Confirm the grounding cable (not included) is at least 18 AWG.
Images and diagrams
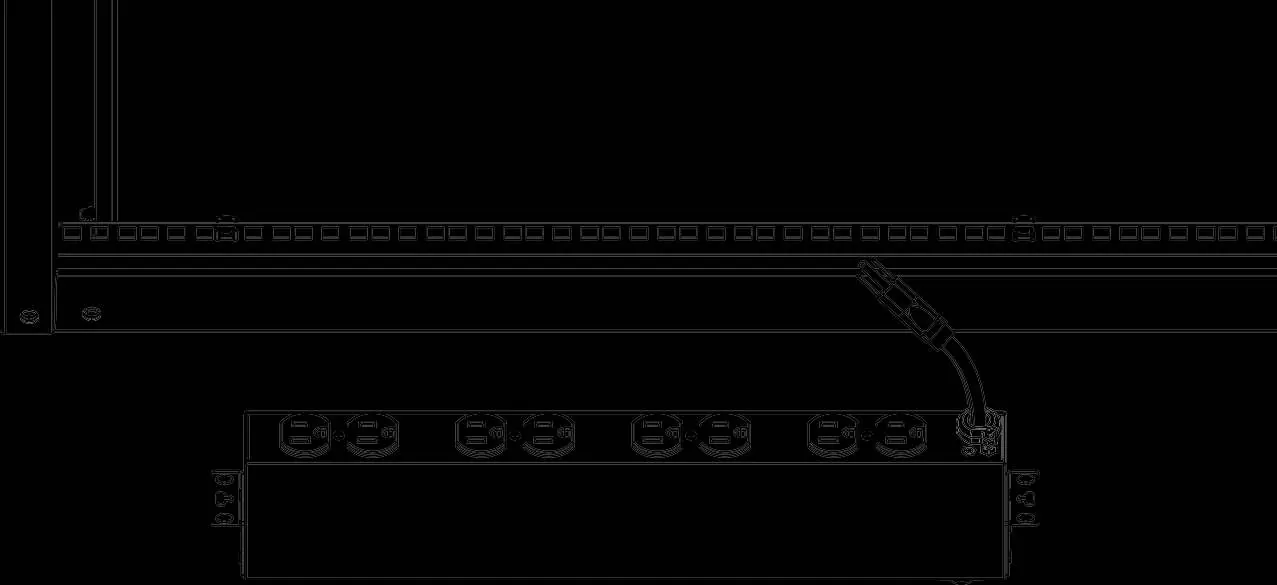
- The front view shows 6 outlets, the LED indicator, circuit breaker reset, and power switch.
- The rear view shows 8 outlets and the grounding point.
Model compatibility
- Designed for use in computer rooms, telecommunications, and cloud data centers.
- Requires 125V AC power source.

Manual page author
Michael Turner
Technical manual editor
Reviews PDF manuals for structure, safety notes, and practical product details so readers can find the right information quickly.