Power / Batteries Chargers
User Guide for GUDE Power Cloud
A comprehensive guide for setting up and managing GUDE Power Cloud, including account registration, connecting GUDE PDUs via MQTT, and organizing devices into groups.
Table of contents
Manual images
Jump to the sectionQuick guide from the manual
This document provides instructions for setting up the GUDE Power Cloud platform and integrating your GUDE PDU devices. The process involves creating a cloud account, configuring MQTT settings on your PDU, and organizing devices into groups for easier management.
Account registration
To begin using the service, follow these steps:
- Visit the official website at https://www.cloud.gude-systems.com.
- Click Continue and select Create a new account.
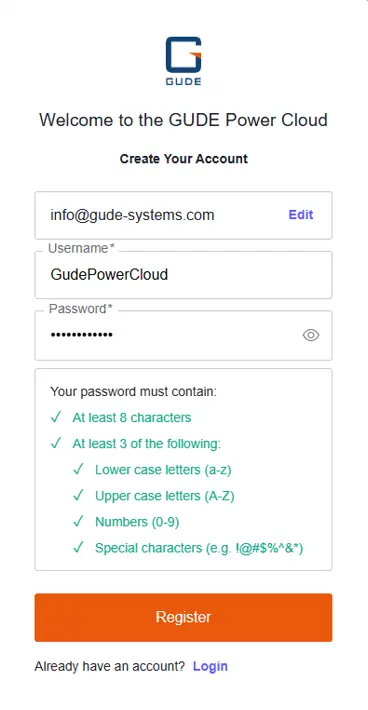
- Enter a valid business email address and follow the prompts to set a username and password.
- Ensure your password meets the security requirements (at least 8 characters, including a mix of uppercase, lowercase, numbers, and special characters).
- Complete the registration and confirm your account via the verification email sent to your inbox.
Adding a GUDE PDU
Once registered, you will receive a free trial license accessible in the dashboard under Gude Device Summary > Licenses. To connect your PDU:
- Access the WebGUI of your GUDE PDU.
- Navigate to Configuration > Protocols > MQTT.
- Enable MQTT by setting Enable MQTT to yes.
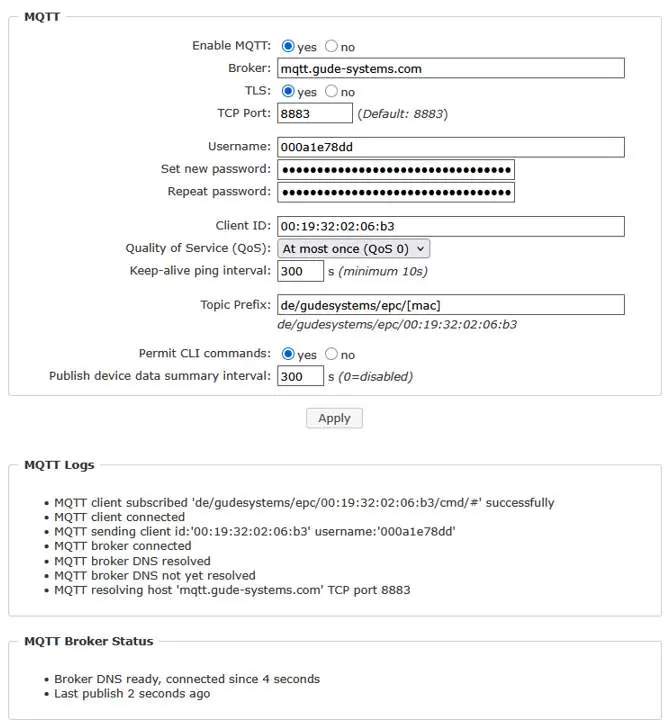
- Configure the following parameters:
- Broker: mqtt.gude-systems.com
- TLS: yes
- TCP Port: 8883
- Username: Use the License Username from the GUDE Power Cloud dashboard.
- Password: Use the Token-ID from the GUDE Power Cloud dashboard.
- Client ID: Enter the MAC-Address of your GUDE PDU.
- Permit CLI commands: yes
- Publish device data summary interval: 300 s
- Click Apply to save settings.
Verify the connection by checking the MQTT Logs in the PDU WebGUI for the message: MQTT client subscribed 'de/gudesystems/epc/[MAC]/cmd/#' successfully. The device will appear in the cloud dashboard within 5 minutes.
Organizing devices into groups
Groups help manage devices by location, room, or customer:
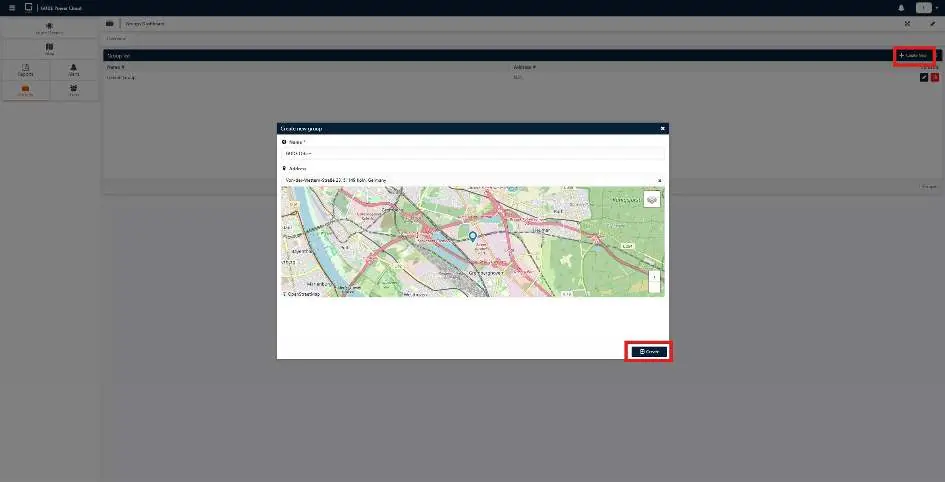
- Go to the Groups dashboard in the cloud portal and click Create new.
- Enter a name and optional address, then click Create.
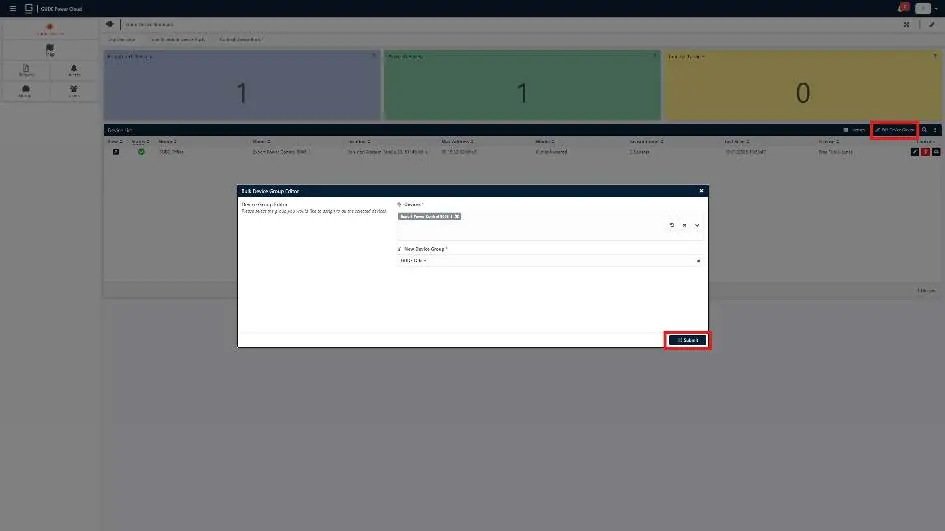
- Navigate to Gude Devices > Gude Device Summary.
- Use Edit Device Groups to select multiple PDUs and assign them to your created group, then click Submit.
Official resources from the manual
Practical help
Common problems
Device not appearing in cloud dashboard
Wait up to 5 minutes after successful MQTT connection. Verify that the PDU has internet access and the MQTT settings (Broker, Port, TLS, Credentials) are entered correctly.
MQTT connection failure
Check the MQTT Logs in the PDU WebGUI. Ensure the Broker address is correct and the PDU can reach the server on TCP port 8883.
Before use
- Valid business email address for registration
- Access to the PDU WebGUI
- PDU MAC address for Client ID configuration
- Active internet connection for the PDU
- Verification of the confirmation email
Specs in practice
- Broker: mqtt.gude-systems.com
- The server address for cloud communication.
- TCP Port: 8883
- The secure port used for encrypted MQTT traffic.
- Publish interval: 300 s
- Frequency at which the PDU sends data updates to the cloud.
Images and diagrams
- The registration process requires entering a business email and creating a secure password.
- The MQTT configuration panel requires specific credentials (Username/Token-ID) generated by the cloud portal.
- The Device Summary dashboard provides an overview of registered, active, and inactive devices.
- The Group management interface allows for bulk assignment of devices to specific locations.
Model compatibility
- Requires a GUDE PDU capable of MQTT communication.
- Requires an active internet connection for the PDU to reach the cloud broker.

Manual page author
Emily Carter
User documentation editor
Prepares concise manual descriptions and highlights the most useful setup, operation, and maintenance information for readers.